

Technical Documentation: pymc-devs/pymc
ℹ️ Provenance: Multi-Tier Ingestion · CodeWiki Reference
Source Index (`docs/source/index.md`)
sd_hide_title: true
PyMC versioned Documentation
:::{toctree}
:hidden:
Home https://www.pymc.io/welcome.html
Examples https://www.pymc.io/projects/examples/en/latest/gallery.html
Learn
api
Community https://www.pymc.io/community/index.html
contributing/index
:::
Source Contributing Index (`docs/source/contributing/index.md`)
Contributing
PyMC is an open source, collective effort.
There are many ways in which you can help make it better.
And all of them are welcome!
Contribute as an individual
PyMC is a joint effort of many people, each contributing to the areas they like
and have some expertise in, coordinating to try and cover all tasks.
Coding and documentation are the most common types of contributions, but
there are many more things that you can do to help PyMC which are just as
important. Moreover, both code and docs require submitting PRs via GitHub
to some of the repositories under the pymc-devs organization, and
while we have a {ref}pr_tutorial guide available, GitHub might not be
everyone's cup of tea. If that is your case, don't worry, you will be
more than welcome if you want to help.
:::{tip}
Contact us on Discourse if you want to contribute to the project but are not sure where you can contribute or how to start.
We also host office hours regularly to provide more support, especially to contributors.
If you are interested in participating subscribe to the office-hours tag on Discourse.
:::
Below there are some examples of non code nor doc contributions that could serve as an inspiration.
If you have other ideas let us know on Discourse to see if we can make it happen too.
- Report a bug or make a suggestion for improvement by opening an issue in Github
- Answer questions on Discourse
- Teach about PyMC and advertise best practices by writing blogs or giving talks
- Help plan PyMCon
- Help with outreach and marketing. This could include for example reaching out to potential sponsor
companies, to people who could use PyMC in their work or making sure that academics who use PyMC
cite it correctly in their work - Help with our fundraising efforts
- Add timestamps to videos from PyMCon
Contribute via Pull Requests on GitHub
We have a {ref}pr_tutorial and a {ref}pr_checklist page to help in all the steps of the contributing
process, from before your first ever contribution to regular contributions as a core contributor.
(pr_etiquette)=
Etiquette for code contributions
- When you start working working on an issue, open a
Draftpull request as soon as you make your first commit (see {ref}pr_tutorial). - Before opening a PR with a new feature, please make a proposal by opening an issue or Discussion with the maintainers. Depending on the proposal we might direct you to other places such as
pymc-experimentalorpymc-examples. - Any issue without an open pull request is available for work.
- If a pull request has no recent activity it may be closed, or taken over by someone else.
- The specific timeframe for "recent" is hard to define as it depends on the contributor the specific code change, and other contextual factors. As a rule of thumb in a normal pull request with no other blockers there is typically activity every couple of days.
- The core devs will make their best judgement when opting to close PRs or reassign them to others.
- If unsure if an issue ticket is available feel free to ask in the issue ticket. Note however, that per the previous point an open pull request is way to claim an issue ticket. Please do not make unrealistic pledges in the issue tickets.
- It's okay if you are delayed or need to take a break, but please leave a comment in the pull request if you cannot get it to a state where it can be merged. Depending on the change (urgent bugfix vs. new feature) the core devs can determine if the PR needs to be reassigned to get the work done.
Code related contributions
Join the discussion or submit a solution for an open issue. See open issues
Documentation related contributions
See all open issues in documentation here
:::{admonition} New to the open source space?
:class: tip
If you are not sure where or how to start, take a look at the sprint materials
(even if you plan on contributing on your own outside of sprint events).
They are the most detailed guide available on contributing to PyMC also
with advice on which contributions are good starting points.
:::
Contribute as an institution
Institutions can contribute in the following ways:
- By becoming Institutional Partners
- By becoming Sponsors
Contact PyMC at [email protected] for more information.
:::{toctree}
:hidden:
:maxdepth: 1
:caption: Tutorials
pr_tutorial
:::
:::{toctree}
:hidden:
:maxdepth: 1
:caption: How-to guides
build_docs
docker_container
running_the_test_suite
review_pr_pymc_examples
using_gitpod
implementing_distribution
:::
:::{toctree}
:hidden:
:maxdepth: 1
:caption: Reference content
python_style
jupyter_style
pr_checklist
release_checklist
:::
:::{toctree}
:hidden:
:maxdepth: 1
:caption: In depth explanations
versioning_schemes_explanation
:::
Source Learn Core Notebooks Index (`docs/source/learn/core_notebooks/index.md`)
(core_notebooks)=
Notebooks on core features
:::{toctree}
:maxdepth: 1
pymc_overview
model_comparison
posterior_predictive
dimensionality
pymc_pytensor
dims_module
GLM_linear
Gaussian_Processes
:::
:::{note}
The notebooks above are executed with each version of the library
(available on the navigation bar). In addition, a much larger gallery
of example notebooks is available at the {doc}"Examples" tab <nb:gallery>.
These are executed more sparsely and independently.
They include a watermark to show which versions were used to run them.
:::
Source 404 (`docs/source/404.md`)
orphan: true
Page not found
Sorry, we could not find this page
Click on the navigation bar on top of the page to go to the right section
of the default docs, or alternatively:
- Go to the current PyMC website homepage
Source Api (`docs/source/api.rst`)
.. _api:
API
.. toctree::
:maxdepth: 1
api/distributions
api/gp
api/model
api/samplers
api/vi
api/smc
api/data
api/ode
api/logprob
api/stats
api/tuning
api/math
api/pytensorf
api/shape_utils
api/backends
api/misc
api/testing
api/dims
Dimensionality
PyMC provides numerous methods, and syntactic sugar, to easily specify the dimensionality of
Random Variables in modeling. Refer to :ref:dimensionality notebook to see examples
demonstrating the functionality.
API extensions
Plots, stats and diagnostics
Plots, stats and diagnostics are delegated to the
:doc:ArviZ <arviz:index>.
library, a general purpose library for
"exploratory analysis of Bayesian models".
Functions from the
arviz_plotspackage are available throughpymc.plots.<function>,
but for their API documentation please refer to the :doc:arviz_plots documentation <arviz_plots:index>.Functions from the
arviz_statspackage are available throughpymc.stats.<function>,
but for their API documentation please refer to the :doc:arviz_stats documentation <arviz_stats:index>.
ArviZ is a dependency of PyMC and so, in addition to the locations described above,
importing ArviZ and using arviz.<function> will also work without any extra installation.
Generalized Linear Models (GLMs)
Generalized Linear Models are delegated to theBambi <https://bambinos.github.io/bambi>_.
library, a high-level Bayesian model-building
interface built on top of PyMC.
Bambi is not a dependency of PyMC and should be installed in addition to PyMC
to use it to generate PyMC models via formula syntax.
Source Glossary (`docs/source/glossary.md`)
(glossary)=
Glossary
A glossary of common terms used throughout the PyMC documentation and examples.
:::::{glossary}
:sorted:
Functional Programming
Functional programming is a programming style that prefers the use of basic functions with explicit and distinct inputs and outputs.
This contrasts with functions or methods that depend on variables that are not explicitly passed as an input (such as accessing self.variable inside a method) or that alter the inputs or other state variables in-place, instead of returning new distinct variables as outputs.
Dispatching
Choosing which function or method implementation to use based on the type of the input variables (usually just the first variable). For some examples, see Python's documentation for the {func}singledispatch <~functools.singledispatch> decorator.
Dispersion
In statistics, dispersion (also called variability, scatter, or spread) is the extent to which a distribution is stretched or squeezed
Overdispersion
In statistics, overdispersion is the presence of greater {term}variability <dispersion> in a data set than would be expected based on a given statistical model.
Underdispersion
In statistics, underdispersion is the presence of lower {term}variability <dispersion> in a data set than would be expected based on a given statistical model.
Bayesian Workflow
The Bayesian workflow involves all the steps needed for model building. This includes {term}Bayesian inference but also other tasks such as i) diagnoses of the quality of the inference, ii) model criticism, including evaluations of both model assumptions and model predictions, iii) comparison of models, not just for the purpose of model selection or model averaging but more importantly to better understand these models and iv) Preparation of the results for a particular audience. These non-inferencial tasks require both numerical and visual summaries to help practitioners analyse their models. And they are sometimes collectively known as Exploratory Analysis of Bayesian Models.
- For a compact overview, see Bayesian statistics and modelling by van de Schoot, R., Depaoli, S., King, R. et al in Nat Rev Methods - Primers 1, 1 (2021).
- For an in-depth overview, see Bayesian Workflow by Andrew Gelman, Aki Vehtari, Daniel Simpson, Charles C. Margossian, Bob Carpenter, Yuling Yao, Lauren Kennedy, Jonah Gabry, Paul-Christian Bürkner, Martin Modrák
- For an exercise-based material, see Think Bayes 2e: Bayesian Statistics Made Simple by Allen B. Downey
- For a textbook that uses PyMC and ArviZ libraries, see Bayesian Analysis with Python by Osvaldo A. Martin
Bayesian inference
Once we have defined the statistical model, Bayesian inference processes the data and model to produce a {term}posterior distribution. That is a joint distribution of all parameters in the model. This distribution is used to represent plausibility, and is the logical consequence of the model and data.
Bayesian model
A Bayesian model is a composite of variables and distributional definitions for these variables. Bayesian models have two defining characteristics: i) Unknown quantities are described using probability distributions and ii) Bayes' theorem is used to update the values of the parameters conditioned on the data
Prior
Bayesian statistics allow us, in principle, to include all information we have about the structure of the problem into a model. We can do this via assuming prior distributions of the model’s parameters. Priors represent the plausibility of the value of the parameters before accounting for the data. Priors multiplied by {term}likelihood produce the {term}posterior.
Priors’ informativeness can fall anywhere on the complete uncertainty to relative certainty continuum. An informative prior might encode known restrictions on the possible range of values of that parameter.
To understand the implications of a prior and likelihood we can simulate predictions from the model, before seeing any data. This can be done by taking samples from the prior predictive distribution.
- For an in-depth guide to priors, consider Statistical Rethinking 2nd Edition By Richard McElreath, especially chapters 2.3
- For software that help to set up priors see the PreliZ
Likelihood
There are many perspectives on likelihood, but conceptually we can think about it as the probability of the data, given the parameters. Or in other words, as the relative number of ways the data could have been produced.
- For an in-depth unfolding of the concept, refer to Statistical Rethinking 2nd Edition By Richard McElreath, particularly chapter 2.
- For the problem-based material, see Think Bayes 2e: Bayesian Statistics Made Simple by Allen B. Downey
- For univariate, continuous scenarios, see the calibr8 paper: Bayesian calibration, process modeling and uncertainty quantification in biotechnology by Laura Marie Helleckes, Michael Osthege, Wolfgang Wiechert, Eric von Lieres, Marco Oldiges
Posterior
The outcome of Bayesian inference is a posterior distribution, which describes the relative plausibilities of every possible combination of parameter values, given the observed data. We can think of the posterior as the updated {term}priors after the model has seen the data.
When the posterior is obtained using numerical methods we generally need to first diagnose the quality of the computed approximation. This is necessary as, for example, methods like {term}MCMC has only asymptotic guarantees. In a Bayesian setting predictions can be simulated by sampling from the posterior predictive distribution. When such predictions are used to check the internal consistency of the models by comparing it with the observed data used for inference, the process is known as the posterior predictive checks.
Once you are satisfied with the model, posterior distribution can be summarized and interpreted. Common questions for the posterior include: intervals of defined boundaries, intervals of defined probability mass, and point estimates. When the posterior is very similar to the prior, the available data does not contain much information about a parameter of interest.
- For more on generating and interpreting the posterior samples, see Statistical Rethinking 2nd Edition By Richard McElreath, chapter 3.
Generalized Linear Model
GLM
In a Generalized Linear Model (GLM), we assume the response variable $y_i$ to follow an
exponential family distribution with mean $\mu_i$, which is assumed to be some (often nonlinear)
function of $x_i^T\beta$. They're considered linear because the covariates affect the distribution
of $Y_i$ only through the linear combination $x_i^T\beta$. Some examples of Generalized Linear
Models are: Linear Regression, ANOVA, Logistic Regression and Poisson Regression
:::{note} Do not confuse these with general linear models
:::
Probability Mass Function
PMF
A function that gives the probability that a discrete random variable is exactly equal to some value.
Maximum a Posteriori
MAP
It is a point-estimate of an unknown quantity, that equals the mode of the posterior distribution.
If the prior distribution is a flat distribution, the MAP method is numerically equivalent to the {term}Maximum Likelihood Estimate (MLE).
When the prior is not flat the MAP estimation can be seen as a regularized version of the MLE.
- For a concise comparison between {term}
MLEand {term}MAP, consider Deep Learning by Ian Goodfellow, chapter 5.6.1 or Machine Learning: a Probabilistic Perspective by Kevin Murphy.
No-U-Turn Sampler
NUTS
An extension of {term}Hamiltonian Monte Carlo that algorithmically sets likely candidate points that spans a wide swath of the target distribution, stopping automatically when it starts to double back and retrace its steps.
Hamiltonian Monte Carlo
HMC
A {term}Markov Chain Monte Carlo method for obtaining a sequence of random samples which converge to being distributed according to a target probability distribution.
Credibility
A form of statistical inference used to forecast an uncertain future event
Ordinary Differential Equation
ODE
A type of differential equation containing one or more functions of one independent variable and the derivatives of those functions
Hierarchical Ordinary Differential Equation
Individual, group, or other level types calculations of {term}Ordinary Differential Equation's.
Generalized Poisson Distribution
A generalization of the {term}Poisson distribution, with two parameters X1, and X2, is obtained as a limiting form of the generalized negative binomial distribution. The variance of the distribution is greater than, equal to or smaller than the mean according as X2 is positive, zero or negative. For formula and more detail, visit the link in the title.
Bayes' theorem
Describes the probability of an event, based on prior knowledge of conditions that might be related to the event. For example, if the risk of developing health problems is known to increase with age, Bayes' theorem allows the risk to an individual of a known age to be assessed more accurately (by conditioning it on their age) than simply assuming that the individual is typical of the population as a whole.
Formula:
$$
P(A|B) = \frac{P(B|A) P(A)}{P(B)}
$$
Where $A$ and $B$ are events and $P(B) \neq 0$
Markov Chain
A Markov chain or Markov process is a stochastic model describing a sequence of possible events in which the probability of each event depends only on the state attained in the previous event.
Markov Chain Monte Carlo
MCMC
Markov chain Monte Carlo (MCMC) methods comprise a class of algorithms for sampling from a probability distribution. By constructing a {term}Markov Chain that has the desired distribution as its equilibrium distribution, one can obtain a sample of the desired distribution by recording states from the chain. Various algorithms exist for constructing chains, including the Metropolis–Hastings algorithm.
tensor_like
Any scalar or sequence that can be interpreted as a {class}~pytensor.tensor.TensorVariable. In addition to TensorVariables, this includes NumPy ndarrays, scalars, lists and tuples (possibly nested). Any argument accepted by pytensor.tensor.as_tensor_variable is tensor_like.
import pytensor.tensor as pt

pt.as_tensor_variable([[1, 2.0], [0, 0]])
unnamed_distribution
PyMC distributions can be initialized directly (e.g. pm.Normal) or using the .dist classmethod (e.g. pm.Normal.dist). Distributions initialized with the 1st method are registered as model parameters and thus, need to be given a name and be initialized within a model context. "unnamed_distributions" are distributions initialized with the 2nd method. These are standalone distributions, they are not parameters in any model and can be used to draw samples from a distribution by itself or as parameters to other distributions like mixtures or censored.
"unnamed_distributions" can be used outside the model context. For example:

```{jupyter-execute}
import pymc as pm

unnamed_dist = pm.Normal.dist(mu=1, sigma=2)
pm.draw(unnamed_dist, draws=10)
```

Trying to initialize a named distribution outside a model context raises a `TypeError`:

```{jupyter-execute}
:raises: TypeError

import pymc as pm

pm.Normal("variable")
```
:::::
Source Installation (`docs/source/installation.md`)
(installation)=
Installation
PyMC can be installed with pip.
We also recommend installing nutpie, a
fast NUTS sampler written in Rust. When nutpie is installed, PyMC selects it as
the default NUTS sampler automatically.
pip install "pymc[nutpie]"To install PyMC on its own:
pip install pymcInstalling with conda
As an alternative, PyMC can be installed with conda using
Anaconda or
Miniforge. This is recommended if you
want to use the legacy C backend or need control over the BLAS library.
We recommend a fresh
conda environment:
conda create -c conda-forge -n pymc_env "pymc>=6"
conda activate pymc_env
If you like, replace the name pymc_env with whatever environment name you prefer.
To enable nutpie when using conda:
conda install -c conda-forge nutpie:::{seealso}
The conda-forge tips & tricks page to avoid installation
issues when using multiple conda channels (e.g. defaults and conda-forge).
:::
JAX sampling
If you wish to enable sampling using the JAX backend via NumPyro,
you need to install it manually as it is an optional dependency:
pip install numpyroSimilarly, to use the BlackJAX sampler instead:
pip install blackjaxSource Learn (`docs/source/learn.md`)
(learn)=
Learn PyMC & Bayesian modeling
:::{toctree}
:maxdepth: 1
installation
learn/core_notebooks/index
learn/books
learn/videos_and_podcasts
learn/consulting
glossary
:::
At a glance
Beginner
Intermediate
- {ref}
pymc_overviewshows PyMC code in action - Example notebooks: {doc}
nb:gallery- {ref}
GLM_linear - {ref}
posterior_predictive - Comparing models: {ref}
model_comparison - Shapes and dimensionality {ref}
dimensionality
- {ref}
- {ref}
videos_and_podcasts - Book: Bayesian Modeling and Computation in Python
Advanced
- {octicon}
plug;1em;sd-text-infoExperimental and cutting edge functionality: {doc}pmx:indexlibrary - {octicon}
gear;1em;sd-text-infoPyMC internals guides (To be outlined and referenced here once pymc#5538
is addressed)
Source Templates Distribution (`docs/source/_templates/distribution.rst`)
{{ fullname | escape | underline}}
.. currentmodule:: {{ module }}
{% if objtype == "class" %}
.. autoclass:: {{ objname }}
.. rubric:: {{ _('Methods') }}
.. autosummary::
:toctree: classmethods
{{ objname }}.dist{% else %}
.. autofunction:: {{ objname }}
{% endif %}
Source Api Backends (`docs/source/api/backends.rst`)
Storage backends
.. currentmodule:: pymc
.. autosummary::
:toctree: generated/
to_inference_data
predictions_to_inference_data
Internal structures
.. automodule:: pymc.backends
.. autosummary::
:toctree: generated/
NDArray
base.BaseTrace
base.MultiTrace
zarr.ZarrTrace
zarr.ZarrChain
Source Api Data (`docs/source/api/data.rst`)
Data
.. currentmodule:: pymc
.. autosummary::
:toctree: generated/
Data
get_data
Minibatch
Source Api Dims (`docs/source/api/dims.rst`)
.. _api_dims:
Dims
.. warning:: This module is experimental and may contain critical breaks. API changes are expected in future releases.
This submodule contains functions for defining distributions and operations that use explicit dimensions.
The module is presented in :ref:dims_module.
.. toctree::
dims/model
dims/math
dims/distributions
dims/transforms
Source Api Distributions (`docs/source/api/distributions.rst`)
.. _api_distributions:
Distributions
.. toctree::
:maxdepth: 2
distributions/continuous
distributions/discrete
distributions/multivariate
distributions/mixture
distributions/timeseries
distributions/truncated
distributions/censored
distributions/custom
distributions/simulator
distributions/transforms
distributions/utilities
Source Api Gp (`docs/source/api/gp.rst`)
Gaussian Processes
.. automodule:: pymc.gp
.. toctree::
:maxdepth: 2
gp/implementations
gp/mean
gp/cov
gp/util
Source Api Logprob (`docs/source/api/logprob.rst`)
Probability
.. currentmodule:: pymc
.. autosummary::
:toctree: generated/
logp
logcdf
icdf
Conditional probability
.. currentmodule:: pymc.logprob
.. autosummary::
:toctree: generated/
conditional_logp
transformed_conditional_logp
Source Api Math (`docs/source/api/math.rst`)
==== Math
This submodule contains various mathematical functions. Most are re-exported directly from
:mod:pytensor.tensor and :mod:pytensor.tensor.linalg (see there for full signatures and
details). Doing any kind of math with PyMC random variables, or defining custom likelihoods
or priors, requires you to use these PyTensor expressions rather than NumPy or Python code.
.. automodule:: pymc.math
:members:
Source Api Misc (`docs/source/api/misc.rst`)
Other utils
.. currentmodule:: pymc
.. autosummary::
:toctree: generated/
find_constrained_prior
.. currentmodule:: pymc.blocking
.. autosummary::
:toctree: generated/
DictToArrayBijection
model_table
Source Api Model (`docs/source/api/model.rst`)
Model
.. automodule:: pymc.model
.. toctree::
:maxdepth: 2
model/core
model/conditioning
model/transform_values
model/deterministics
model/optimization
model/fgraph
Source Api Ode (`docs/source/api/ode.rst`)
Ordinary differential equations (ODEs)
.. automodule:: pymc.ode
.. autosummary::
:toctree: generated/
DifferentialEquationSource Api Pytensorf (`docs/source/api/pytensorf.rst`)
PyTensor utils
.. currentmodule:: pymc.pytensorf
.. autosummary::
:toctree: generated/
compile
gradient
hessian
hessian_diag
jacobian
inputvars
cont_inputs
floatX
intX
constant_fold
CallableTensor
join_nonshared_inputs
make_shared_replacements
convert_data
Source Api Samplers (`docs/source/api/samplers.rst`)
Samplers
This submodule contains functions for MCMC and forward sampling.
.. currentmodule:: pymc
.. autosummary::
:toctree: generated/
sample
sample_prior_predictive
sample_posterior_predictive
draw
compute_deterministics
vectorize_over_posterior
init_nuts
sampling.jax.sample_blackjax_nuts
sampling.jax.sample_numpyro_nuts
Step methods
HMC family
.. currentmodule:: pymc.step_methods.hmc
.. autosummary::
:toctree: generated/
NUTS
HamiltonianMC
Metropolis family
.. currentmodule:: pymc.step_methods
.. autosummary::
:toctree: generated/
BinaryGibbsMetropolis
BinaryMetropolis
CategoricalGibbsMetropolis
CauchyProposal
DEMetropolis
DEMetropolisZ
LaplaceProposal
Metropolis
MultivariateNormalProposal
NormalProposal
PoissonProposal
UniformProposal
Other step methods
.. currentmodule:: pymc.step_methods
.. autosummary::
:toctree: generated/
CompoundStep
Slice
Source Api Shape Utils (`docs/source/api/shape_utils.rst`)
shape_utils
This submodule contains various functions that apply numpy's broadcasting rules to shape tuples, and also to samples drawn from probability distributions.
The main challenge when broadcasting samples drawn from a generative model, is that each random variate has a core shape. When we draw many i.i.d samples from a given RV, for example if we ask for size_tuple i.i.d draws, the result usually is a size_tuple + RV_core_shape. In the generative model's hierarchy, the downstream RVs that are conditionally dependent on our above sampled values, will get an array with a shape that is inconsistent with the core shape they expect to see for their parameters. This is a problem sometimes because it prevents regular broadcasting in complex hierarchical models, and thus make prior and posterior predictive sampling difficult.
This module introduces functions that are made aware of the requested size_tuple of i.i.d samples, and does the broadcasting on the core shapes, transparently ignoring or moving the i.i.d size_tuple prepended axes around.
.. currentmodule:: pymc.distributions.shape_utils
.. autosummary::
:toctree: generated/
to_tuple
rv_size_is_none
change_dist_size
Source Api Smc (`docs/source/api/smc.rst`)
Sequential Monte Carlo
.. automodule:: pymc.smc
.. autosummary::
:toctree: generated/
sample_smc.. _smc_kernels:
SMC kernels
.. currentmodule:: pymc.smc.kernels
.. autosummary::
:toctree: generated/
SMC_KERNEL
IMH
MH
Source Api Stats (`docs/source/api/stats.rst`)
Stats
.. currentmodule:: pymc.stats
.. autosummary::
:toctree: generated/
compute_log_prior
compute_log_likelihood
PyMC re-exports functions from the arviz_stats library under the pymc.stats
namespace, allowing functions like summary, ess, rhat, loo etc. to be
accessed as pymc.stats.<function>. For the API documentation of those functions,
see the :doc:arviz_stats documentation <arviz_stats:index>.
Source Api Testing (`docs/source/api/testing.rst`)
======= Testing
This submodule contains tools to help with testing PyMC code.
.. currentmodule:: pymc.testing
.. autosummary::
:toctree: generated/
mock_sample
mock_sample_setup_and_teardown
Source Api Tuning (`docs/source/api/tuning.rst`)
Tuning
.. currentmodule:: pymc
.. autosummary::
:toctree: generated/
find_hessian
find_MAP
Source Api Vi (`docs/source/api/vi.rst`)
Variational Inference
.. currentmodule:: pymc
.. autosummary::
:toctree: generated/
ADVI
ASVGD
SVGD
FullRankADVI
fit
.. currentmodule:: pymc.variational
.. autosummary::
:toctree: generated/
ImplicitGradient
Inference
KLqp
Approximations
.. currentmodule:: pymc
.. autosummary::
:toctree: generated/
Empirical
FullRank
MeanField
sample_approx
OPVI
.. autosummary::
:toctree: generated/
Group
.. currentmodule:: pymc.variational
.. autosummary::
:toctree: generated/
Approximation
Operators
.. automodule:: pymc.variational.operators
.. autosummary::
:toctree: generated/
KL
KSD
Special
.. currentmodule:: pymc.variational
.. autosummary::
:toctree: generated/
Stein
.. currentmodule:: pymc
.. autosummary::
:toctree: generated/
adadelta
adagrad
adagrad_window
adam
adamax
apply_momentum
apply_nesterov_momentum
momentum
nesterov_momentum
norm_constraint
rmsprop
sgd
total_norm_constraint
Source Contributing Build Docs (`docs/source/contributing/build_docs.md`)
Build documentation locally
:::{warning}
Docs build is not supported on Windows.
To build docs on Windows we recommend running inside a Docker container.
:::
To build the docs, first install dependencies by running these commands at the PyMC repo root:
# create the pymc-docs conda env, or equivalently make
# sure all dependencies listed in this file are installed
conda env create -f conda-envs/environment-docs.yml

# Install local pymc version in editable mode
pip install -e .
Building the documentation
There is a Makefile in the pymc repo to help with the doc building process.
make clean
make html
make html is the command that builds the documentation with sphinx-build.make clean deletes caches and intermediate files.
The make clean step is not always necessary. If you are working on a specific page,
for example, then you can rebuild the docs without the clean step, and everything should
work fine. If you are restructuring the content or editing toctrees, then you'll need
to execute make clean.
A good approach is generally to skip make clean, which makes
the make html faster, and see how everything looks. If something
looks strange, run make clean and make html one after the other
to see if it fixes the issue before checking anything else.
Emulate building on readthedocs
The target rtd is also available to chain make clean with sphinx-build
setting also some extra options and environment variables to instruct
sphinx to simulate a readthedocs build as much as possible.
make rtd:::{important}
This won't reinstall or update any dependencies, unlike on readthedocs where
all dependencies are installed in a clean env before each build.
But it will execute all notebooks inside the core_notebooks folder,
which by default are not executed. Executing the notebooks will add several minutes
to the doc build, as there are 6 notebooks which take between 20s to 5 minutes
to run.
:::
View the generated docs
make viewThis will use Python's webbrowser module to open the generated website on your browser.
The generated website is static, so there is no need to set a server to preview it.
Source Contributing Developer Guide (`docs/source/contributing/developer_guide.md`)
orphan: true
PyMC Developer Guide
{doc}PyMC is a Python package for Bayesian statistical modeling built on top of {doc}PyTensor .
This document aims to explain the design and implementation of probabilistic programming in PyMC, with comparisons to other PPLs like TensorFlow Probability (TFP) and Pyro.
A user-facing API introduction can be found in the {ref}API quickstart .
A more accessible, user facing deep introduction can be found in Peadar Coyle's probabilistic programming primer.
Distribution
Probability distributions in PyMC are implemented as classes that inherit from {class}~pymc.Continuous or {class}~pymc.Discrete.
Either of these inherit {class}~pymc.Distribution which defines the high level API.
For a detailed introduction on how a new distribution should be implemented check out the {ref}guide on implementing distributions .
Reflection
How tensor/value semantics for probability distributions are enabled in PyMC:
In PyMC, model variables are defined by calling probability distribution classes with parameters:
z = Normal("z", 0, 5)This is done inside the context of a pm.Model, which intercepts some information, for example to capture known dimensions.
The notation aligns with the typically used math notation:
$$
z \sim \text{Normal}(0, 5)
$$
A call to a {class}~pymc.Distribution constructor as shown above returns a PyTensor {class}~pytensor.tensor.TensorVariable, which is a symbolic representation of the model variable and the graph of inputs it depends on.
Under the hood, the variables are created through the {meth}~pymc.Distribution.dist API, which calls the {class}~pytensor.tensor.random.basic.RandomVariable {class}~pytensor.graph.op.Op corresponding to the distribution.
At a high level of abstraction, the idea behind RandomVariable Ops is to create symbolic variables (TensorVariables) that can be associated with the properties of a probability distribution.
For example, the RandomVariable Op which becomes part of the symbolic computation graph is associated with the random number generators or probability mass/density functions of the distribution.
In the example above, where the TensorVariable z is created to be {math}\text{Normal}(0, 5) random variable, we can get a handle on the corresponding RandomVariable Op instance:
with pm.Model():
    z = pm.Normal("z", 0, 5)
print(type(z.owner.op))
# ==> pytensor.tensor.random.basic.NormalRV
isinstance(z.owner.op, pytensor.tensor.random.basic.RandomVariable)
# ==> True
Now, because the NormalRV can be associated with the probability density function of the Normal distribution, we can now evaluate it through the special pm.logp function:
with pm.Model():
    z = pm.Normal("z", 0, 5)
symbolic = pm.logp(z, 2.5)
numeric = symbolic.eval()
# array(-2.65337645)
We can, of course, also work out the math by hand:
$$
\begin{aligned}
pdf_{\mathcal{N}}(\mu, \sigma, x) &= \frac{1}{\sigma \sqrt{2 \pi}} \exp^{- 0.5 (\frac{x - \mu}{\sigma})^2} \
pdf_{\mathcal{N}}(0, 5, 2.5) &= 0.070413 \
ln(0.070413) &= -2.6533
\end{aligned}
$$
In the probabilistic programming context, this enables PyMC and its backend PyTensor to create and evaluate computation graphs to compute, for example log-prior or log-likelihood values.
PyMC in Comparison
Within the PyMC model context, random variables are essentially PyTensor tensors that can be used in all kinds of operations as if they were NumPy arrays.
This is different compared to TFP and pyro, where one needs to be more explicit about the conversion from random variables to tensors.
Consider the following examples, which implement the below model.
$$
\begin{aligned}
z &\sim \mathcal{N}(0, 5) \
x &\sim \mathcal{N}(z, 1) \
\end{aligned}
$$
PyMC
with pm.Model() as model:
    z = pm.Normal('z', mu=0., sigma=5.)             # ==> pytensor.tensor.var.TensorVariable
    x = pm.Normal('x', mu=z, sigma=1., observed=5.) # ==> pytensor.tensor.var.TensorVariable
# The log-prior of z=2.5
pm.logp(z, 2.5).eval()                              # ==> -2.65337645
# ???????
x.logp({'z': 2.5})                                  # ==> -4.0439386
# ???????
model.logp({'z': 2.5})                              # ==> -6.6973152
Tensorflow Probability
import tensorflow.compat.v1 as tf
from tensorflow_probability import distributions as tfd

with tf.Session() as sess:
    z_dist = tfd.Normal(loc=0., scale=5.)            # ==> <class 'tfp.python.distributions.normal.Normal'>
    z = z_dist.sample()                              # ==> <class 'tensorflow.python.framework.ops.Tensor'>
    x = tfd.Normal(loc=z, scale=1.).log_prob(5.)     # ==> <class 'tensorflow.python.framework.ops.Tensor'>
    model_logp = z_dist.log_prob(z) + x
    print(sess.run(x, feed_dict={z: 2.5}))           # ==> -4.0439386
    print(sess.run(model_logp, feed_dict={z: 2.5}))  # ==> -6.6973152
Pyro
z_dist = dist.Normal(loc=0., scale=5.)           # ==> <class 'pyro.distributions.torch.Normal'>
z = pyro.sample("z", z_dist)                     # ==> <class 'torch.Tensor'>
# reset/specify value of z
z.data = torch.tensor(2.5)
x = dist.Normal(loc=z, scale=1.).log_prob(5.)    # ==> <class 'torch.Tensor'>
model_logp = z_dist.log_prob(z) + x
x                                                # ==> -4.0439386
model_logp                                       # ==> -6.6973152
Behind the scenes of the ``logp`` function
The logp function is straightforward - it is a PyTensor function within each distribution.
It has the following signature:
:::{warning}
The code block is outdated.
:::
def logp(self, value):
    # GET PARAMETERS
    param1, param2, ... = self.params1, self.params2, ...
    # EVALUATE LOG-LIKELIHOOD FUNCTION, all inputs are (or array that could be convert to) PyTensor tensor
    total_log_prob = f(param1, param2, ..., value)
    return total_log_prob
In the logp method, parameters and values are either PyTensor tensors, or could be converted to tensors.
It is rather convenient as the evaluation of logp is represented as a tensor (RV.logpt), and when we linked different logp together (e.g., summing all RVs.logpt to get the model total logp) the dependence is taken care of by PyTensor when the graph is built and compiled.
Again, since the compiled function depends on the nodes that already in the graph, whenever you want to generate a new function that takes new input tensors you either need to regenerate the graph with the appropriate dependencies, or replace the node by editing the existing graph.
In PyMC we use the second approach by using pytensor.clone_replace() when it is needed.
As explained above, distribution in a pm.Model() context automatically turn into a tensor with distribution property (PyMC random variable).
To get the logp of a free_RV is just evaluating the logp() on itself:
# self is a pytensor.tensor with a distribution attached
self.logp_sum_unscaledt = distribution.logp_sum(self)
self.logp_nojac_unscaledt = distribution.logp_nojac(self)
Or for an observed RV. it evaluate the logp on the data:
self.logp_sum_unscaledt = distribution.logp_sum(data)
self.logp_nojac_unscaledt = distribution.logp_nojac(data)
Model context and Random Variable
I like to think that the with pm.Model() ... is a key syntax feature and the signature of PyMC model language, and in general a great out-of-the-box thinking/usage of the context manager in Python (with some critics, of course).
Essentially what a context manager does is:
with EXPR as VAR:
    USERCODE
which roughly translates into this:
VAR = EXPR
VAR.__enter__()
try:
    USERCODE
finally:
    VAR.__exit__()
or conceptually:
with EXPR as VAR:
    # DO SOMETHING
    USERCODE
    # DO SOME ADDITIONAL THINGS
So what happened within the with pm.Model() as model: ... block, besides the initial set up model = pm.Model()?
Starting from the most elementary:
Random Variable
From the above session, we know that when we call e.g. pm.Normal('x', ...) within a Model context, it returns a random variable.
Thus, we have two equivalent ways of adding random variable to a model:
with pm.Model() as m:
    x = pm.Normal('x', mu=0., sigma=1.)

print(type(x))                              # ==> <class 'pytensor.tensor.var.TensorVariable'>
print(m.free_RVs)                           # ==> [x]
print(logpt(x, 5.0))                        # ==> Elemwise{switch,no_inplace}.0
print(logpt(x, 5.).eval({}))                # ==> -13.418938533204672
print(m.logp({'x': 5.}))                    # ==> -13.418938533204672
In general, if a variable has observations (observed parameter), the RV is an observed RV, otherwise if it has a transformed (transform parameter) attribute, it is a transformed RV otherwise, it will be the most elementary form: a free RV.
Note that this means that random variables with observations cannot be transformed.
Additional things that ``pm.Model`` does
In a way, pm.Model is a tape machine that records what is being added to the model, it keeps track the random variables (observed or unobserved) and potential term (additional tensor that to be added to the model logp), and also deterministic transformation (as bookkeeping):
- named_vars
- free_RVs
- observed_RVs
- deterministics
- potentials
- missing_values
The model context then computes some simple model properties, builds a bijection mapping that transforms between dictionary and numpy/PyTensor ndarray, thus allowing thelogp/dlogpfunctions to have two equivalent versions:
One takes adictas input and the other takes anndarrayas input.
More importantly, apm.Model()contains methods to compile PyTensor functions that take Random Variables (that are also initialised within the same model) as input, for example:
with pm.Model() as m:
    z = pm.Normal('z', 0., 10., shape=10)
    x = pm.Normal('x', z, 1., shape=10)

print(m.initial_point)
print(m.dict_to_array(m.initial_point))  # ==> m.bijection.map(m.initial_point)
print(m.bijection.rmap(np.arange(20)))
# {'z': array([0., 0., 0., 0., 0., 0., 0., 0., 0., 0.]), 'x': array([0., 0., 0., 0., 0., 0., 0., 0., 0., 0.])}
# [0. 0. 0. 0. 0. 0. 0. 0. 0. 0. 0. 0. 0. 0. 0. 0. 0. 0. 0. 0.]
# {'z': array([10., 11., 12., 13., 14., 15., 16., 17., 18., 19.]), 'x': array([0., 1., 2., 3., 4., 5., 6., 7., 8., 9.])}list(filter(lambda x: "logp" in x, dir(pm.Model)))
#['d2logp',
# 'd2logp_nojac',
# 'datalogpt',
# 'dlogp',
# 'dlogp_array',
# 'dlogp_nojac',
# 'fastd2logp',
# 'fastd2logp_nojac',
# 'fastdlogp',
# 'fastdlogp_nojac',
# 'fastlogp',
# 'fastlogp_nojac',
# 'logp',
# 'logp_array',
# 'logp_dlogp_function',
# 'logp_elemwise',
# 'logp_nojac',
# 'logp_nojact',
# 'logpt',
# 'varlogpt']Logp and dlogp
The model collects all the random variables (everything in model.free_RVs and model.observed_RVs) and potential term, and sum them together to get the model logp:
@property
def logpt(self):
    """PyTensor scalar of log-probability of the model"""
    with self:
        factors = [var.logpt for var in self.basic_RVs] + self.potentials
        logp = at.sum([at.sum(factor) for factor in factors])
        ...
        return logp
which returns a PyTensor tensor that its value depends on the free parameters in the model (i.e., its parent nodes from the PyTensor graph).
You can evaluate or compile into a python callable (that you can pass numpy as input args).
Note that the logp tensor depends on its input in the PyTensor graph, thus you cannot pass new tensor to generate a logp function.
For similar reason, in PyMC we do graph copying a lot using pytensor.clone_replace to replace the inputs to a tensor.
with pm.Model() as m:
    z = pm.Normal('z', 0., 10., shape=10)
    x = pm.Normal('x', z, 1., shape=10)
    y = pm.Normal('y', x.sum(), 1., observed=2.5)

print(m.basic_RVs)    # ==> [z, x, y]
print(m.free_RVs)     # ==> [z, x]

type(m.logp)
# pytensor.tensor.var.TensorVariable

m.logpt.eval(m.initial_point())
# array(-51.25369126)
PyMC then compiles a logp function with gradient that takes model.free_RVs as input and model.logpt as output.
It could be a subset of tensors in model.free_RVs if we want a conditional logp/dlogp function:
def logp_dlogp_function(self, grad_vars=None, **kwargs):
    if grad_vars is None:
        grad_vars = list(typefilter(self.free_RVs, continuous_types))
    else:
        ...
    varnames = [var.name for var in grad_vars]  # In a simple case with only continuous RVs,
                                                # this is all the free_RVs
    extra_vars = [var for var in self.free_RVs if var.name not in varnames]
    return ValueGradFunction(self.logpt, grad_vars, extra_vars, **kwargs)
ValueGradFunction is a callable class which isolates part of the PyTensor graph to compile additional PyTensor functions.
PyMC relies on pytensor.clone_replace to copy the model.logpt and replace its input.
It does not edit or rewrite the graph directly.
The important parts of the above function is highlighted and commented.
On a high level, it allows us to build conditional logp function and its gradient easily.
Here is a taste of how it works in action:
/* Detailed source-code truncated for AI context efficiency. */So why is this necessary?
One can imagine that we just compile one logp function, and do bookkeeping ourselves.
For example, we can build the logp function in PyTensor directly:
import pytensor
func = pytensor.function(m.free_RVs, m.logpt)
func(*inputlist)
# array(-51.0769075)

logpt_grad = pytensor.grad(m.logpt, m.free_RVs)
func_d = pytensor.function(m.free_RVs, logpt_grad)
func_d(*inputlist)
# [array([ 0.74230226,  0.01658948,  1.38606194,  0.11253699, -1.07003284,
#          2.64302891,  1.12497754, -0.35967542, -1.18117557, -1.11489642]),
#  array([ 0.98281586,  1.69545542,  0.34626619,  1.61069443,  2.79155183,
#         -0.91020295,  0.60094326,  2.08022672,  2.8799075 ,  2.81681213])]
Similarly, build a conditional logp:
shared = pytensor.shared(inputlist[1])
func2 = pytensor.function([m.free_RVs[0]], m.logpt, givens=[(m.free_RVs[1], shared)])
print(func2(inputlist[0]))
# -51.07690750130328

logpt_grad2 = pytensor.grad(m.logpt, m.free_RVs[0])
func_d2 = pytensor.function([m.free_RVs[0]], logpt_grad2, givens=[(m.free_RVs[1], shared)])
print(func_d2(inputlist[0]))
# [ 0.74230226  0.01658948  1.38606194  0.11253699 -1.07003284  2.64302891
#   1.12497754 -0.35967542 -1.18117557 -1.11489642]
The above also gives the same logp and gradient as the output from model.logp_dlogp_function.
But the difficulty is to compile everything into a single function:
func_logp_and_grad = pytensor.function(m.free_RVs, [m.logpt, logpt_grad])
# ==> ERROR
We want to have a function that return the evaluation and its gradient re each input:value, grad = f(x), but the naive implementation does not work.
We can of course wrap 2 functions - one for logp one for dlogp - and output a list.
But that would mean we need to call 2 functions.
In addition, when we write code using python logic to do bookkeeping when we build our conditional logp.
Using pytensor.clone_replace, we always have the input to the PyTensor function being a 1d vector (instead of a list of RV that each can have very different shape), thus it is very easy to do matrix operation like rotation etc.
Notes
The current setup is quite powerful, as the PyTensor compiled function is fairly fast to compile and to call.
Also, when we are repeatedly calling a conditional logp function, external RV only need to reset once.
However, there are still significant overheads when we are passing values between PyTensor graph and NumPy.
That is the reason we often see no advantage in using GPU, because the data is copying between GPU and CPU at each function call - and for a small model, the result is a slower inference under GPU than CPU.
Also, pytensor.clone_replace is too convenient (PyMC internal joke is that it is like a drug - very addictive).
If all the operation happens in the graph (including the conditioning and setting value), I see no need to isolate part of the graph (via graph copying or graph rewriting) for building model and running inference.
Moreover, if we are limiting to the problem that we can solved most confidently - model with all continuous unknown parameters that could be sampled with dynamic HMC, there is even less need to think about graph cloning/rewriting.
Inference
MCMC
The ability for model instance to generate conditional logp and dlogp function enable one of the unique feature of PyMC - {class}~pymc.step_methods.CompoundStep method.
On a conceptual level it is a Metropolis-within-Gibbs sampler.
Users can specify different sampler for different RVs.
Alternatively, it is implemented as yet another interceptor:
The pm.sample(...) call will try to assign the best step methods to different free_RVs (e.g., NUTS if all free_RVs are continuous).
Then, (conditional) logp function(s) are compiled, and the sampler called each sampler within the list of CompoundStep in a for-loop for one sample circle.
For each sampler, it implements a step.step method to perform MH updates.
Each time a dictionary (point in PyMC land, same structure as model.initial_point) is passed as input and output a new dictionary with the free_RVs being sampled now has a new value (if accepted, see here and here).
There are some example in the CompoundStep doc:
Transition kernel
The base class for most MCMC sampler (except SMC) is in ArrayStep.
You can see that the step.step() is mapping the point into an array, and call self.astep(), which is an array in, array out function.
A PyMC model compiles a conditional logp/dlogp function that replace the input RVs with a shared 1D tensor (flatten and stack view of the original RVs).
And the transition kernel (i.e., .astep()) takes an array as input and outputs an array.
For example, see the MH sampler.
This is of course very different compared to the transition kernel in e.g. TFP, which is a tenor in tensor out function.
Moreover, transition kernels in TFP do not flatten the tensors, see eg docstring of tensorflow_probability/python/mcmc/random_walk_metropolis.py:
new_state_fn: Python callable which takes a list of state parts and a
        seed; returns a same-type `list` of `Tensor`s, each being a perturbation
        of the input state parts. The perturbation distribution is assumed to be
        a symmetric distribution centered at the input state part.
        Default value: `None` which is mapped to
            `tfp.mcmc.random_walk_normal_fn()`.
Dynamic HMC
We love NUTS, or to be more precise Dynamic HMC with complex stopping rules.
This part is actually all done outside of PyTensor, for NUTS, it includes:
The leapfrog, dual averaging, tuning of mass matrix and step size, the tree building, sampler related statistics like divergence and energy checking.
We actually have a PyTensor version of HMC, but it has never been used, and has been removed from the main repository.
It can still be found in the git history, though.
Variational Inference (VI)
The design of the VI module takes a different approach than MCMC - it has a functional design, and everything is done within PyTensor (i.e., Optimization and building the variational objective).
The base class of variational inference is pymc.variational.Inference, where it builds the objective function by calling:
...
self.objective = op(approx, **kwargs)(tf)
...
Where:
op     : Operator class
approx : Approximation class or instance
tf     : TestFunction instance
kwargs { kwargs passed to :class}`Operator`
The design is inspired by the great work Operator Variational Inference.Inference object is a very high level of VI implementation.
It uses primitives: Operator, Approximation, and Test functions to combine them into single objective function.
Currently we do not care too much about the test function, it is usually not required (and not implemented).
The other primitives are defined as base classes in this file.
We use inheritance to easily implement a broad class of VI methods leaving a lot of flexibility for further extensions.
For example, consider ADVI.
We know that in the high-level, we are approximating the posterior in the latent space with a diagonal Multivariate Gaussian.
In another word, we are approximating each elements in model.free_RVs with a Gaussian.
Below is what happen in the set up:
def __init__(self, *args, **kwargs):
    super(ADVI, self).__init__(MeanField(*args, **kwargs))
# ==> In the super class KLqp
    super(KLqp, self).__init__(KL, MeanField(*args, **kwargs), None, beta=beta)
# ==> In the super class Inference
    ...
    self.objective = KL(MeanField(*args, **kwargs))(None)
    ...
where KL is Operator based on Kullback Leibler Divergence (it does not need any test function).
...
def apply(self, f):
    return -self.datalogp_norm + self.beta * (self.logq_norm - self.varlogp_norm)
Since the logp and logq are from the approximation, let's dive in further on it (there is another abstraction here - Group - that allows you to combine approximation into new approximation, but we will skip this for now and only consider SingleGroupApproximation like MeanField):
The definition of datalogp_norm, logq_norm, varlogp_norm are in variational/opvi, strip away the normalizing term, datalogp and varlogp are expectation of the variational free_RVs and data logp - we clone the datalogp and varlogp from the model, replace its input with PyTensor tensor that samples from the variational posterior.
For ADVI, these samples are from a Gaussian.
Note that the samples from the posterior approximations are usually 1 dimension more, so that we can compute the expectation and get the gradient of the expectation (by computing the expectation of the gradient!).
As for the [logq`` since it is a Gaussian it is pretty straightforward to evaluate](https://github.com/pymc-devs/pymc/blob/6d07591962a6c135640a3c31903eba66b34e71d8/pymc/variational/approximations.py#L91-L97).
Some challenges and insights from implementing VI.
- Graph based approach was helpful, but PyTensor had no direct access to previously created nodes in the computational graph.
You can find a lot of@node_propertyusages in implementation.
This is done to cache nodes.
TensorFlow has graph utils for that that could potentially help in doing this.
On the other hand graph management in Tensorflow seemed to more tricky than expected.
The high level reason is that graph is an add only container. - There were few fixed bugs not obvious in the first place.
PyTensor has a tool to manipulate the graph (pytensor.clone_replace) and this tool requires extremely careful treatment when doing a lot of graph replacements at different level. - We coined a term
pytensor.clone_replacecurse.
We got extremely dependent on this feature.
Internal usages are uncountable:- We use this to vectorize the model for both MCMC and VI to speed up computations
- We use this to create sampling graph for VI. This is the case you want posterior predictive as a part of computational graph.
As this is the core of the VI process, we were trying to replicate this pattern in TF.
However, when pytensor.clone_replace is called, PyTensor creates a new part of the graph that can be collected by garbage collector, but TF's graph is add only.
So we should solve the problem of replacing input in a different way.
Forward sampling
As explained above, in distribution we have method to walk the model dependence graph and generate forward random sample in scipy/numpy.
This allows us to do prior predictive samples using [pymc.sampling.sample_prior_predictive`` see code](https://github.com/pymc-devs/pymc/blob/6d07591962a6c135640a3c31903eba66b34e71d8/pymc/sampling.py#L1303-L1345).
It is a fairly fast batch operation, but we have quite a lot of bugs and edge case especially in high dimensions.
The biggest pain point is the automatic broadcasting.
As in the batch random generation, we want to generate (n_sample, ) + RV.shape random samples.
In some cases, where we broadcast RV1 and RV2 to create a RV3 that has one more batch shape, we get error (even worse, wrong answer with silent error).
The good news is, we are fixing these errors with the amazing works from lucianopaz and others.
The challenge and some summary of the solution could be found in Luciano's blog post
with pm.Model() as m:
    mu = pm.Normal('mu', 0., 1., shape=(5, 1))
    sigma = pm.HalfNormal('sigma', 5., shape=(1, 10))
    pm.Normal('x', mu=mu, sigma=sigma, observed=np.random.randn(2, 5, 10))
    trace = pm.sample_prior_predictive(100)

trace['x'].shape # ==> should be (100, 2, 5, 10)

pm.Normal.dist(mu=np.zeros(2), sigma=1).random(size=(10, 4))
There are also other error related random sample generation (e.g., Mixture is currently broken).
Extending PyMC
- Custom Inference method
- Connecting it to other library within a model
- Using "black box" likelihood function by creating a custom PyTensor Op.
- Using emcee
- Using other library for inference
- Connecting to Julia for solving ODE (with gradient for solution that can be used in NUTS)
What we got wrong
Shape
One of the pain point we often face is the issue of shape.
The approach in TFP and pyro is currently much more rigorous.
Adrian’s PR (https://github.com/pymc-devs/pymc/pull/2833) might fix this problem, but likely it is a huge effort of refactoring.
I implemented quite a lot of patches for mixture distribution, but still they are not done very naturally.
Random methods in numpy
There is a lot of complex logic for sampling from random variables, and because it is all in Python, we can't transform a sampling graph further.
Unfortunately, PyTensor does not have code to sample from various distributions and we didn't want to write that our own.
Samplers are in Python
While having the samplers be written in Python allows for a lot of flexibility and intuitive for experiment (writing e.g. NUTS in PyTensor is also very difficult), it comes at a performance penalty and makes sampling on the GPU very inefficient because memory needs to be copied for every logp evaluation.
Source Contributing Docker Container (`docs/source/contributing/docker_container.md`)
(docker_container)=
Running PyMC in Docker
We have provided a Dockerfile which helps for isolating build problems, and local development.
Install Docker for your operating system, clone this repo, then
run the following commands to build a pymc docker image.
cd pymc
bash scripts/docker_container.sh build
After successfully building the docker image, you can start a local docker container called pymc either from bash or from jupyter notebook server running on port 8888.
bash scripts/docker_container.sh bash # running the container with bash
bash scripts/docker_container.sh jupyter # running the container with jupyter notebook
Source Contributing Implementing Distribution (`docs/source/contributing/implementing_distribution.md`)
(implementing-a-distribution)=
Implementing a RandomVariable Distribution
This guide provides an overview on how to implement a distribution for PyMC.
It is designed for developers who wish to add a new distribution to the library.
Users will not be aware of all this complexity and should instead make use of helper methods such as ~pymc.CustomDist.
PyMC {class}~pymc.Distribution builds on top of PyTensor's {class}~pytensor.tensor.random.op.RandomVariable, and implements logp, logcdf, icdf and support_point methods as well as other initialization and validation helpers.
Most notably shape/dims/observed kwargs, alternative parametrizations, and default transform.
Here is a summary check-list of the steps needed to implement a new distribution.
Each section will be expanded below:
- Creating a new
RandomVariableOp - Implementing the corresponding
Distributionclass - Adding tests for the new
RandomVariable - Adding tests for
logp/logcdf/icdfandsupport_pointmethods - Documenting the new
Distribution.
This guide does not attempt to explain the rationale behind the Distributions current implementation, and details are provided only insofar as they help to implement new "standard" distributions.
1. Creating a new `RandomVariable` `Op`
{class}~pytensor.tensor.random.op.RandomVariable are responsible for implementing the random sampling methods.
The RandomVariable is also responsible for parameter broadcasting and shape inference.
Before creating a new RandomVariable make sure that it is not already offered in the {mod}NumPy library <numpy.random>.
If it is, it should be added to the {doc}PyTensor library first and then imported into the PyMC library.
In addition, it might not always be necessary to implement a new RandomVariable.
For example if the new Distribution is just a special parametrization of an existing Distribution.
This is the case of the OrderedLogistic and OrderedProbit, which are just special parametrizations of the Categorical distribution.
The following snippet illustrates how to create a new RandomVariable:
/* Detailed source-code truncated for AI context efficiency. */Some important things to keep in mind:
- Everything inside the
rng_fnmethod is pure Python code (as are the inputs) and should not make use of otherPyTensorsymbolic ops. The random method should make use of therngwhich is a NumPy {class}~numpy.random.RandomGenerator, so that samples are reproducible. - Non-default
RandomVariabledimensions will end up in therng_fnvia thesizekwarg. Therng_fnwill have to take this into consideration for correct output.sizeis the specification used by NumPy and SciPy and works like PyMCshapefor univariate distributions, but is different for multivariate distributions. For multivariate distributions thesizeexcludes the support dimensions, whereas theshapeof the resultingTensorVariableorndarrayincludes the support dimensions. For more context check {ref}The dimensionality notebook <dimensionality>. PyTensorcan automatically infer the output shape of univariateRandomVariables. For multivariate distributions, the method_supp_shape_from_paramsmust be implemented in the newRandomVariableclass. This method returns the support dimensionality of an RV given its parameters. In some cases this can be derived from the shape of one of its parameters, in which case the helper {func}pytensor.tensor.random.utils.supp_shape_from_ref_param_shapecand be used as is in {class}~pymc.DirichletMultinomialRV. In other cases the argument values (and not their shapes) may determine the support shape of the distribution, as happens in the~pymc.distributions.multivarite._LKJCholeskyCovRV. In simpler cases they may be constant.- It's okay to use the
rng_fnclassmethodsof other PyTensor and PyMCRandomVariablesinside the newrng_fn. For example if you are implementing a negative HalfNormalRandomVariable, yourrng_fncan simply return- halfnormal.rng_fn(rng, scale, size).
Note: In addition to size, the PyMC API also provides shape, dims and observed as alternatives to define a distribution dimensionality, but this is taken care of by {class}~pymc.Distribution, and should not require any extra changes.
For a quick test that your new RandomVariable Op is working, you can call the Op with the necessary parameters and then call {class}~pymc.draw on the returned object:
# blah = pytensor.tensor.random.uniform in this example
# multiple calls with the same seed should return the same values
pm.draw(blah([0, 0], [1, 2], size=(10, 2)), random_seed=1)

# array([[0.83674527, 0.76593773],
#    [0.00958496, 1.85742402],
#    [0.74001876, 0.6515534 ],
#    [0.95134629, 1.23564938],
#    [0.41460156, 0.33241175],
#    [0.66707807, 1.62134924],
#    [0.20748312, 0.45307477],
#    [0.65506507, 0.47713784],
#    [0.61284429, 0.49720329],
#    [0.69325978, 0.96272673]])
2. Inheriting from a PyMC base `Distribution` class
After implementing the new RandomVariable Op, it's time to make use of it in a new PyMC {class}~pymc.Distribution.
PyMC works in a very {term}functional <Functional Programming> way, and the distribution classes are there mostly to add PyMC API features and keep related methods organized together.
In practice, they take care of:
- Linking ({term}
Dispatching) anrv_opclass with the correspondingsupport_point,logp,logcdfandicdfmethods. - Defining a standard transformation (for continuous distributions) that converts a bounded variable domain (e.g., positive line) to an unbounded domain (i.e., the real line), which many samplers prefer.
- Validating the parametrization of a distribution and converting non-symbolic inputs (i.e., numeric literals or NumPy arrays) to symbolic variables.
- Converting multiple alternative parametrizations to the standard parametrization that the
RandomVariableis defined in terms of.
Here is how the example continues:
/* Detailed source-code truncated for AI context efficiency. */Some notes:
- A distribution should at the very least inherit from {class}
~pymc.Discreteor {class}~pymc.Continuous. For the latter, more specific subclasses exist:PositiveContinuous,UnitContinuous,BoundedContinuous,CircularContinuous,SimplexContinuous, which specify default transformations for the variables. If you need to specify a one-time custom transform you can also create a_default_transformdispatch function as is done for the {class}~pymc.distributions.multivariate.LKJCholeskyCov. - If a distribution does not have a corresponding
rng_fnimplementation, aRandomVariableshould still be created to raise aNotImplementedError. This is, for example, the case in {class}~pymc.distributions.continuous.Flat. In this case it will be necessary to provide asupport_pointmethod, because without arng_fn, PyMC can't fall back to a random draw to use as an initial point for MCMC. - As mentioned above, PyMC works in a very {term}
functional <Functional Programming>way, and all the information that is needed in thelogp,logcdf,icdfandsupport_pointmethods is expected to be "carried" via theRandomVariableinputs. You may pass numerical arguments that are not strictly needed for therng_fnmethod but are used in the those methods. Just keep in mind whether this affects the correct shape inference behavior of theRandomVariable. - The
logcdf, andicdfmethods is not a requirement, but it's a nice plus! - Currently, only one moment is supported in the
support_pointmethod, and probably the "higher-order" one is the most useful (that ismean>median>mode)... You might need to truncate the moment if you are dealing with a discrete distribution.support_pointshould return a valid point for the random variable (i.e., it always has non-zero probability when evaluated at that point) - When creating the
support_pointmethod, be careful withsize != Noneand broadcast properly also based on parameters that are not necessarily used to calculate the moment. For example, thesigmainpm.Normal.dist(mu=0, sigma=np.arange(1, 6))is irrelevant for the moment, but may nevertheless inform about the shape. In this case, thesupport_pointshould return[mu, mu, mu, mu, mu].
For a quick check that things are working you can try the following:
import pymc as pm
from pymc.distributions.distribution import support_point

# pm.blah = pm.Normal in this example
blah = pm.blah.dist(mu=0, sigma=1)

# Test that the returned blah_op is still working fine
pm.draw(blah, random_seed=1)
# array(-1.01397228)

# Test the support_point method
support_point(blah).eval()
# array(0.)

# Test the logp method
pm.logp(blah, [-0.5, 1.5]).eval()
# array([-1.04393853, -2.04393853])

# Test the logcdf method
pm.logcdf(blah, [-0.5, 1.5]).eval()
# array([-1.17591177, -0.06914345])
3. Adding tests for the new `RandomVariable`
Tests for new RandomVariables are mostly located in tests/distributions/test_*.py.
Most tests can be accommodated by the default BaseTestDistributionRandom class, which provides default tests for checking:
- Expected inputs are passed to the
rv_opby thedistclassmethod, viacheck_pymc_params_match_rv_op - Expected (exact) draws are being returned, via
check_pymc_draws_match_reference - Shape variable inference is correct, via
check_rv_size
from pymc.testing import BaseTestDistributionRandom, seeded_scipy_distribution_builder


class TestBlah(BaseTestDistributionRandom):
    pymc_dist = pm.Blah
    # Parameters with which to test the blah pymc Distribution
    pymc_dist_params = {"param1": 0.25, "param2": 2.0}
    # Parameters that are expected to have passed as inputs to the RandomVariable op
    expected_rv_op_params = {"param1": 0.25, "param2": 2.0}
    # If the new `RandomVariable` is simply calling a `numpy`/`scipy` method,
    # we can make use of `seeded_[scipy|numpy]_distribution_builder` which
    # will prepare a seeded reference distribution for us.
    reference_dist_params = {"mu": 0.25, "loc": 2.0}
    reference_dist = seeded_scipy_distribution_builder("blah")
    tests_to_run = [
        "check_pymc_params_match_rv_op",
        "check_pymc_draws_match_reference",
        "check_rv_size",
    ]
Additional tests should be added for each optional parametrization of the distribution.
In this case it's enough to include the test check_pymc_params_match_rv_op since only this differs.
Make sure the tested alternative parameter value would lead to a different value for the associated default parameter.
For instance, if it's just the inverse, testing with 1.0 is not very informative, since the conversion would return 1.0 as well, and we can't be (as) sure that is working correctly.
class TestBlahAltParam2(BaseTestDistributionRandom):

    pymc_dist = pm.Blah
    # param2 is equivalent to 1 / alt_param2
    pymc_dist_params = {"param1": 0.25, "alt_param2": 4.0}
    expected_rv_op_params = {"param1": 0.25, "param2": 2.0}
    tests_to_run = ["check_pymc_params_match_rv_op"]
Custom tests can also be added to the class as is done for the {class}~tests.distributions.test_continuous.TestFlat.
Note on `check_rv_size` test:
Custom input sizes (and expected output shapes) can be defined for the check_rv_size test, by adding the optional class attributes sizes_to_check and sizes_expected:
sizes_to_check = [None, (1), (2, 3)]
sizes_expected = [(3,), (1, 3), (2, 3, 3)]
tests_to_run = ["check_rv_size"]
This is usually needed for Multivariate distributions.
You can see an example in {class}~tests.distributions.test_multivariate.TestDirichlet.
Notes on `check_pymcs_draws_match_reference` test
The check_pymcs_draws_match_reference is a very simple test for the equality of draws from the RandomVariable and the exact same python function, given the same inputs and random seed.
A small number (size=15) is checked. This is not supposed to be a test for the correctness of the random number generator.
The latter kind of test (if warranted) can be performed with the aid of pymc_random and pymc_random_discrete methods, which will perform an expensive statistical comparison between the RandomVariable.rng_fn and a reference Python function.
This kind of test only makes sense if there is a good independent generator reference (i.e., not just the same composition of NumPy / SciPy calls that is done inside rng_fn).
Finally, when your rng_fn is doing something more than just calling a NumPy or SciPy method, you will need to set up an equivalent seeded function with which to compare for the exact draws (instead of relying on seeded_[scipy|numpy]_distribution_builder).
You can find an example in {class}~tests.distributions.test_continuous.TestWeibull, whose rng_fn returns beta * np.random.weibull(alpha, size=size).
4. Adding tests for the `logp` / `logcdf` / `icdf` methods
Tests for the logp, logcdf and icdf mostly make use of the helpers check_logp, check_logcdf, check_icdf andcheck_selfconsistency_discrete_logcdf implemented in ~testing
from pymc.testing import Domain, check_logp, check_logcdf, select_by_precision

R = Domain([-np.inf, -2.1, -1, -0.01, 0.0, 0.01, 1, 2.1, np.inf])
Rplus = Domain([0, 0.01, 0.1, 0.9, 0.99, 1, 1.5, 2, 100, np.inf])


def test_blah():
    check_logp(
        pymc_dist=pm.Blah,
        # Domain of the distribution values
        domain=R,
        # Domains of the distribution parameters
        paramdomains={"mu": R, "sigma": Rplus},
        # Reference scipy (or other) logp function
        scipy_logp=lambda value, mu, sigma: sp.norm.logpdf(value, mu, sigma),
        # Number of decimal points expected to match between the pymc and reference functions
        decimal=select_by_precision(float64=6, float32=3),
        # Maximum number of combinations of domain * paramdomains to test
        n_samples=100,
    )

    check_logcdf(
        pymc_dist=pm.Blah,
        domain=R,
        paramdomains={"mu": R, "sigma": Rplus},
        scipy_logcdf=lambda value, mu, sigma: sp.norm.logcdf(value, mu, sigma),
        decimal=select_by_precision(float64=6, float32=1),
        n_samples=-1,
    )
These methods will perform a grid evaluation on the combinations of domain and paramdomains values, and check that the PyMC methods and the reference functions match.
There are a couple of details worth keeping in mind:
- By default, the first and last values (edges) of the
Domainare not compared (they are used for other things). If it is important to test the edge of theDomain, the edge values can be repeated. This is done by theBool:Bool = Domain([0, 0, 1, 1], "int64") - There are some default domains (such as
RandRplus) that you can use for testing your new distribution, but it's also perfectly fine to create your own domains inside the test function if there is a good reason for it (e.g., when the default values lead too many extreme unlikely combinations that are not very informative about the correctness of the implementation). - By default, a random subset of 100
paramxparamdomaincombinations is tested, to keep the test runtime under control. When testing your shiny new distribution, you can temporarily setn_samples=-1to force all combinations to be tested. This is important to avoid yourPRleading to surprising failures in future runs whenever some bad combinations of parameters are randomly tested. - On GitHub some tests run twice, under the
pytensor.config.floatXflags of"float64"and"float32". However, the reference Python functions will run in a pure "float64" environment, which means the reference and the PyMC results can diverge quite a lot (e.g., underflowing to-np.inffor extreme parameters). You should therefore make sure you test locally in both regimes. A quick and dirty way of doing this is to temporarily addpytensor.config.floatX = "float32"at the very top of file, immediately afterimport pytensor. Remember to setn_samples=-1as well to test all combinations. The test output will show what exact parameter values lead to a failure. If you are confident that your implementation is correct, you may opt to tweak the decimal precision withselect_by_precision, or adjust the testedDomainvalues. In extreme cases, you can mark the test with a conditionalxfail(if only one of the sub-methods is failing, they should be separated, so that thexfailis as narrow as possible):
def test_blah_logp(self):
    ...


@pytest.mark.xfail(
   condition=(pytensor.config.floatX == "float32"),
   reason="Fails on float32 due to numerical issues",
)
def test_blah_logcdf(self):
    ...
5. Adding tests for the `support_point` method
Tests for the support_point make use of the function assert_support_point_is_expected
which checks if:
- Moments return the
expectedvalues - Moments have the expected size and shape
- Moments have a finite logp
import pytest
from pymc.distributions import Blah
from pymc.testing import assert_support_point_is_expected


@pytest.mark.parametrize(
    "param1, param2, size, expected",
    [
        (0, 1, None, 0),
        (0, np.ones(5), None, np.zeros(5)),
        (np.arange(5), 1, None, np.arange(5)),
        (np.arange(5), np.arange(1, 6), (2, 5), np.full((2, 5), np.arange(5))),
    ],
)
def test_blah_support_point(param1, param2, size, expected):
    with Model() as model:
        Blah("x", param1=param1, param2=param2, size=size)
    assert_support_point_is_expected(model, expected)
Here are some details worth keeping in mind:
- In the case where you have to manually broadcast the parameters with each other it's important to add test conditions that would fail if you were not to do that. A straightforward way to do this is to make the used parameter a scalar, the unused one(s) a vector (one at a time) and size
None. - In other words, make sure to test different combinations of size and broadcasting to cover these cases.
6. Documenting the new `Distribution`
New distributions should have a rich docstring, following the same format as that of previously implemented distributions.
It generally looks something like this:
r"""Univariate blah distribution.

 The pdf of this distribution is

 .. math::

    f(x \mid \param1, \param2) = \exp{x * (param1 + \log{param2})}

 .. plot::

     import matplotlib.pyplot as plt
     import numpy as np
     import scipy.stats as st
     import arviz as az
     x = np.linspace(-5, 5, 1000)
     params1 = [0., 0., 0., -2.]
     params2 = [0.4, 1., 2., 0.4]
     for param1, param2 in zip(params1, params2):
         pdf = st.blah.pdf(x, param1, param2)
         plt.plot(x, pdf, label=r'$\param1$ = {}, $\param2$ = {}'.format(param1, param2))
     plt.xlabel('x', fontsize=12)
     plt.ylabel('f(x)', fontsize=12)
     plt.legend(loc=1)
     plt.show()

 ========  ==========================================
 Support   :math:`x \in [0, \infty)`
 ========  ==========================================

 Blah distribution can be parameterized either in terms of param2 or
 alt_param2. The link between the two parametrizations is
 given by

 .. math::

    \param2 = \dfrac{1}{\alt_param2}


 Parameters
 ----------
 param1: float
     Interpretation of param1.
 param2: float
     Interpretation of param2 (param2 > 0).
 alt_param2: float
     Interpretation of alt_param2 (alt_param2 > 0) (alternative to param2).

 Examples
 --------
 .. code-block:: python

     with pm.Model():
         x = pm.Blah('x', param1=0, param2=10)
 """
The new distribution should be referenced in the respective API page in the docs module (e.g., pymc/docs/api/distributions.continuous.rst).
If appropriate, a new notebook example should be added to pymc-examples illustrating how this distribution can be used and how it relates (and/or differs) from other distributions that users are more likely to be familiar with.
Source Contributing Jupyter Style (`docs/source/contributing/jupyter_style.md`)
(jupyter_style)=
Jupyter Style Guide
These guidelines should be followed by notebooks in the documentation.
All notebooks in pymc-examples must follow this to the letter, the style
is more permissive for the ones on pymc where not everything is available.
The documentation websites are generated by Sphinx, which uses
{doc}MYST <myst:index> and {doc}MYST-NB <myst-nb:index>
to parse the notebooks.
:::{tip}
There is a webinar available on contributing to the PyMC example gallery
:::
Template Notebook
There is a template Jupyter notebook to be used for new notebooks.
General guidelines
Don't use abbreviations or acronyms whenever you can use complete words. For example, write "random variables" instead of "RVs".
Explain the reasoning behind each step.
Attribute quoted text or code, and link to relevant references.
Keep notebooks short: 20/30 cells for content aimed at beginners or intermediate users, longer notebooks are fine at the advanced level.
MyST guidelines
Using MyST allows taking advantage of all sphinx features from markdown cells in the notebooks.
All markdown should be valid MyST (note that MyST is a superset of recommonmark).
This guide does not teach nor cover MyST extensively, only gives some opinionated guidelines.
Never use url links to refer to other notebooks, PyMC documentation or other python libraries documentations.
When linking to other notebooks, always use areftype cross-reference pointing to the target in the {ref}jupyter_style_first_cell.:::{caution}
Using urls links breaks self referencing in versioned docs! And at the same time they are
less robust than sphinx cross-references.
:::::::{dropdown} Examples of cross-references
References to targets within the current project
That is, notebooks in pymc-examples referring to other notebooks in pymc-examples.
Pattern:
text{ref}`explicit text <anchor_id>`Example source:
text{ref}`Kronecker product <GP-Kron>`Rendered example: {ref}
Kronecker product <GP-Kron>References to targets of other projects
Here "other projects" means any sphinx documentation site that was build independently
of the current one. Therefore, this includes linking to pymc-examples notebooks
from the pymc documentation or vice versa, or linking to other libraries like
arviz, numpy, matplotlib...Pattern:
text{ref}`explicit text <key:anchor_id>`Example source:
text{ref}`how to use InferenceData <arviz:working_with_InferenceData>`Rendered example: {ref}
how to use InferenceData <arviz:working_with_InferenceData>where
keyin the pattern (arvizin the example) is one of the keys defined in
theintersphinx_mappingvariable ofconf.pysuch asarviz,numpy,mpl...
For the main pymc repo it is located indocs/source/conf.py, for pymc-examples it is
inexamples/conf.py.To identify which
anchor_idto use, you need to either look at the source of the document, or use sphobjinv.References to python objects
Pattern
text{type}`import.path` # to show full import path {type}`~import.path` # to show only object namewhere type is func for functions, meth for methods, class for classes, prop for property, etc.
Example source:
text{class}`~pymc.gp.HSGP`Rendered example: {class}
~pymc.gp.HSGP:::{seealso}
- ReadTheDocs page on sphinx cross-references instead.
- {ref}
MyST docs on cross-references <myst:syntax/referencing>.
:::
::::
If the output (or even code and output) of a cell is not necessary to follow the
notebook or it is very long and can break the flow of reading, consider hiding
it with a {ref}toggle button <myst-nb:use/hiding/code>Consider using {ref}
myst:syntax/md-figuresto add captions to images used in the notebook.Use the glossary whenever possible. If you use a term that is defined in the Glossary, link to it the first time that term appears in a significant manner. Use this syntax to add a term reference. Link to glossary source where new terms should be added.
Variable names
- Above all, stay consistent with variable names within the notebook. Notebooks using multiple names for the same variable will not be merged.
- Use meaningful variable names wherever possible. Our users come from different backgrounds and not everyone is familiar with the same naming conventions.
- Annotate dimensions too. Notebooks are published to be read, so even if the shape is derived
from the inputs or you don't like to use named dims and don't use them in your personal
code, notebooks must use dims, even if annotating and not setting the shape.
It makes the code easier to follow, especially for newcomers.
- Annotate dimensions too. Notebooks are published to be read, so even if the shape is derived
- Sometimes it makes sense to use Greek letters to refer to variables, for example when writing equations, as this makes them easier to read. In that case, use LaTeX to insert the Greek letter like this
$\theta$instead of using Unicode likeθ. - If you need to use Greek letter variable names inside the code, please spell them out instead of using unicode. For example,
theta, notθ. - When using non meaningful names such as single letters, add bullet points with a 1-2 sentence description of each variable below the equation where they are first introduced.
Choosing variable names can sometimes be difficult, tedious or annoying.
In case it helps, the dropdown below has some suggestions so you can focus on writing the actual content
:::::::{dropdown} Variable name suggestions
:icon: light-bulb
Models and sampling results
- Use
idatafor sampling results, always containing a variable of type InferenceData. - Store inferecedata groups as variables to ease writing and reading of code operating on sampling results.
Use underscore separated 3-5 word abbreviations or the group name. Some examples ofabbrebiation/group_name:post/posterior,const/constant_data,post_pred/posterior_predictiveorobs_data/observed_data - For stats and diagnostics, use the ArviZ function name as variable name:
ess = az.ess(...),loo = az.loo(...) - If there are multiple models in a notebook, assign a prefix to each model,
and use it throughout to identify which variables map to each model.
Taking the famous eight school as example, with acenteredandnon_centeredmodel
to compare parametrizations, usecentered_model(pm.Model object),centered_idata,centered_post,centered_ess... andnon_centered_model,non_centered_idata...
Dimension and random variable names
Use singular dimension names, following ArviZ
chainanddraw.
For examplecluster,axis,component,forest,time...If you can't think of a meaningful name for the dimension representing the number of observations such as time, fall back to
obs_id.For matrix dimensions, as xarray doesn't allow repeated dimension names, add a
_bissuffix. i.e.param, param_bis.For the dimension resulting from stacking
chainanddrawusesample, that is.stack(sample=("chain", "draw")).We often need to encode a categorical variable as integers. add
_idxto the name of the variable it's encoding.
i.e. fromfloorandcountytofloor_idxandcounty_idx.To avoid clashes and overwriting variables when using
pm.Data, use the following pattern:textx = np.array(...) with pm.Model(): x_ = pm.Data("x", x) ...This avoids overwriting the original
xwhile havingidata.constant_data["x"],
and within the modelx_is still available to play the role ofx.
Otherwise, always try to use the same variable name as the string name given to the PyMC random variable.
Plotting
Matplotlib figures and axes. Use:
figfor matplotlib figuresaxfor a single matplotib axes objectaxsfor arrays of matplotlib axes objects
When manually working with multiple matplotlib axes, use local
axvariables:::::{tab-set}
:::{tab-item} Localaxvariables{code-block} python:emphasize-lines: 3, 7 fig, axs = pyplot.subplots() ax = axs[0, 1] ax.plot(...) ax.set(...) ax = axs[1, 2] ax.scatter(...):::
:::{tab-item} Instead of subsetting every timetextfig, axs = pyplot.subplots() axs[0, 1].plot(...) axs[0, 1].set(...) axs[1. 2].scatter(...):::
::::This makes editing the code if restructuring the subplots easier, only one change per subplot
is needed instead of one change per matplotlib function call.It is often useful to make a numpy linspace into an {class}
~xarray.DataArray
for xarray to handle aligning and broadcasting automatically and ease computation.- If a dimension name is needed, use
x_plot - If a variable name is needed for the original array and DataArray to coexist, add
_dasuffix
Thus, ending up with code like:
textx = xr.DataArray(np.linspace(0, 10, 100), dims=["x_plot"]) # or x = np.linspace(0, 10, 100) x_da = xr.DataArray(x)- If a dimension name is needed, use
Looping
When using enumerate, take the first letter of the variable as the count:
textfor p, person in enumerate(persons)When looping, if you need to store a variable after subsetting with the loop index,
append the index variable used for looping to the original variable name:{code-block} python:emphasize-lines: 4, 6 variable = np.array(...) x = np.array(...) for i in range(N): variable_i = variable[i] for j in range(K): x_j = x[j] ...
:::::::
(jupyter_style_first_cell)=
First cell
The first cell of all example notebooks should have a MyST target, a level 1 markdown title (that is a title with a single #) followed by the post directive.
The syntax is as follows:
(notebook_name)=
# Notebook Title

:::{post} Aug 31, 2021
:tags: tag1, tag2, tags can have spaces, tag4
:category: level
:author: Alice Abat, Bob Barceló
:::
The date should correspond to the latest update/execution date, at least roughly (it's not a problem if the date is a few days off due to the review process before merging the PR). This will allow users to see which notebooks have been updated lately and will help the PyMC team make sure no notebook is left outdated for too long.
:::{important}
The {ref}MyST target <myst:syntax/targets> (the (notebook_name)= bit)
is used to link notebooks between each other.
It must be notebook specific, for example its file name.
Do not copy paste this and leave notebook_name unmodified
:::
Tags can be anything, but we ask you to try to use {doc}existing tags <nb:gallery>
to avoid the tag list from getting too long.
Each notebook should have a one or two categories indicating:
- the level of the notebook (required):
beginner(standing crow icon)intermediate(flying dove icon)advanced(dragon icon)
- the diataxis type (optional for old notebooks):
tutorialhow-toexplanationreference
Authors should list people who authored, adapted or updated the notebook, excluding those
who only re-executed a notebook with little to no code or wording changes.
Only author names should be added here as this is only metadata of the notebook,
self-promotion links and details on the changes should be added at the "Authors" section,
see {ref}jupyter_authors for more details.
Extra dependencies
If the notebook uses libraries that are not PyMC dependencies, these extra dependencies should
be indicated together with some advise on how to install them.
This ensures readers know what they'll need to install beforehand and can for example
decide between running it locally or on binder.
To make things easier for notebook writers and maintainers, pymc-examples contains
a template for this that warns about the extra dependencies and provides specific
installation instructions inside a dropdown.
Thus, notebooks with extra dependencies should:
list the extra dependencies as notebook metadata using the
myst_substitutionscategory
and then either theextra_dependenciesor thepip_dependenciesandconda_dependencies.
In addition, there is also anextra_install_notesto include custom text inside the dropdown.notebook metadata can be edited from the menu with {menuselection}
Edit --> Edit notebook metadataThis will open a window with json formatted text that might look a bit like:
::::{tab-set}
:::{tab-item} No myst_substitutionsjson{ "kernelspec": { "name": "python3", "display_name": "Python 3 (ipykernel)", "language": "python" }, "language_info": { "name": "python", "version": "3.9.7", "mimetype": "text/x-python", "codemirror_mode": { "name": "ipython", "version": 3 }, "pygments_lexer": "ipython3", "nbconvert_exporter": "python", "file_extension": ".py" } }:::
:::{tab-item} extra_dependencies key
{code-block} json:emphasize-lines: 19-23 { "kernelspec": { "name": "python3", "display_name": "Python 3 (ipykernel)", "language": "python" }, "language_info": { "name": "python", "version": "3.9.7", "mimetype": "text/x-python", "codemirror_mode": { "name": "ipython", "version": 3 }, "pygments_lexer": "ipython3", "nbconvert_exporter": "python", "file_extension": ".py" }, "myst": { "substitutions": { "extra_dependencies": "bambi seaborn" } } }:::
:::{tab-item} pip and conda specific keys
{code-block} json:emphasize-lines: 19-24 { "kernelspec": { "name": "python3", "display_name": "Python 3 (ipykernel)", "language": "python" }, "language_info": { "name": "python", "version": "3.9.7", "mimetype": "text/x-python", "codemirror_mode": { "name": "ipython", "version": 3 }, "pygments_lexer": "ipython3", "nbconvert_exporter": "python", "file_extension": ".py" }, "myst": { "substitutions": { "pip_dependencies": "graphviz", "conda_dependencies": "python-graphviz", } } }The pip and conda specific keys overwrite the
extra_installsone, so it doesn't make
sense to useextra_installsif using them. Either both pip and conda substitutions
are defined or none of them is.
:::
::::
include the warning and installation advise template with the following markdown right before
the extra dependencies are imported:markdown:::{include} ../extra_installs.md :::
Code preamble
In a cell just below the cell where you imported matplotlib and/or ArviZ (usually the first one),
set the ArviZ style to darkgrid (this has to be in another cell than the matplotlib import because of the way matplotlib sets its defaults):
RANDOM_SEED = 8927
rng = np.random.default_rng(RANDOM_SEED)
az.style.use("arviz-darkgrid")
A good practice when generating synthetic data is also to set a random seed as above, to improve reproducibility. Also, please check convergence (e.g. assert all(r_hat < 1.03)) because we sometime re-run notebooks automatically without carefully checking each one.
Reading from file
Use a try... except clause to load the data and use pm.get_data in the except path. This will ensure that users who have cloned pymc-examples repo will read their local copy of the data while also downloading the data from github for those who don't have a local copy. Here is one example:
try:
    df_all = pd.read_csv(os.path.join("..", "data", "file.csv"), ...)
except FileNotFoundError:
    df_all = pd.read_csv(pm.get_data("file.csv"), ...)
pre-commit and code formatting
We run some code-quality checks on our notebooks during Continuous Integration.
The easiest way to make sure your notebook(s) pass the CI checks is using pre-commit.
You can install it with
pip install -U pre-commitand then enable it with
pre-commit installThen, the code-quality checks will run automatically whenever you commit any changes.
To run the code-quality checks manually, you can do, e.g.:
pre-commit run --files notebook1.ipynb notebook2.ipynbreplacing notebook1.ipynb and notebook2.ipynb with any notebook you've modified.
NB: sometimes, Black will be frustrating (well, who isn't?). In these cases, you can disable its magic for specific lines of code: just write #fmt: on/off to disable/re-enable it, like this:
# fmt: off
np.array(
    [
        [1, 0, 0, 0],
        [0, -1, 0, 0],
        [0, 0, 1, 0],
        [0, 0, 0, -1],
    ]
)
# fmt: on
(jupyter_authors)=
Authorship and attribution
After the notebook content finishes, there should be an ## Authors section with bullet points
to provide attribution to the people who contributed to the notebook. The general pattern should be:
## Authors

* <verb> by <author> in <date> ([repo#PR](https://link-to.pr))
where <author> should be the name (multiple people allowed) which can be formatted as
a hyperlink to the personal site or GitHub profile of the person,
and <date> should preferably be month and year.
The <verb> part should aim to be descriptive of the changes done, for example
"updated", "re-executed", "authored" or "adapted", but it is not restricted to anything.
Authors with significant contributions should also be included in the post metadata as indicated in
{ref}jupyter_style_first_cell. There are no general and strict guidelines on that, if in doubt,
add yourself and ask reviewers for a second opinion. The main reason for that is the authors
section here at the bottom aims to be a log of all changes that happen to the notebook,
whereas the metadata at the top is used for rendering citation recommendation,
so for example, re-executing a notebook that requires no changes is a valuable contribution
which will be logged both here in this section and on GitHub but does not match authorship criteria
for citing. On the other hand, updating the wording and rendering of a notebook to make
it clearer and more friendly to the reader is something that should be added in both places,
even if the notebook is not re-executed.
some examples:
## Authors

* Authored by Chris Fonnesbeck in May, 2017 ([pymc#2124](https://github.com/pymc-devs/pymc/pull/2124))
* Updated by Colin Carroll in June, 2018 ([pymc#3049](https://github.com/pymc-devs/pymc/pull/3049))
* Updated by Alex Andorra in January, 2020 ([pymc#3765](https://github.com/pymc-devs/pymc/pull/3765))
* Updated by Oriol Abril in June, 2020 ([pymc#3963](https://github.com/pymc-devs/pymc/pull/3963))
* Updated by Farhan Reynaldo in November 2021 ([pymc-examples#246](https://github.com/pymc-devs/pymc-examples/pull/246))
and
## Authors

* Adapted from chapter 5 of Bayesian Data Analysis 3rd Edition {cite:p}`gelman2013bayesian`
  by Demetri Pananos and Junpeng Lao in June, 2018 ([pymc#3054](https://github.com/pymc-devs/pymc/pull/3054))
* Reexecuted by Ravin Kumar with PyMC 3.6 in March, 2019 ([pymc#3397](https://github.com/pymc-devs/pymc/pull/3397))
* Reexecuted by Alex Andorra and Michael Osthege with PyMC 3.9 in June, 2020 ([pymc#3955](https://github.com/pymc-devs/pymc/pull/3955))
* Updated by Raúl Maldonado in 2021 ([pymc-examples#24](https://github.com/pymc-devs/pymc-examples/pull/24), [pymc-examples#45](https://github.com/pymc-devs/pymc-examples/pull/45) and [pymc-examples#147](https://github.com/pymc-devs/pymc-examples/pull/147))
References
References should be added to the references.bib file in bibtex format, and cited with sphinxcontrib-bibtex within the notebook text wherever they are relevant.
The references in the .bib file should have as id something along the lines authorlastnameYEARkeyword or libraryYEARkeyword for documentation pages, and they should be alphabetically sorted by this id in order to ease finding references within the file and preventing adding duplicate ones.
References can be cited twice within a single notebook. Two common reference formats are:
{cite:p}`bibtex_id`  # shows the reference author and year between parenthesis
{cite:t}`bibtex_id`  # textual cite, shows author and year without parenthesis
which can be added inline, within the text itself. At the end of the notebook, add the bibliography with the following markdown
## References

:::{bibliography}
:filter: docname in docnames
:::
or alternatively, if you wanted to add extra references that have not been cited within the text, use:
## References

:::{bibliography}
:filter: docname in docnames

extra_bibtex_id_1
extra_bibtex_id_2
:::
Watermark
watermark is a library which automatically prints the versions of Python and the packages you used to run the NB -- reproducibility rocks!
This library should be in your virtual environment if you installed our requirements-dev.txt. Otherwise, run pip install watermark.
First, add a Markdown cell with the ## Watermark title only so it appears in the table of contents. This is the second to last section, above the epilogue/footer. Then, add a code cell to print the versions of Python and packages used in the notebook. This is the last code cell in the notebook.
The p flag is optional (or it may need to have different libraries as input), but should be added if PyTensor or xarray are not imported explicitly. This will also be checked by pre-commit (because we all forget to do things sometimes 😳).
## Watermark%load_ext watermark
%watermark -n -u -v -iv -w -p pytensor,xarrayEpilogue
The last cell in the notebooks should be a markdown cell with exactly the following content:
:::{include} ../page_footer.md
:::
The only exception being notebooks that are not on the usual place and therefore need to
update the path to page footer for the include to work.
You're all set now 🎉. You can push your changes, open a pull request, and, once it's merged, rest with the feeling of a job well done 👏. Thanks a lot for your contribution to open-source, we really appreciate it!
Source Contributing Pr Checklist (`docs/source/contributing/pr_checklist.md`)
(pr_checklist)=
Pull request checklist
We recommended that your contribution complies with the following guidelines before you submit a pull request:
If your pull request addresses an issue, use the pull request title to describe the issue and mention the issue number in the pull request description.
This will make sure a link back to the original issue is created.:::{caution}
Adding the related issue in the PR title generates no link and is therefore
not useful as nobody knows issue numbers. Please mention all related
issues in the PR but do so only in the PR description.
:::All public methods must have informative docstrings with sample usage when appropriate.
Docstrings should follow the numpydoc stylePlease select "Create draft pull request" in the dropdown menu when opening your pull request to indicate a work in progress. This is to avoid duplicated work, to get early input on implementation details or API/functionality, or to seek collaborators.
Documentation and high-coverage tests are necessary for enhancements to be accepted.
When adding additional functionality, consider adding also one example notebook at pymc-examples.
Open a proposal issue in the example repo to discuss the specific scope of the notebook.Run any of the pre-existing examples in pymc-examples that contain analyses that would be affected by your changes to ensure that nothing breaks. This is a useful opportunity to not only check your work for bugs that might not be revealed by unit test, but also to show how your contribution improves PyMC for end users.
No
pre-commiterrors: see the {ref}python_styleand {ref}jupyter_stylepage on how to install and run it.All other tests pass when everything is rebuilt from scratch. See {ref}
running_the_test_suite
Source Contributing Pr Tutorial (`docs/source/contributing/pr_tutorial.md`)
(pr_tutorial)=
Pull request step-by-step
The preferred workflow for contributing to PyMC is to fork the GitHub repository, clone it to your local machine, and develop on a feature branch.
Steps
Read the {ref}
pr_etiquette.Fork the project repository by clicking on the 'Fork' button near the top right of the main repository page. This creates a copy of the code under your GitHub user account.
Clone your fork of the PyMC repo from your GitHub account to your local disk, and add the base repository as a remote:
bashgit clone [email protected]:<your GitHub handle>/pymc.git cd pymc git remote add upstream [email protected]:pymc-devs/pymc.gitCreate a
featurebranch to hold your development changes:bashgit checkout -b my-feature:::{attention}
Always use afeaturebranch. It's good practice to never routinely work on themainbranch of any repository.
:::Project requirements are in
pyproject.toml, and libraries used for development are inrequirements-dev.txt.
The easiest (and recommended) way to set up a development environment is via miniconda:::::{tab-set}
:::{tab-item} Linux/MacOSbashconda env create -f conda-envs/environment-dev.yml:::
:::{tab-item} Windowsbashconda env create -f .\conda-envs\windows-environment-dev.yml:::
:::{tab-item} Windows (Git Bash)bashconda env create -f conda-envs/windows-environment-dev.yml:::
::::bashconda activate pymc-dev pip install -e .Alternatively you may (probably in a virtual environment) run:
bashpip install -e . pip install -r requirements-dev.txtDevelop the feature on your feature branch.
bashgit checkout my-feature # no -b flag because the branch is already createdBefore committing, run
pre-commitchecks.bashpip install pre-commit pre-commit run --all # 👈 to run it manually pre-commit install # 👈 to run it automatically before each commitAdd changed files using
git addand thengit commitfiles:bash$ git add modified_files $ git committo record your changes locally.
After committing, it is a good idea to sync with the base repository in case there have been any changes:
bashgit fetch upstream git rebase upstream/mainThen push the changes to the fork in your GitHub account with:
bashgit push -u origin my-feature:::{sidebar}
If this is your first contribution, the start of some CI jobs will have to be approved by a maintainer.
:::Go to the GitHub web page of your fork of the PyMC repo.
Click the 'Pull request' button to send your changes to the project's maintainers for review.
This will send a notification to the committers.:::{tip}
Now that your PR is ready, read the {ref}pr_checklistto make sure it follows best practices.
:::
Source Contributing Python Style (`docs/source/contributing/python_style.md`)
(python_style)=
Python style guide
Pre commit checks
Some code-quality checks are performed during continuous integration. The easiest way to check that they pass locally,
before submitting your pull request, is by using pre-commit.
Steps to get set up are (run these within your virtual environment):
install:
bashpip install pre-commitenable:
bashpre-commit install
Now, whenever you stage some file, when you run git commit -m "<some descriptive message>", pre-commit will run
the checks defined in .pre-commit-config.yaml and will block your commit if any of them fail. If any hook fails, you
should fix it (if necessary), run git add <files> again, and then re-run git commit -m "<some descriptive message>".
You can skip pre-commit using --no-verify, e.g.
git commit -m "wip lol" --no-verifyTo skip one particular hook, you can set the SKIP environment variable. E.g. (on Linux):
SKIP=ruff git commit -m "<descriptive message>"You can manually run all pre-commit hooks on all files with
pre-commit run --all-filesor, if you just want to manually run them on a subset of files,
pre-commit run --files <file_1> <file_2> ... <file_n>Gotchas & Troubleshooting
Pre-commit runs on staged files
If you have some git changes staged and other unstaged, the pre-commit will only run on the staged files.
Pre-commit repeatedly complains about the same formatting changes
Check the unstaged changes (see previous point).
Whitespace changes in the environment-dev.yml files
On Windows, there are some bugs in pre-commit hooks that can lead to changes in some environment YAML files.
Until this is fixed upstream, you should ignore these changes.
To actually make the commit, deactivate the automated pre-commit with pre-commit uninstall and make sure to run it manually with pre-commit run --all.
Failures in the mypy step
We are running static type checks with mypy to continuously improve the reliability and type safety of the PyMC codebase.
However, there are many files with unresolved type problems, which is why we are allowing some files to fail the mypy check.
If you are seeing the mypy step complain, chances are that you are in one of the following two situations:
- 😕 Your changes introduced type problems in a file that was previously free of type problems.
- 🥳 Your changes fixed type problems.
In any case read the logging output of the mypy hook, because it contains the instructions how to proceed.
You can also run the mypy check manually with python scripts/run_mypy.py [--verbose].
Source Contributing Release Checklist (`docs/source/contributing/release_checklist.md`)
PyMC Release workflow
- Track all relevant issues and PRs via a version-specific milestone
- Make sure that there are no major known bugs that should not be released
- Make a PR to bump the version number in
__init__.pyand edit theRELEASE-NOTES.md.- :::{important}
Please don't name it after the release itself, and remember to push to your own fork like an ordinary citizen.
::: - Create a new "vNext" section at the top
- Edit the header with the release version and date
- Add a line to credit the release manager like in previous releases
- :::{important}
- After merging the PR, check that the CI pipelines on master are all ✔
- Create a Release with the Tag as ´v1.2.3´ and a human-readable title like the ones on previous releases
After the last step, the GitHub Action "release-pipeline" triggers and automatically builds and publishes the new version to PyPI.
Troubleshooting
- If for some reason, the release must be "unpublished", this is possible by manually deleting it on PyPI and GitHub. HOWEVER, PyPI will not accept another release with the same version number!
- The
release-pipelinehas atest-install-job, which can fail if the PyPI index did not update fast enough.
Post-release steps
- Head over to Zenodo and copy the version specific DOI-bade into the release notes
- Rename and close the release milestone and open a new "vNext" milestone
- Monitor the update the conda-forge/pymc-feedstock repository for new PRs. The bots should automatically pick up the new version and open a PR to update it. Manual intervention may be required though (see the repos PR history for examples).
- Re-run notebooks with the new release (see https://github.com/pymc-devs/pymc-examples)
- Make sure the new version appears at the website and that
docs.pymc.io/en/stablepoints to it.
Source Contributing Review Pr Pymc Examples (`docs/source/contributing/review_pr_pymc_examples.md`)
(review_pr_pymc_examples)=
Review a PR on pymc-examples
The target audience for this page are reviewers of PRs in pymc-examples
repo. It mostly gathers resources from its
contributing guide,
PR template
and the {ref}jupyter_style page to
centralize all resources for reviewers and put special emphasis on
reviewer tasks and responsibilities.
:::{important}
The most important guideline is the following: When you aren't completely
sure about something communicate it, ask around and (re)read the documentation.
:::
pymc-examples is a huge collection of notebooks, covering many fields
and applications of PyMC and Bayesian statistics. In addition,
its HTML generation infrastructure has been improved by specialized
people who were also paid so they could dedicate themselves to this task.
It is perfectly fine to not know about the topic, not know about
the tech stack being used or to not be sure about either.
You can still review, either focus on your expertise or take some
time going through all the available resources to learn about the parts
you are not sure about.
(review_pr/scope)=
1. Define the scope
Before starting you need to make sure you understand the scope of the PR and
to set the scope of your own review.
If the scope isn't clear from the PR description, ask the author to update it!
There are many valid contributions that can be done to the notebooks in pymc-examples.
They can be focused on code, styling, wording...
pymc-examples needs to have regular updates and in many cases it doesn't matter if
these are partial and don't update everything that can be updated in the notebook.
Not all partial updates are valid nor helpful though. If doing updates
to the code for example, most of the wording will probably need no changes,
but there may be some sections where the explanation is specifically about the code
used. We don't know when the next partial update will come, so PRs should merge
working and coherent notebooks. If the code is updated to use Potential instead
of DensityDist and the explanation mentions DensityDist, that specific sentence
needs to be updated too.
A PR that aims to update everything about a notebook
could easily have 3 or more reviewers, each covering different aspects of the
example like PyTensor usage, writing and explanation of the concepts used,
ArviZ usage, styling with MyST+Sphinx, or structuring and scope of the notebook.
Unless you plan to review everything, start your review mentioning what your
review covers (or skips).
Part of that is also making sure that the PR description links to the relevant issue(s).
(review_pr/initial_pass)=
2. Try to be concise and clear
Try to be concise and to the point with your reviews.
Make sure to leave actionable responses.
You'll need less time to review and the PR author will need less time to go over the review.
Here are some examples about what this does:
- Skim the notebook from top to bottom before starting your review.
This will prevent you from spending some time writing about missing content
and suggesting how to add it only to find out it is not missing but badly structured. - Do not proofread the text until you are sure no large rewritings will be needed.
What is the point of reviewing/fixing a typo when the whole paragraph is to be rewritten? - Include some rationale about your comments. Contributors come from a wide range
of places, fields and personal contexts and English might not be their (nor your) first language.
Adding the reasons behind a suggestion goes a long way in making sure the suggestion
is clear and makes it more probable that the author doesn't repeat this pattern again.
and doesn't mean:
- Avoiding mentioning good things from the PR or not thanking the PR author.
- Being cryptic or writing badly
3. Review the code and supporting text
- Check the intended level of the notebook, both when it comes to code and to text.
i.e. beginner notebooks should sacrifice performance for the sake of clarity without even needing
an explanation, intermediate and advanced ones should not. - In all cases, however, remember that this code is written to be read!
There is little to gain from obscure one-liners and much to lose, even in
intermediate or advanced notebooks. If some code is necessary but not
very relevant and you think takes up too much space, hide that cell/input/output
under a toggle button. - Make sure that the text is relevant, it explains the code blocks when needed and
is up to date with the code. - Check diffs and output on ReviewNB
4. Review the styling and formatting
- Ignore ReviewNB. ReviewNB renders notebooks incorrectly when there are diffs involving formatting,
it can add non-existent HTML tags to the rendered view, mess up links... Moreover, we don't
want to render the notebook by itself but as a page on the example gallery. - Check the readthedocs preview and use the MyST notebook format to see the raw text diff
and comment on it when it comes to formatting. - In general check that the style described in {ref}
jupyter_styleis followed.
For the time being (while we rerun the notebooks with v4 and update the docs to new formatting)
please ensure all of the following:
- There are NO URLs pointing to PyMC/ArviZ/PyTensor docs
- There is a post directive and MyST target at the top of the notebook.
- The notebook is being checked by pre-commit (it should not appear in any exclude section in
.pre-commit-config.yaml) - No watermark (this is already CI breaking but is still included here for full context)
They are very specific and should be part of the PR scope even if the PR author
didn't intend to originally. Think of this as CI breaking.
5. Check CI
- CI in pymc-examples is very specific and has never had a false failure yet.
- What it does however is skipping some files from given checks! Make sure to check the
file is not excluded from CI when reviewing.
Checklist
This might be moved to a comment added by a bot to every new PR, see pymc-examples#288
- Check PR description for clarity and links to relevant issues
- Define scope of review
- Leave actionable comments with rationale
- Check code, outputs and supporting text in ReviewNB
- Check styling and rendering in readthedocs preview and MyST notebook representation
- Check there are:
- No URLs pointing to PyMC/PyTensor/ArviZ docs
- A post directive with tags and categories and MyST target at the top of the notebook
- A watermark with all relevant libraries for reproducibility at the bottom of the notebook
- Check CI is passing and the notebook is being checked by pre-commit
- Proofread changes (once no significant rewriting is needed)
Source Contributing Running The Test Suite (`docs/source/contributing/running_the_test_suite.md`)
(running_the_test_suite)=
Running the test suite
The first step to run tests is the installation of additional dependencies that are needed for testing:
pip install -r requirements-dev.txtThe PyMC test suite uses pytest as the testing framework.
If you are unfamiliar with pytest, check out this short video series.
With the optional dependencies installed, you can start running tests.
Below are some example of how you might want to run certain parts of the test suite.
Running the entire test suite will take hours.
Therefore, we recommend to run just specific tests that target the parts of the codebase you're working on.
To run all tests from a single file:
pytest -v tests/model/test_core.pyThe `-v` flag is short-hand for `--verbose` and prints the names of the test cases that are currently running.Often, you'll want to focus on just a few test cases first.
By using the -k flag, you can filter for test cases that match a certain pattern.
For example, the following command runs all test cases from test_core.py that have "coord" in their name:
pytest -v tests/model/test_core.py -k coordTo get a coverage report, you can pass --cov=pymc, optionally with --cov-report term-missing to get a printout of the line numbers that were visited by the invoked tests.
Note that because you are not running the entire test suite, the coverage will be terrible.
But you can still watch for specific line numbers of the code that you're working on.
pytest -v --cov=pymc --cov-report term-missing tests/<name of test>.pyWhen you are reasonably confident about the changes you made, you can push the changes and open a pull request.
Our GitHub Actions pipeline will run the entire test suite and if there are failures you can go back and run these tests on your local machine.
Source Contributing Using Gitpod (`docs/source/contributing/using_gitpod.md`)
(using_gitpod)=
Using Gitpod
About Gitpod
Gitpod is a browser-based development environment.
These are some benefits to using Gitpod:
- Bypass local computer configuration and technical issues
- Save time by using a pre-configured virtual environment for contributing to open source
- Save space on your local computer
Using Gitpod to Contribute to PyMC
These instructions are for contributing specifically to the pymc-devs/pymc repo.
Gitpod Workflow
Fork the pymc repo: https://github.com/pymc-devs/pymc
Create a Gitpod account. You can login and authorize access via your GitHub account: https://gitpod.io/
:::{note}
Gitpod will show up as an authorized application in your GitHub account here: https://github.com/settings/applications
:::Grant GitHub / Gitpod integration permissions.
a) Go to: https://gitpod.io/user/integrations
b) Select GitHub and then "Edit Permissions"
c) Select these permission:
user:email,public_repo,repo,workflow:::{figure-md} Gitpod integration
Gitpod integration options
:::Within Gitpod, create a "New Workspace". Here you will want to select the forked pymc repo. If you do not see it, you can paste your forked repo path into the "Context URL" box. For example:
https://github.com/yourusername/pymc. Then select "New Workspace".:::{figure-md} Gitpod workspace
Gitpod workspace
::::::{note}
Gitpod will pull a container and set up the workspace. It will take a few minutes for the container to build.
:::Once Gitpod is up and running, the interface is similar to a Visual Studio Code (VSC) interface, which will appear in your browser. You will observe installation notices in the terminal window. This can take 5-10 minutes. Once that is complete, the terminal will indicate you are on the "(base)" environment on Gitpod with your forked repo.
Here is an example:
console(base) gitpod@reshamas-pymc-0ygu5rf74md:/workspace/pymc$:::{note}
This working environment has been set up with micromamba which is a small, pure-C++ executable with enough functionalities to bootstrap fully functional conda-environments.
:::Check that your git remotes are correct with
git remote -vat the terminal.Example:
console(base) gitpod@reshamas-pymc-0ygu5rf74md:/workspace/pymc$ git remote -v origin https://github.com/reshamas/pymc.git (fetch) origin https://github.com/reshamas/pymc.git (push) upstream https://github.com/pymc-devs/pymc.git (fetch) upstream https://github.com/pymc-devs/pymc.git (push) (base) gitpod@reshamas-pymc-0ygu5rf74md:/workspace/pymc$Check which version of python and pymc are being used at the terminal.
Check the version of pymc:
pip list | grep pymcExample:
console(base) gitpod@reshamas-pymc-vpfb4pvr90z:/workspace/pymc$ pip list | grep pymc pymc 5.1.0 /workspace/pymc pymc-sphinx-theme 0.1Check the version of python:
python3 --versionExample:
console(base) gitpod@reshamas-pymc-vpfb4pvr90z:/workspace/pymc$ python3 --version Python 3.11.0Syncing the repository
Ensure you are in the correct place:
consolecd /workspace/pymc git checkout mainSync the repository code and version tags:
git pull upstream main --tagsUpdate installed version number:
pip install -e .Example:
consoleObtaining file:///workspace/pymc Installing build dependencies ... done Checking if build backend supports build_editable ... done Getting requirements to build editable ... done Preparing editable metadata (pyproject.toml) ... done Requirement already satisfied: arviz>=0.13.0 in /opt/conda/lib/python3.11/site-packages (from pymc==5.1.1+303.g6f8f9eef) (0.15.1) ... Building editable for pymc (pyproject.toml) ... done Created wheel for pymc: filename=pymc-5.1.1+303.g6f8f9eef-0.editable-py3-none-any.whl size=11527 sha256=6211b7149b3ab09813b2badb3010f54d2d4ab014f75054d73f204ac5ea82ed82 Stored in directory: /tmp/pip-ephem-wheel-cache-wmkfx8pd/wheels/73/bf/14/341b7fa040e9af1991e12077c13913921be3069fe3bdf78752 Successfully built pymc Installing collected packages: pytensor, pymc Attempting uninstall: pytensor Found existing installation: pytensor 2.10.1 Uninstalling pytensor-2.10.1: Successfully uninstalled pytensor-2.10.1 Successfully installed pymc-5.1.1+303.g6f8f9eef pytensor-2.18.6Check the PyMC version being used:
python -c "import pymc; print(pymc.__version__)"Example:
console(base) gitpod@reshamas-pymc-syxfrf90fp0:/workspace/pymc$ python -c "import pymc; print(pymc.__version__)" 5.1.1+303.g6f8f9eef
Reminder: Git Workflow
:::{attention}
At the terminal, before beginning work, remember to create a feature branch:
git checkout -b feature-branchAfter working on a file, follow the Git workflow:
git add file_namegit commit -m 'message'git push origin feature-branch
:::
Resources
- Video: Using Gitpod to Contribute to PyMC (15 minute video)
Gitpod Notes
Billing
The Gitpod free plan currently allows 500 free credits per month, which is 50 hours of standard workspace usage. Usage information can be found in the Gitpod billing section.
:::{caution}
Be sure to check out the Gitpod policies on Workspace Deletion and learn more about:
- "Starting" & "Stopping" workspaces
- "Workplace Inactivity": By default, workspaces stop following 30 minutes without user input (e.g. keystrokes or terminal input commands). You can increase the workspace timeout up to a maximum of 24 hours.
- Workspaces are deleted after 14 days. Pinned workspaces are never deleted automatically.
- You can pin a workspace from your workspace list in the Gitpod dashboard.
:::
Source Contributing Versioning Schemes Explanation (`docs/source/contributing/versioning_schemes_explanation.md`)
PyMC websites versioning
The PyMC project has 3 main websites related directly to the
PyMC library. These exist in addition to more specific websites like PyMCon, sprints or the docs of pymc-experimental.
This guide explains their relation and what type of content should go on each of the websites.
:::{attention}
All 3 websites share the same nabvar to give the appearance of
a single website to users, but their generation process is completely independent from one another.
:::
The content that appears under the Home and Community sections is generated from the source at pymc.io;
the content that appears under Learn, API and Contributing
is generated from the source at pymc and the content under Examples is generated from pymc-examples.
The unversioned website is the main PyMC website, it contains the landing page and it is the parent project on ReadTheDocs.
The other two are configured as subprojects of the unversioned
website so that when we use the search bar, the keyword is searched
across all 3 websites.
Unversioned website: `www.pymc.io`
We publish the unversioned website at www.pymc.io.
It has no language or version indicator.
The unversioned website is the main landing page and hosts content
that is relevant to the PyMC library or project but not
tied to a specific version. For example the PyMC ecosystem,
community resources like the calendar or the code of conduct and
the PyMC blog.
Versioned docs: `www.pymc.io/projects/docs`
We publish the versioned docs at www.pymc.io/projects/docs
plus the language and version indicators. By default /en/stable/.
The versioned docs are synced with PyMC releases and contain a handful of
guides about core functionality, the API documentation and the
contributing guides.
Being synced with the releases means that the same exact code
we tag on GitHub and that goes to PyPI is used to generate the docs.
Therefore, even if the latest version is updated with every commit,
the default website stable is only updated when a new release is published.
Example gallery: `www.pymc.io/projects/examples`
We publish the example gallery at: www.docs.pymc.io/projects/examples
plus the language and snapshot indicator, by default /en/latest/.
We will update the notebooks in the example gallery regularly
and publish the updates to the example gallery website with each commit.
We recommend using the example gallery as an unversioned living
resource, but we will also provide snapshots every few months for cases such as books
that need links to a stable resource.
You can access the snapshots from the menu at the bottom right of the page.
A version number in the YYYY.0M.MICRO format identifies the time the snapshot was published.
Notebooks are treated as blog posts. The metadata of each notebook
describes its topics and type of content via tags and categories
and the last update date. We believe that tags and categories
ease and improve navigation (as opposed to a fixed topic division/hierarchy).
In addition, we also provide a list of recent updates and a search bar in the
navigation bar at the top of the page.
:::{caution}
The website is still under construction. Thus, not all notebooks have been updated
to include all the relevant metadata. Those notebooks can only be reached
from the search bar.
:::
Categories
Notebooks have at most two categories, one indicating the level of the
notebook and another indicating the type of content according to the
diataxis framework. The left sidebar
shows all 7 categories (3 levels + 4 types) at all times. You can click
there to reach the page listing all the notebooks in that category.
If a page has some categories in its metadata they are highlighted in green
in the category list.
Tags
Notebooks can have any number of tags. Each tag represents a specific topic
of potential interest to readers or a pymc object used within that notebook.
The left sidebar shows all tags at all times. Like categories, they can be clicked
on to reach the page listing all notebooks that contain the tag. If a notebook
has tags in its metadata they are listed on the right sidebar after the {fas}tags icon.
Source Guides Gaussian Processes (`docs/source/guides/Gaussian_Processes.rst`)
:orphan:
..
_href from docs/source/index.rst
Gaussian Processes
GP Basics
Sometimes an unknown parameter or variable in a model is not a scalar value or
a fixed-length vector, but a function. A Gaussian process (GP) can be used
as a prior probability distribution whose support is over the space of
continuous functions. A GP prior on the function :math:f(x) is usually written,
.. math::
f(x) \sim \mathcal{GP}(m(x), , k(x, x')) ,.
The function values are modeled as a draw from a multivariate normal
distribution that is parameterized by the mean function, :math:m(x), and the
covariance function, :math:k(x, x'). Gaussian processes are a convenient
choice as priors over functions due to the marginalization and conditioning
properties of the multivariate normal distribution. Usually, the marginal
distribution over :math:f(x) is evaluated during the inference step. The
conditional distribution is then used for predicting the function values
:math:f(x_*) at new points, :math:x_*.
The joint distribution of :math:f(x) and :math:f(x_*) is multivariate
normal,
.. math::
\begin{bmatrix} f(x) \ f(x_*) \ \end{bmatrix} \sim
\text{N}\left(
\begin{bmatrix} m(x) \ m(x_*) \ \end{bmatrix} ,,
\begin{bmatrix} k(x,x') & k(x_*, x) \
k(x_*, x) & k(x_*, x_*') \ \end{bmatrix}
\right) ,.
Starting from the joint distribution, one obtains the marginal distribution
of :math:f(x), as :math:\text{N}(m(x),\, k(x, x')). The conditional
distribution is
.. math::
f(x_*) \mid f(x) \sim \text{N}\left( k(x_*, x) k(x, x)^{-1} [f(x) - m(x)] + m(x_*) ,,
k(x_*, x_*) - k(x, x_*) k(x, x)^{-1} k(x, x_*) \right) ,.
.. note::
For more information on GPs, check out the book Gaussian Processes for Machine Learning <http://www.gaussianprocess.org/gpml/>_ by Rasmussen &
Williams, or this introduction <https://www.ics.uci.edu/~welling/teaching/KernelsICS273B/gpB.pdf>_
by D. Mackay.
PyMC is a great environment for working with fully Bayesian Gaussian Process
models. GPs in PyMC have a clear syntax and are highly composable, and many
predefined covariance functions (or kernels), mean functions, and several GP
implementations are included. GPs are treated as distributions that can be
used within larger or hierarchical models, not just as standalone regression
models.
Mean and covariance functions
Those who have used the GPy or GPflow Python packages will find the syntax for
construction mean and covariance functions somewhat familiar. When first
instantiated, the mean and covariance functions are parameterized, but not
given their inputs yet. The covariance functions must additionally be provided
with the number of dimensions of the input matrix, and a list that indexes
which of those dimensions they are to operate on. The reason for this design
is so that covariance functions can be constructed that are combinations of
other covariance functions.
For example, to construct an exponentiated quadratic covariance function that
operates on the second and third column of a three column matrix representing
three predictor variables::
ls = [2, 5] # the lengthscales
cov_func = pm.gp.cov.ExpQuad(input_dim=3, ls=ls, active_dims=[1, 2])
Here the :code:ls, or lengthscale, parameter is two dimensional, allowing the second
and third dimension to have a different lengthscale. The reason we have to
specify :code:input_dim, the total number of columns of :code:X, and
:code:active_dims, which of those columns or dimensions the covariance
function will act on, is because :code:cov_func hasn't actually seen the
input data yet. The :code:active_dims argument is optional, and defaults to
all columns of the matrix of inputs.
Covariance functions in PyMC closely follow the algebraic rules for kernels,
which allows users to combine covariance functions into new ones, for example:
The sum of two covariance functions is also a covariance function::
cov_func = pm.gp.cov.ExpQuad(...) + pm.gp.cov.ExpQuad(...)
The product of two covariance functions is also a covariance function::
cov_func = pm.gp.cov.ExpQuad(...) * pm.gp.cov.Periodic(...)
The product (or sum) of a covariance function with a scalar is a
covariance function::cov_func = eta**2 * pm.gp.cov.Matern32(...)
After the covariance function is defined, it is now a function that is
evaluated by calling :code:cov_func(x, x) (or :code:mean_func(x)). Since
PyMC is built on top of PyTensor, it is relatively easy to define and experiment
with non-standard covariance and mean functions. For more information check out
the tutorial on covariance functions.
GP Implementations
PyMC includes several GP implementations, including marginal and latent
variable models and also some fast approximations. Their usage all follows a
similar pattern: First, a GP is instantiated with a mean function and a
covariance function. Then, GP objects can be added together, allowing for
function characteristics to be carefully modeled and separated. Finally, one
of prior, marginal_likelihood or conditional methods is called on the GP
object to actually construct the PyMC random variable that represents the
function prior.
Using :code:gp.Latent for the example, the syntax to first specify the GP
is::
gp = pm.gp.Latent(mean_func, cov_func)The first argument is the mean function and the second is the covariance
function. We've made the GP object, but we haven't made clear which function
it is to be a prior for, what the inputs are, or what parameters it will be
conditioned on.
.. note::
The :code:gp.Marginal class and similar don't have a :code:prior method.
Instead they have a :code:marginal_likelihood method that is used similarly,
but has additional required arguments, such as the observed data, noise,
or other, depending on the implementation. See the notebooks for examples.
The :code:conditional method works similarly.
Calling the prior method will create a PyMC random variable that represents
the latent function :math:f(x) = \mathbf{f}::
f = gp.prior("f", X):code:f is a random variable that can be used within a PyMC model like any
other type of random variable. The first argument is the name of the random
variable representing the function we are placing the prior over.
The second argument is the inputs to the function that the prior is over,
:code:X. The inputs are usually known and present in the data, but they can
also be PyMC random variables. If the inputs are a PyTensor tensor or a
PyMC random variable, the :code:shape needs to be given.
Usually at this point, inference is performed on the model. The
:code:conditional method creates the conditional, or predictive,
distribution over the latent function at arbitrary :math:x_* input points,
:math:f(x_*). To construct the conditional distribution we write::
f_star = gp.conditional("f_star", X_star)Additive GPs
The GP implementation in PyMC is constructed so that it is easy to define
additive GPs and sample from individual GP components. We can write::
gp1 = pm.gp.Marginal(mean_func1, cov_func1)
gp2 = pm.gp.Marginal(mean_func2, cov_func2)
gp3 = gp1 + gp2
The GP objects have to have the same type, :code:gp.Marginal cannot
be added to :code:gp.Latent.
Consider two independent GP distributed functions, :math:f_1(x) \sim \mathcal{GP}\left(m_1(x),\, k_1(x, x')\right) and :math:f_2(x) \sim \mathcal{GP}\left( m_2(x),\, k_2(x, x')\right). The joint distribution of
:math:f_1,\, f_1^*,\, f_2,\, f_2^*,\, f_1 + f_2 and f_1^* + f_2^* is
.. math::
\begin{bmatrix} f_1 \ f_1^* \ f_2 \ f_2^*
\ f_1 + f_2 \ f_1^* + f_2^* \end{bmatrix} \sim
\text{N}\left(
\begin{bmatrix} m_1 \ m_1^* \ m_2 \ m_2^* \
m_1 + m_2 \ m_1^* + m_2^* \ \end{bmatrix} ,,,
\begin{bmatrix}
K_1 & K_1^* & 0 & 0 & K_1 & K_1^* \
K_1^{^T} & K_1^{**} & 0 & 0 & K_1^ & K_1^{} \
0 & 0 & K_2 & K_2^* & K_2 & K_2^{} \
0 & 0 & K_2^{^T} & K_2^{} & K_2^{} & K_2^{**} \
K_1 & K_1^{} & K_2 & K_2^{} & K_1 + K_2 & K_1^{} + K_2^{} \
K_1^{^T} & K_1^{} & K_2^{*^T} & K_2^{} & K_1^{^T}+K_2^{^T} & K_1^{}+K_2^{}
\end{bmatrix}
\right) ,.
Using the joint distribution to obtain the conditional distribution of :math:f_1^*
with the contribution due to :math:f_1 + f_2 factored out, we get
.. math::
f_1^* \mid f_1 + f_2 \sim \text{N}\left(
m_1^* + K_1^{^T}(K_1 + K_2)^{-1}\left[f_1 + f_2 - m_1 - m_2\right] ,,,
K_1^{**} - K_1^{^T}(K_1 + K_2)^{-1}K_1^* \right) ,.
These equations show how to break down GP models into individual components to see how each
contributes to the data. For more information, check out David Duvenaud's PhD thesis <https://www.cs.toronto.edu/~duvenaud/thesis.pdf>_.
The GP objects in PyMC keeps track of these marginals automatically. The
following code sketch shows how to define the conditional distribution of
:math:f_2^*. We use gp.Marginal in the example, but the same works for
other implementations. The first block fits the GP prior. We denote
:math:f_1 + f_2 as just :math:f for brevity::
with pm.Model() as model:
    gp1 = pm.gp.Marginal(mean_func1, cov_func1)
    gp2 = pm.gp.Marginal(mean_func2, cov_func2)

    # gp represents f1 + f2.
    gp = gp1 + gp2

    f = gp.marginal_likelihood("f", X, y, noise)

    idata = pm.sample(1000)
To construct the conditional distribution of :code:gp1 or :code:gp2, we
also need to include the additional arguments, :code:X, :code:y, and
:code:noise::
with model:
    # conditional distributions of f1 and f2
    f1_star = gp1.conditional("f1_star", X_star,
                              given={"X": X, "y": y, "noise": noise, "gp": gp})
    f2_star = gp2.conditional("f2_star", X_star,
                              given={"X": X, "y": y, "noise": noise, "gp": gp})

    # conditional of f1 + f2, `given` not required
    f_star = gp.conditional("f_star", X_star)
This second block produces the conditional distributions. Notice that extra
arguments are required for conditionals of :math:f1 and :math:f2, but not
:math:f. This is because those arguments are cached when
:code:.marginal_likelihood is called on :code:gp.
.. note::
When constructing conditionals, the additional arguments :code:X, :code:y,
:code:noise and :code:gp must be provided as a dict called given!
Since the marginal likelihoood method of :code:gp1 or :code:gp2 weren't called,
their conditionals need to be provided with the required inputs. In the same
fashion as the prior, :code:f_star, :code:f1_star and :code:f2_star are random
variables that can now be used like any other random variable in PyMC.
Check the notebooks for detailed demonstrations of the usage of GP functionality
in PyMC.
Source Guides Probability Distributions (`docs/source/guides/Probability_Distributions.rst`)
:orphan:
..
_href from docs/source/index.rst
.. _prob_dists:
Probability Distributions in PyMC
The most fundamental step in building Bayesian models is the specification of a full probability model for the problem at hand. This primarily involves assigning parametric statistical distributions to unknown quantities in the model, in addition to appropriate functional forms for likelihoods to represent the information from the data. To this end, PyMC includes a comprehensive set of pre-defined statistical distributions that can be used as model building blocks.
For example, if we wish to define a particular variable as having a normal prior, we can specify that using an instance of the Normal class.
::
with pm.Model():

    x = pm.Normal('x', mu=0, sigma=1)
A variable requires at least a name argument, and zero or more model parameters, depending on the distribution. Parameter names vary by distribution, using conventional names wherever possible. The example above defines a scalar variable. To make a vector-valued variable, a shape argument should be provided; for example, a 3x3 matrix of beta random variables could be defined with:
::
with pm.Model():

    p = pm.Beta('p', 1, 1, shape=(3, 3))
Probability distributions are all subclasses of Distribution, which in turn has two major subclasses: Discrete and Continuous. In terms of data types, a Continuous random variable is given whichever floating point type is defined by pytensor.config.floatX, while Discrete variables are given int16 types when pytensor.config.floatX is float32, and int64 otherwise.
All distributions in pm.distributions are associated with two key functions:
logp(dist, value)- Calculates log-probability at given valuedraw(dist, size=...)- Generates random samples
For example, with a normal distribution:
::
with pm.Model():
    x = pm.Normal('x', mu=0, sigma=1)

# Calculate log-probability
log_prob = pm.logp(x, 0.5)

# Generate samples
samples = pm.draw(x, size=100)
Custom distributions using CustomDist should provide logp via the dist parameter:
::
def custom_logp(value, mu):
    return -0.5 * (value - mu)**2

custom_dist = pm.CustomDist('custom', dist=custom_logp, mu=0)
Custom distributions
Despite the fact that PyMC ships with a large set of the most common probability distributions, some problems may require the use of functional forms that are less common, and not available in pm.distributions. One example of this is in survival analysis, where time-to-event data is modeled using probability densities that are designed to accommodate censored data.
An exponential survival function, where :math:c=0 denotes failure (or non-survival), is defined by:
.. math::
f(c, t) = \left\{ \begin{array}{l} \exp(-\lambda t), \text{if c=1} \\
           \lambda \exp(-\lambda t), \text{if c=0}  \end{array} \right.
Such a function can be implemented as a PyMC distribution by writing a function that specifies the log-probability, then passing that function as a keyword argument to the CustomDist function, which creates an instance of a PyMC distribution with the custom function as its log-probability.
For the exponential survival function, this is:
::
def logp(value, t, lam):
    return (value * log(lam) - lam * t).sum()

exp_surv = pm.CustomDist('exp_surv', dist=logp, t=t, lam=lam, observed=failure)
Similarly, if a random number generator is required, a function returning random numbers corresponding to the probability distribution can be passed as the random argument.
Using PyMC distributions without a Model
Distribution objects, as we have defined them so far, are only usable inside of a Model context. If they are created outside of the model context manager, it raises an error.
::
y = Binomial('y', n=10, p=0.5)::
TypeError: No context on context stackThis is because the distribution classes are designed to integrate themselves automatically inside of a PyMC model. When a model cannot be found, it fails. However, each Distribution has a dist class method that returns a stripped-down distribution object that can be used outside of a PyMC model.
For example, a standalone binomial distribution can be created by:
::
y = pm.Binomial.dist(n=10, p=0.5)This allows for probabilities to be calculated and random numbers to be drawn.
::
>>> pm.logp(y, 4).eval()
array(-1.5843639373779297, dtype=float32)

>>> pm.draw(y, size=3)
array([5, 4, 3])
Auto-transformation
To aid efficient MCMC sampling, any continuous variables that are constrained to a sub-interval of the real line are automatically transformed so that their support is unconstrained. This frees sampling algorithms from having to deal with boundary constraints.
For example, the gamma distribution is positive-valued. If we define one for a model:
::
with pm.Model() as model:
    g = pm.Gamma('g', 1, 1)
We notice a modified variable inside the model value_vars attribute. These variables represent the values of each random variable in the model's log-likelihood.
::
>>> model.value_vars
[g_log__]
As the name suggests, the variable g has been log-transformed, and this is the space over which posterior sampling takes place.
The value of the transformed variable is simply back-transformed when a sample is drawn in order to recover the original variable.
By default, auto-transformed variables are ignored when summarizing and plotting model output.
Source Learn Books (`docs/source/learn/books.md`)
(books)=
Books
:::::{container} full-width
::::{grid} 1 2 2 3
:gutter: 3
:::{grid-item-card} Bayesian Modeling and Computation in Python
:img-top: https://bayesiancomputationbook.com/_images/Cover.jpg
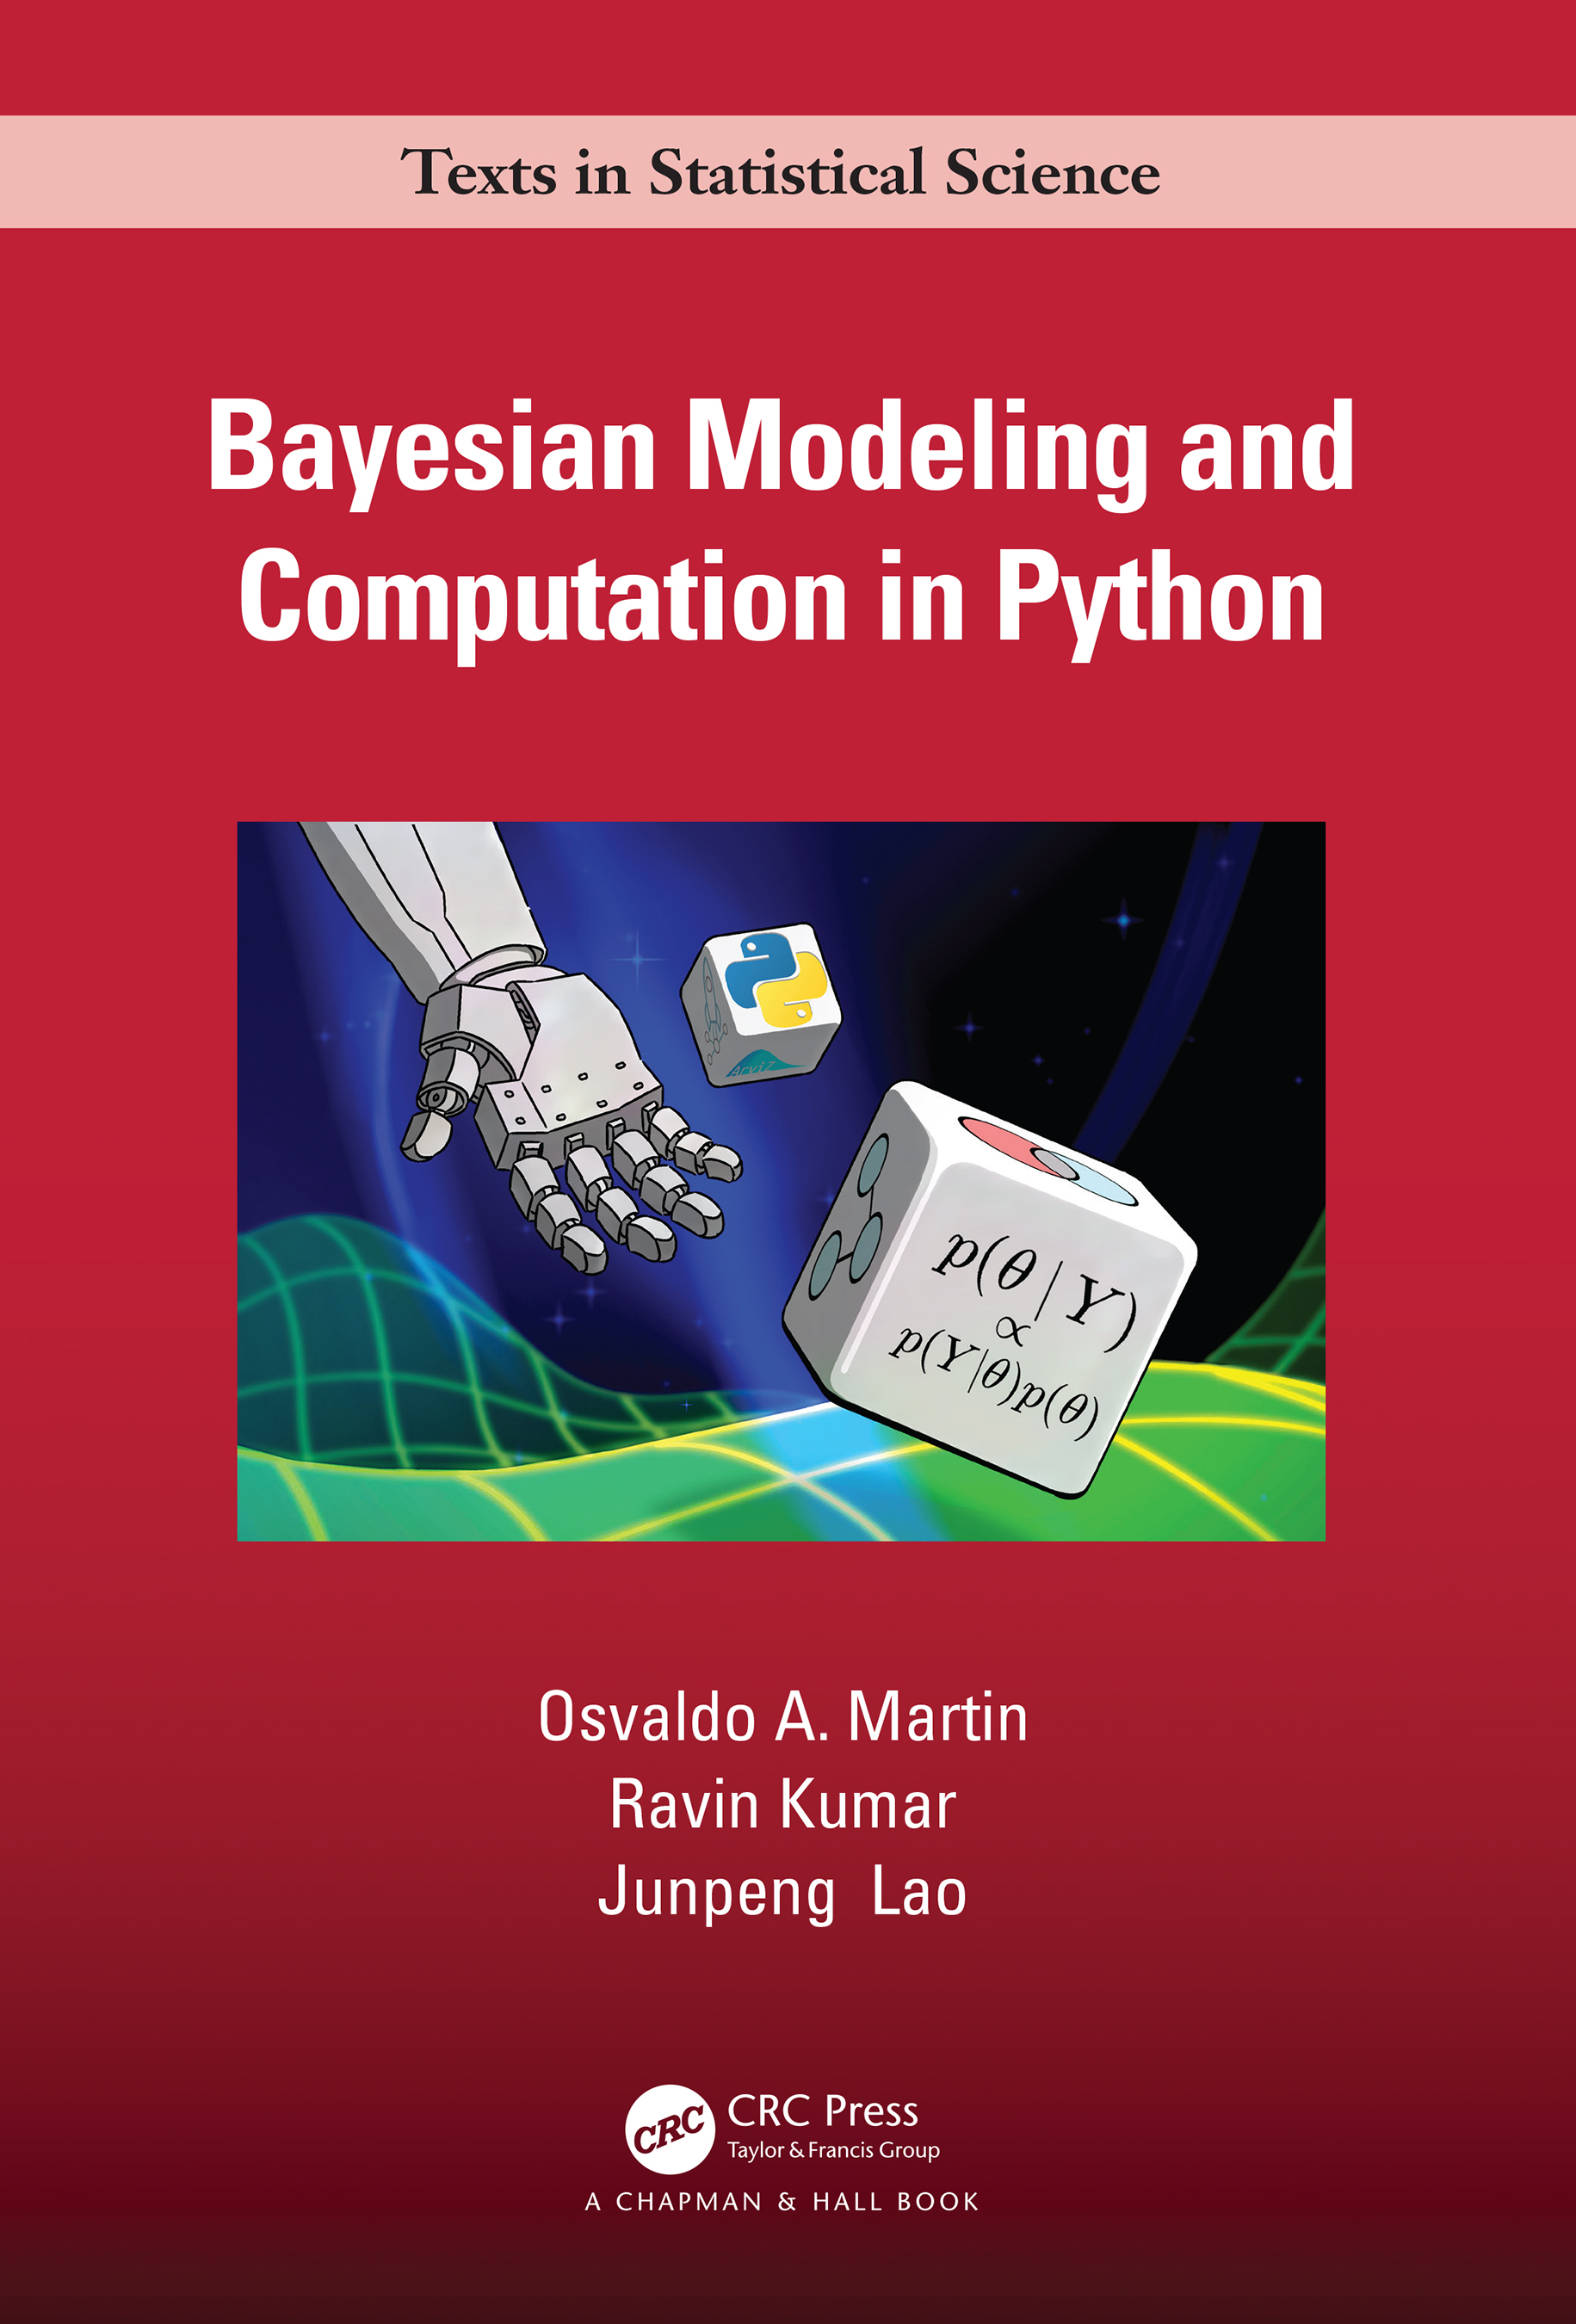
By Osvaldo Martin, Ravin Kumar and Junpeng Lao
Hands on approach with PyMC and ArviZ focusing on the practice of applied statistics.
:::
:::{grid-item-card} Bayesian Methods for Hackers
:img-top: https://www.pearson.com/hipassets/assets/hip/images/bigcovers/0133902838.jpg
By Cameron Davidson-Pilon
The "hacker" in the title means learn-as-you-code. This hands-on introduction teaches intuitive definitions of the Bayesian approach to statistics, worklflow and decision-making by applying them using PyMC.
:::
:::{grid-item-card} Bayesian Analysis with Python
:img-top: https://aloctavodia.github.io/img/BAP.png
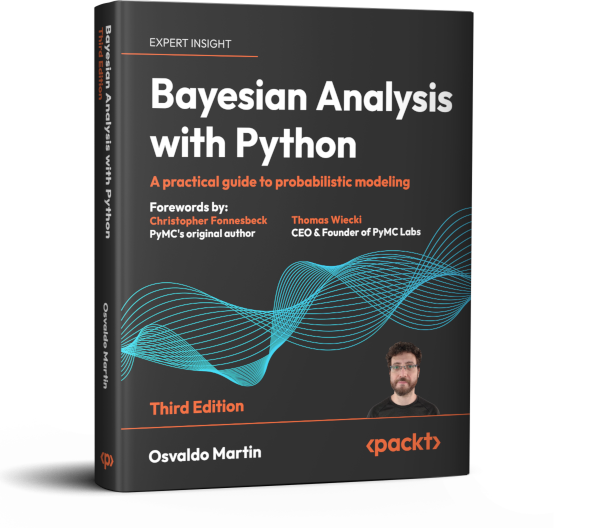
By Osvaldo Martin
A great introductory book written by a maintainer of PyMC. It provides a hands-on introduction to the main concepts of Bayesian statistics using synthetic and real data sets. Mastering the concepts in this book is a great foundation to pursue more advanced knowledge.
Code and errata in PyMC 3.x
:::
:::{grid-item-card} Doing Bayesian Data Analysis
:img-top: https://jkkweb.sitehost.iu.edu/DoingBayesianDataAnalysis/DBDA2Ecover.png
By John K. Kruschke
Principled introduction to Bayesian data analysis, with practical exercises. The book's original examples are coded in R, but notebooks with a PyMC port of the code are available through the links below.
PyMC port of the second edition's code
:::
:::{grid-item-card} Statistical Rethinking
:img-top: https://xcelab.net/rm/sr2edcover-1-187x300.png

By Richard McElreath
A Bayesian Course with Examples in R and Stan.
:::
:::{grid-item-card} Bayesian Cognitive Modeling: A Practical Course
:img-top: https://images-na.ssl-images-amazon.com/images/I/51K33XI2I8L._SX330_BO1,204,203,200_.jpg

By Michael Lee and Eric-Jan Wagenmakers
Focused on using Bayesian statistics in cognitive modeling.
:::{grid-item-card} Bayesian Data Analysis
:img-top: https://www.stat.columbia.edu/~gelman/book/bda_cover.png
By Andrew Gelman, John Carlin, Hal Stern, David Dunson, Aki Vehtari, and Donald Rubin
A comprehensive, standard, and wonderful textbook on Bayesian methods.
Examples and exercises implemented in PyMC 3.x
::::
:::::
Source Learn Consulting (`docs/source/learn/consulting.md`)
(consulting)=
Consulting
If you need professional help with your PyMC model, PyMC Labs is a Bayesian consultancy consisting of members of the PyMC core development team. Typically PyMC Labs work includes:
- Model speed-ups (reparameterizations, JAX, GPU sampling)
- Improving models (adding hierarchy, time-series structure, etc.)
- Building new models to solve applied business problems
- Bayesian Media Mix Models for marketing attribution
Interested? Send an email to [email protected].
Source Learn Usage Overview (`docs/source/learn/usage_overview.rst`)
TODO: incorporate the useful bits of this page into the learning section
Usage Overview
For a detailed overview of building models in PyMC, please read the appropriate sections in the rest of the documentation. For a flavor of what PyMC models look like, here is a quick example.
First, let's import PyMC and :doc:ArviZ <arviz:index> (which handles plotting and diagnostics):
::
import arviz as az
import numpy as np
import pymc as pm
Models are defined using a context manager (with statement). The model is specified declaratively inside the context manager, instantiating model variables and transforming them as necessary. Here is an example of a model for a bioassay experiment:
::
# Set style
az.style.use("arviz-darkgrid")

# Data
n = np.ones(4)*5
y = np.array([0, 1, 3, 5])
dose = np.array([-.86,-.3,-.05,.73])

with pm.Model() as bioassay_model:

    # Prior distributions for latent variables
    alpha = pm.Normal('alpha', 0, sigma=10)
    beta = pm.Normal('beta', 0, sigma=1)

    # Linear combination of parameters
    theta = pm.math.invlogit(alpha + beta * dose)

    # Model likelihood
    deaths = pm.Binomial('deaths', n=n, p=theta, observed=y)
Save this file, then from a python shell (or another file in the same directory), call:
::
with bioassay_model:

    # Draw samples
    idata = pm.sample(1000, tune=2000, cores=2)
    # Plot two parameters
    az.plot_forest(idata, var_names=['alpha', 'beta'], r_hat=True)
This example will generate 1000 posterior samples on each of two cores using the NUTS algorithm, preceded by 2000 tuning samples (these are good default numbers for most models).
::
Auto-assigning NUTS sampler...
Initializing NUTS using jitter+adapt_diag...
Multiprocess sampling (2 chains in 2 jobs)
NUTS: [beta, alpha]
|██████████████████████████████████████| 100.00% [6000/6000 00:04<00:00 Sampling 2 chains, 0 divergences]
The sample is returned as arrays inside a MultiTrace object, which is then passed to the plotting function. The resulting graph shows a forest plot of the random variables in the model, along with a convergence diagnostic (R-hat) that indicates our model has converged.
.. image:: ./images/forestplot.png
:width: 1000px
See also
Tutorials <nb_tutorials/index.html>__Examples <nb_examples/index.html>__
.. |NumFOCUS| image:: https://numfocus.org/wp-content/uploads/2017/07/NumFocus_LRG.png
:target: http://www.numfocus.org/
:height: 120px
.. |PyMCLabs| image:: https://raw.githubusercontent.com/pymc-devs/pymc/main/docs/pymc-labs-logo.png
:target: https://pymc-labs.io
:height: 120px

Source Learn Videos And Podcasts (`docs/source/learn/videos_and_podcasts.md`)
(videos_and_podcasts)=
Videos and Podcasts
:::{card} PyMC Developers Youtube channel
:::{card} PyMC talks
Actively curated YouTube playlist of PyMC talks
:::
:::{card} PyMC Labs Youtube channel
:::{card} PyMCon 2020 talks
:::{card} Learning Bayesian Statistics podcast
Source Templates Autosummary Class (`docs/source/_templates/autosummary/class.rst`)
{{ fullname | escape | underline}}
.. currentmodule:: {{ module }}
.. autoclass:: {{ objname }}
{% block methods %}
{% if methods %}
.. rubric:: Methods
.. autosummary::
:toctree: classmethods
{% for item in methods %}
{{ objname }}.{{ item }}
{%- endfor %}
{% endif %}
{% endblock %}
{% block attributes %}
{% if attributes %}
.. rubric:: Attributes
.. autosummary::
{% for item in attributes %}
~{{ name }}.{{ item }}
{%- endfor %}
{% endif %}
{% endblock %}
Source Api Dims Distributions (`docs/source/api/dims/distributions.rst`)
Distributions
Scalar distributions
.. currentmodule:: pymc.dims
.. autosummary::
:toctree: generated/
:template: distribution.rst
Flat
HalfFlat
Uniform,
Normal
HalfNormal
TruncatedNormal
LogNormal
StudentT
HalfStudentT
Cauchy
HalfCauchy
Beta
Laplace
Gamma
InverseGamma
Weibull
Poisson
NegativeBinomial
DiracDelta
Vector distributions
.. currentmodule:: pymc.dims
.. autosummary::
:toctree: generated/
:template: distribution.rst
Categorical
MvNormal
ZeroSumNormal
Higher-Order distributions
.. currentmodule:: pymc.dims
.. autosummary::
:toctree: generated/
:template: distribution.rst
Censored
Source Api Dims Math (`docs/source/api/dims/math.rst`)
Mathematical operations with dimensions
This module wraps all the mathematical operations defined in :ref:pytensor.xtensor.math .
It includes a linalg submodule that wraps all the operations defined in :ref:pytensor.xtensor.linalg .
Operations defined at the module level in :ref:pytensor.xtensor are available at the pymc.dims module level.
Source Api Dims Model (`docs/source/api/dims/model.rst`)
Model constructors
.. currentmodule:: pymc.dims
.. autosummary::
:toctree: generated/
Data
Deterministic
Potential
Source Api Dims Transforms (`docs/source/api/dims/transforms.rst`)
Distribution Transforms
.. currentmodule:: pymc.dims.transforms
.. autosummary::
:toctree: generated/
LogTransform
LogOddsTransform
ZeroSumTransform
Source Api Distributions Censored (`docs/source/api/distributions/censored.rst`)
Censored
..
Manually follow the template in _templates/distribution.rst.
If at any point, multiple objects are listed here,
the pattern should instead be modified to that of the
other API files such as api/distributions/continuous.rst
.. currentmodule:: pymc
.. autoclass:: Censored
.. rubric:: Methods
.. autosummary::
:toctree: classmethods
Censored.distSource Api Distributions Continuous (`docs/source/api/distributions/continuous.rst`)
Continuous
.. currentmodule:: pymc
.. autosummary::
:toctree: generated/
:template: distribution.rst
AsymmetricLaplace
Beta
Cauchy
ChiSquared
ExGaussian
Exponential
Flat
Gamma
Gumbel
HalfCauchy
HalfFlat
HalfNormal
HalfStudentT
Interpolated
InverseGamma
Kumaraswamy
Laplace
Logistic
LogitNormal
LogNormal
Moyal
Normal
Pareto
PolyaGamma
Rice
SkewNormal
SkewStudentT
StudentT
Triangular
TruncatedNormal
Uniform
VonMises
Wald
Weibull
Source Api Distributions Custom (`docs/source/api/distributions/custom.rst`)
CustomDist
..
Manually follow the template in _templates/distribution.rst.
If at any point, multiple objects are listed here,
the pattern should instead be modified to that of the
other API files such as api/distributions/continuous.rst
.. currentmodule:: pymc
.. autoclass:: CustomDist
.. rubric:: Methods
.. autosummary::
:toctree: classmethods
CustomDist.distSource Api Distributions Discrete (`docs/source/api/distributions/discrete.rst`)
Discrete
.. currentmodule:: pymc
.. autosummary::
:toctree: generated
:template: distribution.rst
Bernoulli
BetaBinomial
Binomial
Categorical
DiscreteUniform
DiscreteWeibull
Geometric
HyperGeometric
NegativeBinomial
OrderedLogistic
OrderedProbit
Poisson
.. note::
OrderedLogistic and OrderedProbit:
The OrderedLogistic and OrderedProbit distributions expect the observed values to be 0-based, i.e., they should range from 0 to K-1. Using 1-based indexing (like 1, 2, 3,...K) can result in errors.
Source Api Distributions Mixture (`docs/source/api/distributions/mixture.rst`)
Mixture
.. currentmodule:: pymc
.. autosummary::
:toctree: generated
:template: distribution.rst
Mixture
NormalMixture
ZeroInflatedBinomial
ZeroInflatedNegativeBinomial
ZeroInflatedPoisson
HurdlePoisson
HurdleNegativeBinomial
HurdleGamma
HurdleLogNormal
Source Api Distributions Multivariate (`docs/source/api/distributions/multivariate.rst`)
Multivariate
.. currentmodule:: pymc
.. autosummary::
:toctree: generated
:template: distribution.rst
CAR
Dirichlet
DirichletMultinomial
ICAR
KroneckerNormal
LKJCholeskyCov
LKJCorr
MatrixNormal
Multinomial
MvNormal
MvStudentT
OrderedMultinomial
StickBreakingWeights
Wishart
WishartBartlett
ZeroSumNormal
Source Api Distributions Simulator (`docs/source/api/distributions/simulator.rst`)
Simulator
..
Manually follow the template in _templates/distribution.rst.
If at any point, multiple objects are listed here,
the pattern should instead be modified to that of the
other API files such as api/distributions/continuous.rst
.. currentmodule:: pymc
.. autoclass:: Simulator
.. rubric:: Methods
.. autosummary::
:toctree: classmethods
Simulator.distSource Api Distributions Timeseries (`docs/source/api/distributions/timeseries.rst`)
Timeseries
.. currentmodule:: pymc
.. autosummary::
:toctree: generated
:template: distribution.rst
AR
EulerMaruyama
GARCH11
GaussianRandomWalk
MvGaussianRandomWalk
MvStudentTRandomWalk
Source Api Distributions Transforms (`docs/source/api/distributions/transforms.rst`)
Transformations
.. currentmodule:: pymc.distributions.transforms
While many distributions are defined on constrained spaces (e.g. intervals), MCMC samplers typically perform best when sampling on the unconstrained real line; this is especially true of HMC samplers. PyMC balances this through the use of transforms. A transform instance can be passed to the constructor of a random variable to tell the sampler how to move between the underlying unconstrained space where the samples are actually drawn and the transformed space constituting the support of the random variable. Transforms are not currently implemented for discrete random variables.
All transforms have three core methods:
forward: The map from a constrained space to the unconstrained space.backward: The inverse map from the unconstrained space to a constrained space.log_jac_det: The log of the determinant of the Jacobian of thebackwardmap. This is used to account for the transformed random variable correctly in the posterior log-probability.
.. note::
Transforms are principally intended for internal use and in most cases users do not need to change them. In particular, all continuous distributions on a constrained domain that are implemented in PyMC have a default_transform that will automatically transform the random variables as required without needing any extra work from the user.
The main use-cases for setting custom transforms include the following:
#. The default_transform may need to be replaced with an alternative transform on the same constained space. For example, the default_transform for positive-valued random variables is the :class:log transform but in some cases it may be advantageous to use the :class:log_exp_m1 transform instead.
#. The default_transform may be removed entirely in some cases when using non-HMC samplers.
#. Exceptionally, transforms can be used to add constraints to the model specification without modifying the default_transform. This can be done by specifying the additional transform via the transform parameter. However this should not be viewed as a default use-case and, in practice, this is mostly limited to using :class:ordered in mixture models.
- NB: :class:
orderedis not guaranteed to work correctly when used in combination with other transforms, such as :class:simplexand :class:ZeroSumTransform.
.. warning::
Transforms are only applied when sampling unobserved random variables with :func:pymc.sample. In particular:
- Transforms are not applied during forward sampling, i.e. :func:
pymc.draw, :func:pymc.sample_prior_predictiveand :func:pymc.sample_posterior_predictive - Transforms are not applied when sampling observed random variables with :func:
pymc.sample
Since transforms are not applied during :func:pymc.sample_prior_predictive, a workaround to carry out prior predictive checks is to remove observations from the likelihood and use :func:pymc.sample instead.
Transforms are not usually the correct tool to represent transformations that are part of the generative specification of the model. Such transformations should be included explicitly in the model, typically via :class:pymc.Deterministic. Doing so allows such transformed random variables to be sampled by forward samplers.
Transform Instances
Transform instances are the entities that should be used in the
``default_transform`` or ``transform`` parameters to a random variable
constructor.

.. autosummary::
   :toctree: generated

    circular
    log
    log_exp_m1
    logodds
    ordered
    simplex


Specific Transform Classes
An instance of these classes needs to be created before being used
in the default_transform or transform parameters to a random variable
constructor.
.. autosummary::
:toctree: generated
CholeskyCovPacked
CircularTransform
Interval
LogExpM1
LogOddsTransform
LogTransform
Ordered
SimplexTransform
ZeroSumTransform
Transform Composition Classes
An instance of this class needs to be created from a list of transforms before
being used in the ``transform`` parameter to a random variable constructor.

If a random variable has a ``default_transform`` and an additional transform
is provided through the ``transform`` parameter, PyMC will automatically
create an instance of the :class:`Chain` transform that applies the
user-provided transform on top of the default one.

.. autosummary::
   :toctree: generated

    Chain

---

### Source Api Distributions Truncated (`docs/source/api/distributions/truncated.rst`)

*********
Truncated
*********

..
   Manually follow the template in _templates/distribution.rst.
   If at any point, multiple objects are listed here,
   the pattern should instead be modified to that of the
   other API files such as api/distributions/continuous.rst

.. currentmodule:: pymc

.. autoclass:: Truncated

   .. rubric:: Methods

   .. autosummary::
      :toctree: classmethods

      Truncated.dist

---

### Source Api Distributions Utilities (`docs/source/api/distributions/utilities.rst`)

**********************
Distribution utilities
**********************

.. currentmodule:: pymc
.. autosummary::
   :toctree: generated/

    Continuous
    Discrete
    Distribution
    SymbolicRandomVariable
    DiracDelta

---

### Source Api Gp Cov (`docs/source/api/gp/cov.rst`)

********************
Covariance Functions
********************

.. automodule:: pymc.gp.cov
.. autosummary::
   :toctree: generated

    Constant
    WhiteNoise
    ExpQuad
    RatQuad
    Exponential
    Matern52
    Matern32
    Linear
    Polynomial
    Cosine
    Periodic
    WarpedInput
    Gibbs
    Coregion
    ScaledCov
    Kron

---

### Source Api Gp Implementations (`docs/source/api/gp/implementations.rst`)

***************
Implementations
***************

.. currentmodule:: pymc.gp
.. autosummary::
   :toctree: generated

   HSGP
   HSGPPeriodic
   Latent
   LatentKron
   Marginal
   MarginalKron
   MarginalApprox
   TP

---

### Source Api Gp Mean (`docs/source/api/gp/mean.rst`)

**************
Mean Functions
**************

.. automodule:: pymc.gp.mean
.. autosummary::
   :toctree: generated

   Zero
   Constant
   Linear

---

### Source Api Gp Util (`docs/source/api/gp/util.rst`)

************
GP Utilities
************

.. automodule:: pymc.gp.util
.. autosummary::
   :toctree: generated

    plot_gp_dist

---

### Source Api Model Conditioning (`docs/source/api/model/conditioning.rst`)

Model Conditioning
------------------

.. currentmodule:: pymc.model.transform
.. autosummary::
   :toctree: generated/

   do
   observe
   change_value_transforms
   remove_value_transforms

---

### Source Api Model Core (`docs/source/api/model/core.rst`)

Model creation and inspection
-----------------------------

.. currentmodule:: pymc.model.core
.. autosummary::
   :toctree: generated/

   BaseModel
   FrozenModel
   Model
   modelcontext

Others
------

.. currentmodule:: pymc.model.core
.. autosummary::
   :toctree: generated/

   Deterministic
   Potential
   set_data
   Point
   compile_fn


Graph visualization
-------------------

.. currentmodule:: pymc.model_graph
.. autosummary::
   :toctree: generated/

   model_to_graphviz
   model_to_mermaid
   model_to_networkx

---

### Source Api Model Deterministics (`docs/source/api/model/deterministics.rst`)

Deterministic Surgery
---------------------

.. currentmodule:: pymc.model.transform
.. autosummary::
   :toctree: generated/

   extract_deterministics
   insert_deterministics

---

### Source Api Model Fgraph (`docs/source/api/model/fgraph.rst`)

FunctionGraph
-------------

.. currentmodule:: pymc.model.fgraph
.. autosummary::
   :toctree: generated/

   clone_model
   fgraph_from_model
   model_from_fgraph

---

### Source Api Model Optimization (`docs/source/api/model/optimization.rst`)

Model Optimization
------------------
.. currentmodule:: pymc.model.transform
.. autosummary::
   :toctree: generated/

   freeze_dims_and_data
   freeze_model

---

### Source Api Model Transform Values (`docs/source/api/model/transform_values.rst`)

Value Transforms
----------------

.. currentmodule:: pymc.model.transform_values
.. autosummary::
   :toctree: generated/

   constrain_values
   unconstrain_values

---

### Source Learn Core Notebooks Gaussian Processes (`docs/source/learn/core_notebooks/Gaussian_Processes.rst`)

.. _gp_guide:

******************
Gaussian Processes
******************

GP Basics
=========

Sometimes an unknown parameter or variable in a model is not a scalar value or
a fixed-length vector, but a *function*.  A Gaussian process (GP) can be used
as a prior probability distribution whose support is over the space of
continuous functions.  A GP prior on the function :math:`f(x)` is usually written,

.. math::

  f(x) \sim \mathcal{GP}(m(x), \, k(x, x')) \,.

The function values are modeled as a draw from a multivariate normal
distribution that is parameterized by the mean function, :math:`m(x)`, and the
covariance function, :math:`k(x, x')`.  Gaussian processes are a convenient
choice as priors over functions due to the marginalization and conditioning
properties of the multivariate normal distribution.  Usually, the marginal
distribution over :math:`f(x)` is evaluated during the inference step.  The
conditional distribution is then used for predicting the function values
:math:`f(x_*)` at new points, :math:`x_*`.

The joint distribution of :math:`f(x)` and :math:`f(x_*)` is multivariate
normal,

.. math::

  \begin{bmatrix} f(x) \\ f(x_*) \\ \end{bmatrix} \sim
  \text{N}\left(
    \begin{bmatrix} m(x)  \\ m(x_*)    \\ \end{bmatrix} \,,
    \begin{bmatrix} k(x,x')    & k(x_*, x)    \\
                    k(x_*, x) &  k(x_*, x_*')  \\ \end{bmatrix}
          \right) \,.

Starting from the joint distribution, one obtains the marginal distribution
of :math:`f(x)`, as :math:`\text{N}(m(x),\, k(x, x'))`.  The conditional
distribution is

.. math::

  f(x_*) \mid f(x) \sim \text{N}\left( k(x_*, x) k(x, x)^{-1} [f(x) - m(x)] + m(x_*) ,\,
    k(x_*, x_*) - k(x, x_*) k(x, x)^{-1} k(x, x_*) \right) \,.

.. note::

  For more information on GPs, check out the book `Gaussian Processes for
  Machine Learning <http://www.gaussianprocess.org/gpml/>`_ by Rasmussen &
  Williams, or `this introduction <http://www.inference.org.uk/mackay/gpB.pdf>`_
  by D. Mackay.

PyMC is a great environment for working with fully Bayesian Gaussian Process
models.  GPs in PyMC have a clear syntax and are highly composable, and many
predefined covariance functions (or kernels), mean functions, and several GP
implementations are included.  GPs are treated as distributions that can be
used within larger or hierarchical models, not just as standalone regression
models.

Mean and covariance functions
=============================

Those who have used the GPy or GPflow Python packages will find the syntax for
construction mean and covariance functions somewhat familiar.  When first
instantiated, the mean and covariance functions are parameterized, but not
given their inputs yet.  The covariance functions must additionally be provided
with the number of dimensions of the input matrix, and a list that indexes
which of those dimensions they are to operate on.  The reason for this design
is so that covariance functions can be constructed that are combinations of
other covariance functions.

For example, to construct an exponentiated quadratic covariance function that
operates on the second and third column of a three column matrix representing
three predictor variables::

    ls = [2, 5] # the lengthscales
    cov_func = pm.gp.cov.ExpQuad(input_dim=3, ls=ls, active_dims=[1, 2])

Here the :code:`ls`, or lengthscale, parameter is two dimensional, allowing the second
and third dimension to have a different lengthscale.  The reason we have to
specify :code:`input_dim`, the total number of columns of :code:`X`, and
:code:`active_dims`, which of those columns or dimensions the covariance
function will act on, is because :code:`cov_func` hasn't actually seen the
input data yet.  The :code:`active_dims` argument is optional, and defaults to
all columns of the matrix of inputs.

Covariance functions in PyMC closely follow the algebraic rules for kernels,
which allows users to combine covariance functions into new ones, for example:

- The sum of two covariance functions is also a covariance function::


    cov_func = pm.gp.cov.ExpQuad(...) + pm.gp.cov.ExpQuad(...)

- The product of two covariance functions is also a covariance function::


    cov_func = pm.gp.cov.ExpQuad(...) * pm.gp.cov.Periodic(...)

- The product (or sum) of a covariance function with a scalar is a
  covariance function::


    cov_func = eta**2 * pm.gp.cov.Matern32(...)


After the covariance function is defined, it is now a function that is
evaluated by calling :code:`cov_func(x, x)` (or :code:`mean_func(x)`).  Since
PyMC is built on top of PyTensor, it is relatively easy to define and experiment
with non-standard covariance and mean functions.  For more information check out
the :ref:`tutorial <GP-MeansAndCovs>` on covariance functions.


GP Implementations
==================

PyMC includes several GP implementations, including marginal and latent
variable models and also some fast approximations.  Their usage all follows a
similar pattern:  First, a GP is instantiated with a mean function and a
covariance function.  Then, GP objects can be added together, allowing for
function characteristics to be carefully modeled and separated.  Finally, one
of ``prior``, ``marginal_likelihood`` or ``conditional`` methods is called on
the GP object to actually construct the PyMC random variable that represents the
function prior.

Using :code:`gp.Latent` for the example, the syntax to first specify the GP
is::

    gp = pm.gp.Latent(mean_func, cov_func)

The first argument is the mean function and the second is the covariance
function.  We've made the GP object, but we haven't made clear which function
it is to be a prior for, what the inputs are, or what parameters it will be
conditioned on.

.. note::

  The :code:`gp.Marginal` class and similar don't have a :code:`prior` method.
  Instead they have a :code:`marginal_likelihood` method that is used similarly,
  but has additional required arguments, such as the observed data, noise,
  or other, depending on the implementation.  See the notebooks for examples.
  The :code:`conditional` method works similarly.

Calling the ``prior`` method will create a PyMC random variable that represents
the latent function :math:`f(x) = \mathbf{f}`::

    f = gp.prior("f", X)

:code:`f` is a random variable that can be used within a PyMC model like any
other type of random variable.  The first argument is the name of the random
variable representing the function we are placing the prior over.
The second argument is the inputs to the function that the prior is over,
:code:`X`.  The inputs are usually known and present in the data, but they can
also be PyMC random variables.  If the inputs are a PyTensor tensor or a
PyMC random variable, the :code:`shape` needs to be given.

Usually at this point, inference is performed on the model.  The
:code:`conditional` method creates the conditional, or predictive,
distribution over the latent function at arbitrary :math:`x_*` input points,
:math:`f(x_*)`.  To construct the conditional distribution we write::

    f_star = gp.conditional("f_star", X_star)

.. _additive_gp:

Additive GPs
============

The GP implementation in PyMC is constructed so that it is easy to define
additive GPs and sample from individual GP components.  We can write::

    gp1 = pm.gp.Marginal(mean_func1, cov_func1)
    gp2 = pm.gp.Marginal(mean_func2, cov_func2)
    gp3 = gp1 + gp2

The GP objects have to have the same type, :code:`gp.Marginal` cannot
be added to :code:`gp.Latent`.

Consider two independent GP distributed functions, :math:`f_1(x) \sim
\mathcal{GP}\left(m_1(x),\, k_1(x, x')\right)` and :math:`f_2(x) \sim
\mathcal{GP}\left( m_2(x),\, k_2(x, x')\right)`.  The joint distribution of
:math:`f_1,\, f_1^*,\, f_2,\, f_2^*,\, f_1 + f_2` and :math:`f_1^* + f_2^*` is

.. math::

  \begin{bmatrix} f_1 \\ f_1^* \\ f_2 \\ f_2^*
               \\ f_1 + f_2    \\ f_1^* + f_2^* \end{bmatrix} \sim
  \text{N}\left(
    \begin{bmatrix} m_1 \\ m_1^* \\ m_2 \\ m_2^* \\
                    m_1 + m_2    \\ m_1^* + m_2^*   \\ \end{bmatrix} \,,\,
    \begin{bmatrix}
      K_1       &  K_1^*     &   0       &    0      & K_1        & K_1^*              \\
      K_1^{*^T} &  K_1^{**}  &   0       &    0      & K_1^*      & K_1^{**}           \\
      0         &  0         & K_2       & K_2^*     & K_2        & K_2^{*}            \\
      0         &  0         & K_2^{*^T} & K_2^{**}  & K_2^{*}    & K_2^{**}           \\
      K_1       &  K_1^{*}   & K_2       & K_2^{*}   & K_1 + K_2  & K_1^{*} + K_2^{*}  \\
      K_1^{*^T} & K_1^{**} & K_2^{*^T} & K_2^{**} & K_1^{*^T}+K_2^{*^T} & K_1^{**}+K_2^{**}
    \end{bmatrix}
  \right) \,.

Using the joint distribution to obtain the conditional distribution of :math:`f_1^*`
with the contribution due to :math:`f_1 + f_2` factored out, we get

.. math::
  f_1^* \mid f_1 + f_2 \sim \text{N}\left(
    m_1^* + K_1^{*^T}(K_1 + K_2)^{-1}\left[f_1 + f_2 - m_1 - m_2\right] \,,\,
    K_1^{**} - K_1^{*^T}(K_1 + K_2)^{-1}K_1^* \right) \,.


These equations show how to break down GP models into individual components to see how each
contributes to the data.  For more information, check out `David Duvenaud's PhD
thesis <https://www.cs.toronto.edu/~duvenaud/thesis.pdf>`_.

The GP objects in PyMC keeps track of these marginals automatically.  The
following code sketch shows how to define the conditional distribution of
:math:`f_2^*`.  We use ``gp.Marginal`` in the example, but the same works for
other implementations.  The first block fits the GP prior.  We denote
:math:`f_1 + f_2` as just :math:`f` for brevity::

    with pm.Model() as model:
        gp1 = pm.gp.Marginal(mean_func1, cov_func1)
        gp2 = pm.gp.Marginal(mean_func2, cov_func2)

        # gp represents f1 + f2.
        gp = gp1 + gp2

        f = gp.marginal_likelihood("f", X, y, sigma)

        idata = pm.sample(1000)


To construct the conditional distribution of :code:`gp1` or :code:`gp2`, we
also need to include the additional arguments, :code:`X`, :code:`y`, and
:code:`sigma`::

    with model:
        # conditional distributions of f1 and f2
        f1_star = gp1.conditional("f1_star", X_star,
                                  given={"X": X, "y": y, "sigma": sigma, "gp": gp})
        f2_star = gp2.conditional("f2_star", X_star,
                                  given={"X": X, "y": y, "sigma": sigma, "gp": gp})

        # conditional of f1 + f2, `given` not required
        f_star = gp.conditional("f_star", X_star)

This second block produces the conditional distributions.  Notice that extra
arguments are required for conditionals of :math:`f1` and :math:`f2`, but not
:math:`f`.  This is because those arguments are cached when
:code:`.marginal_likelihood` is called on :code:`gp`.

.. note::
  When constructing conditionals, the additional arguments :code:`X`, :code:`y`,
  :code:`sigma` and :code:`gp` must be provided as a dict called ``given``!

Since the marginal likelihoood method of :code:`gp1` or :code:`gp2` weren't called,
their conditionals need to be provided with the required inputs.  In the same
fashion as the prior, :code:`f_star`, :code:`f1_star` and :code:`f2_star` are random
variables that can now be used like any other random variable in PyMC.

Check the :ref:`notebooks <gaussian_processes>`
for detailed demonstrations of the usage of GP functionality in PyMC.

---

--- METRICS ---
- Files Extracted: 73
- Estimated Token Budget: ~48081 tokens
- Canonical Reference: https://codewiki.google/github.com/pymc-devs/pymc