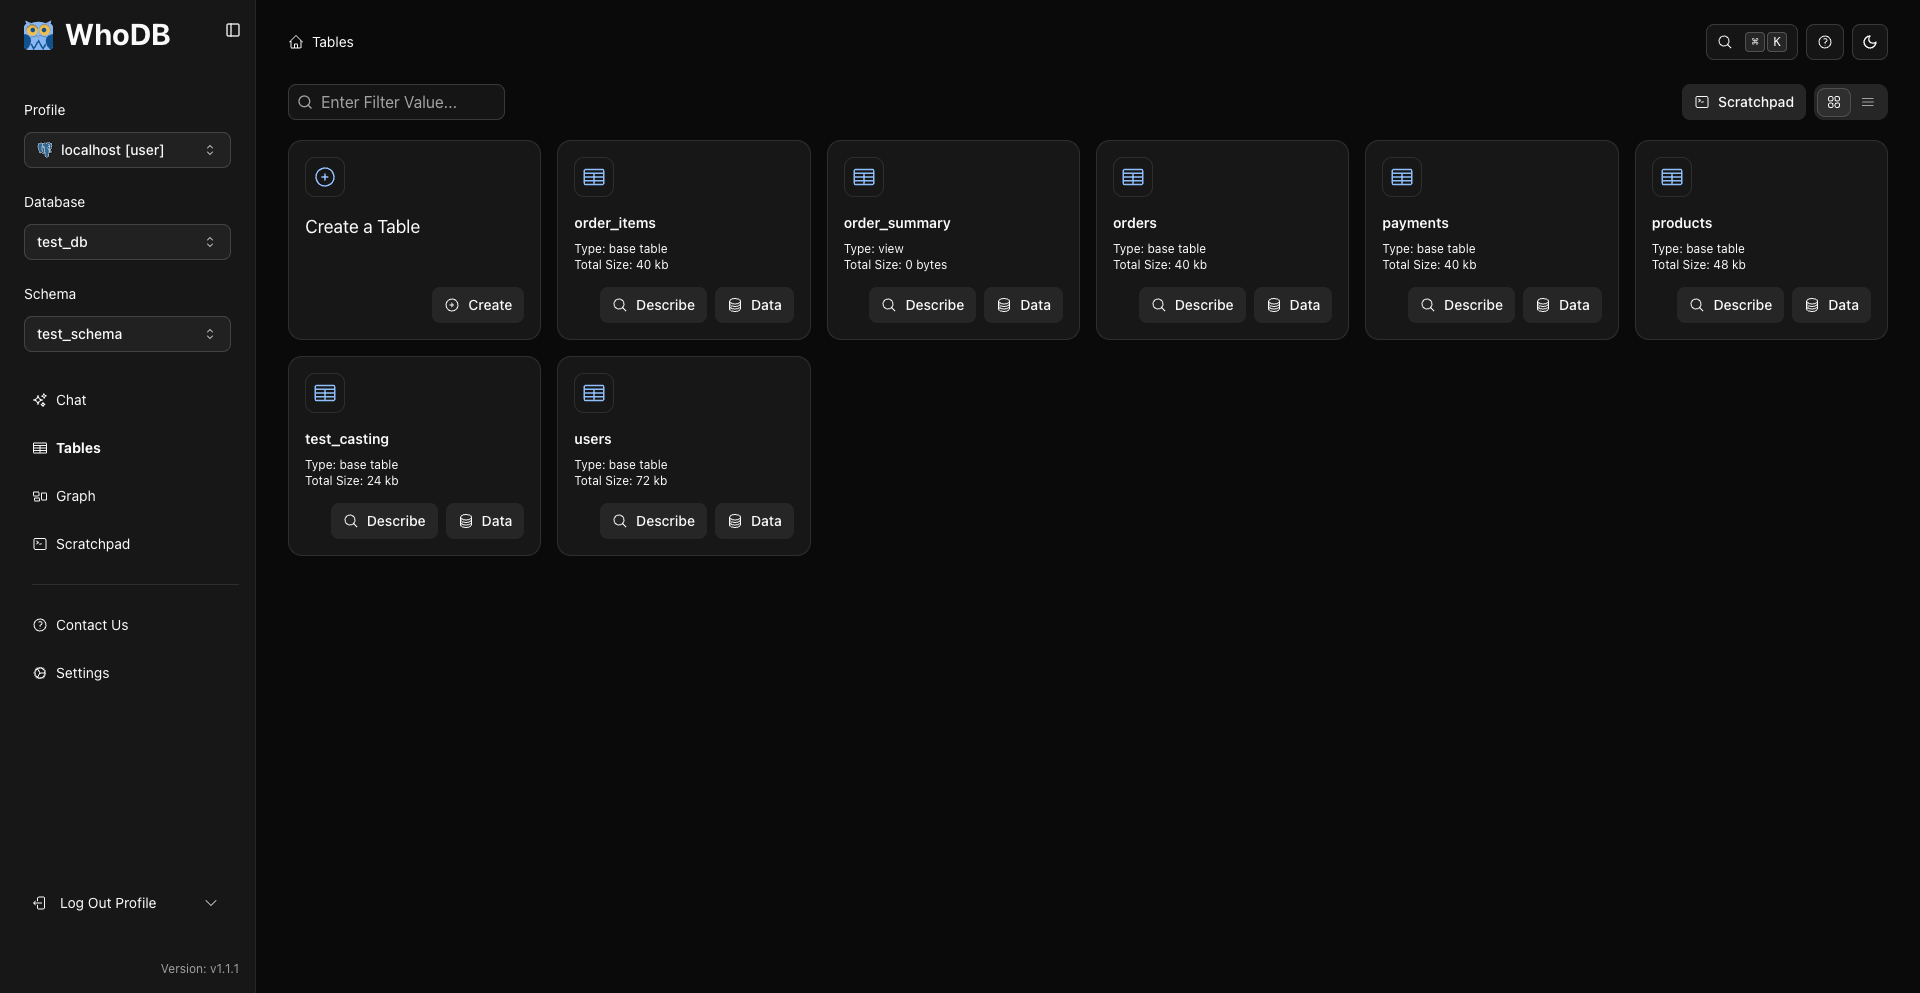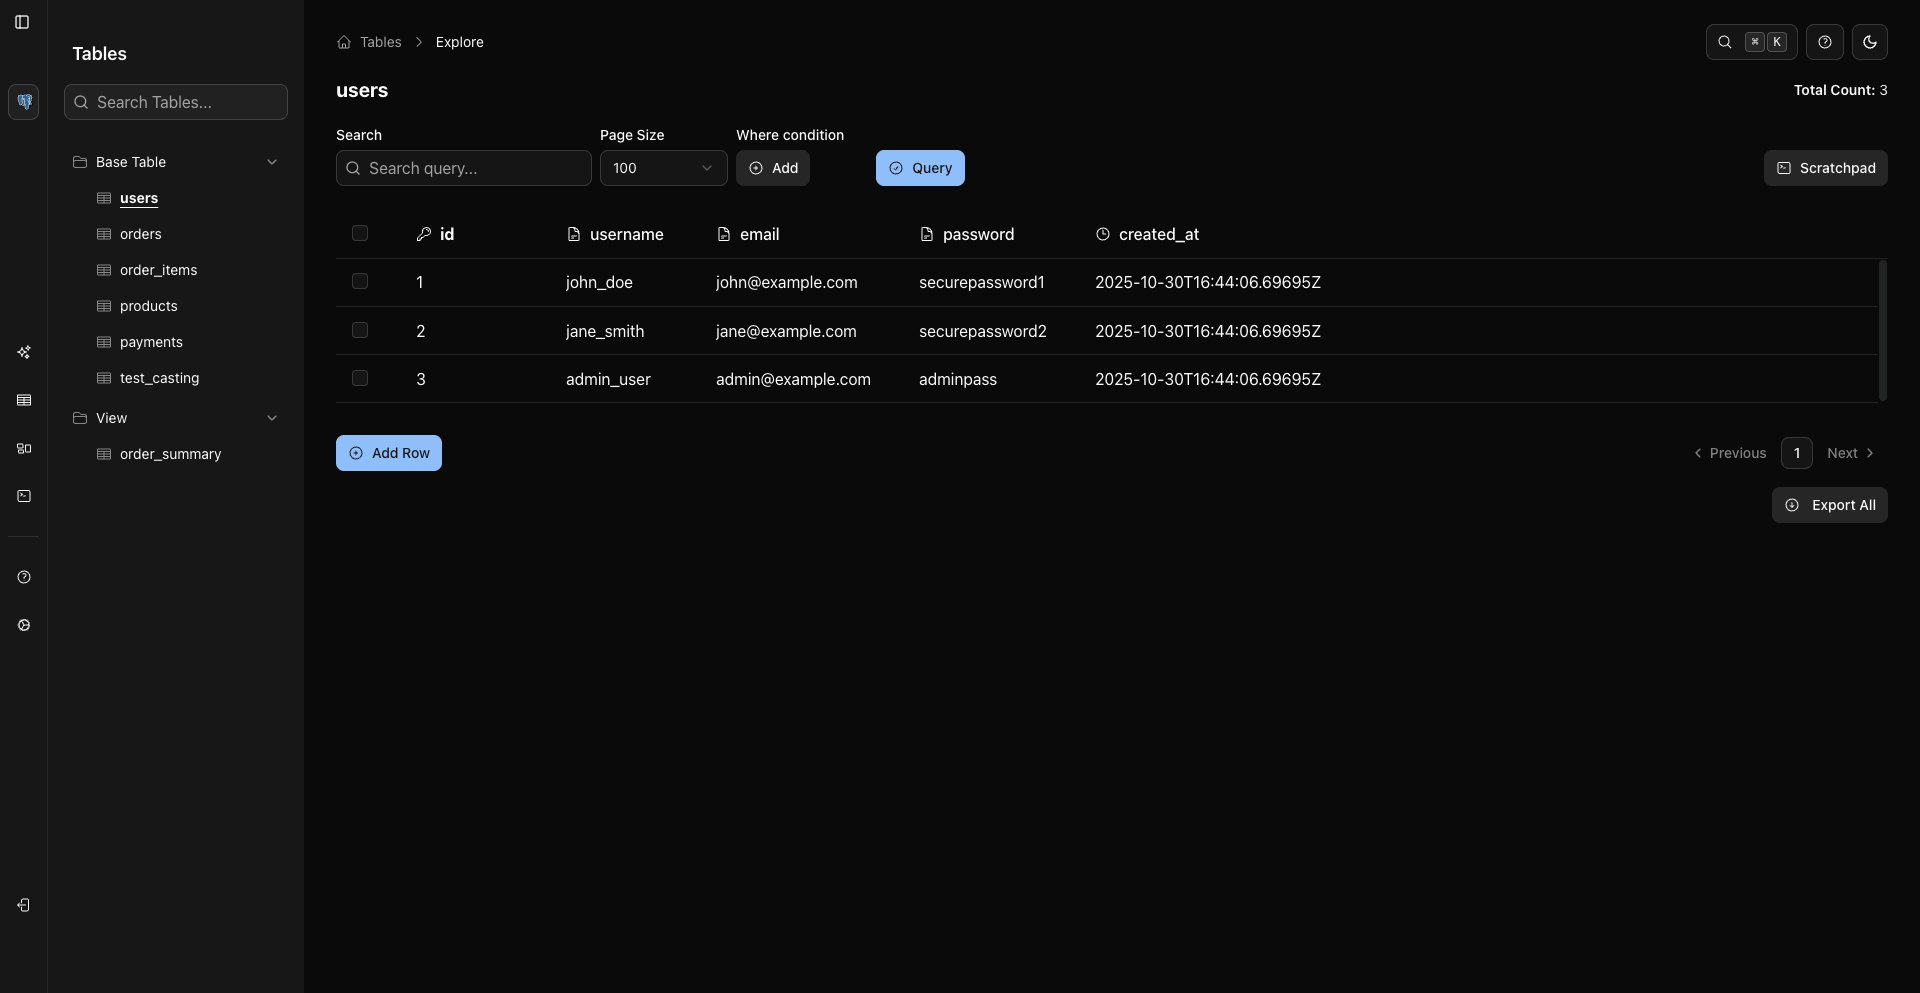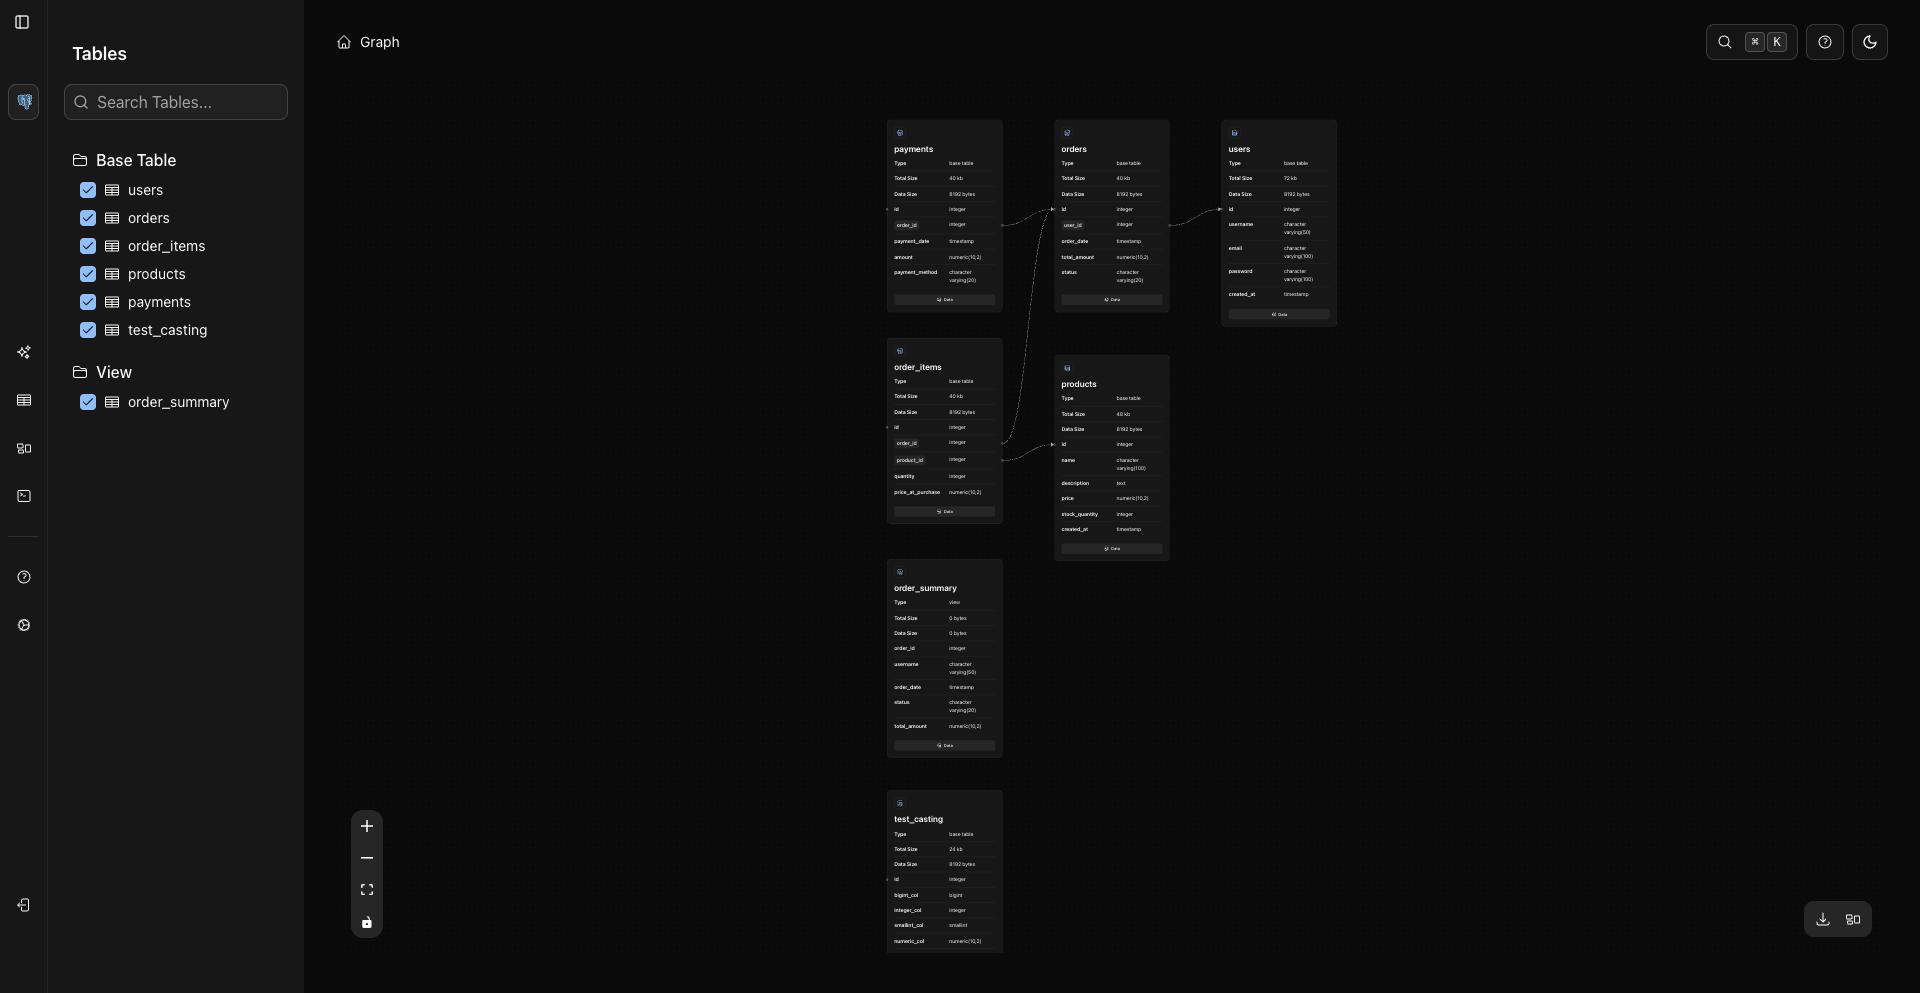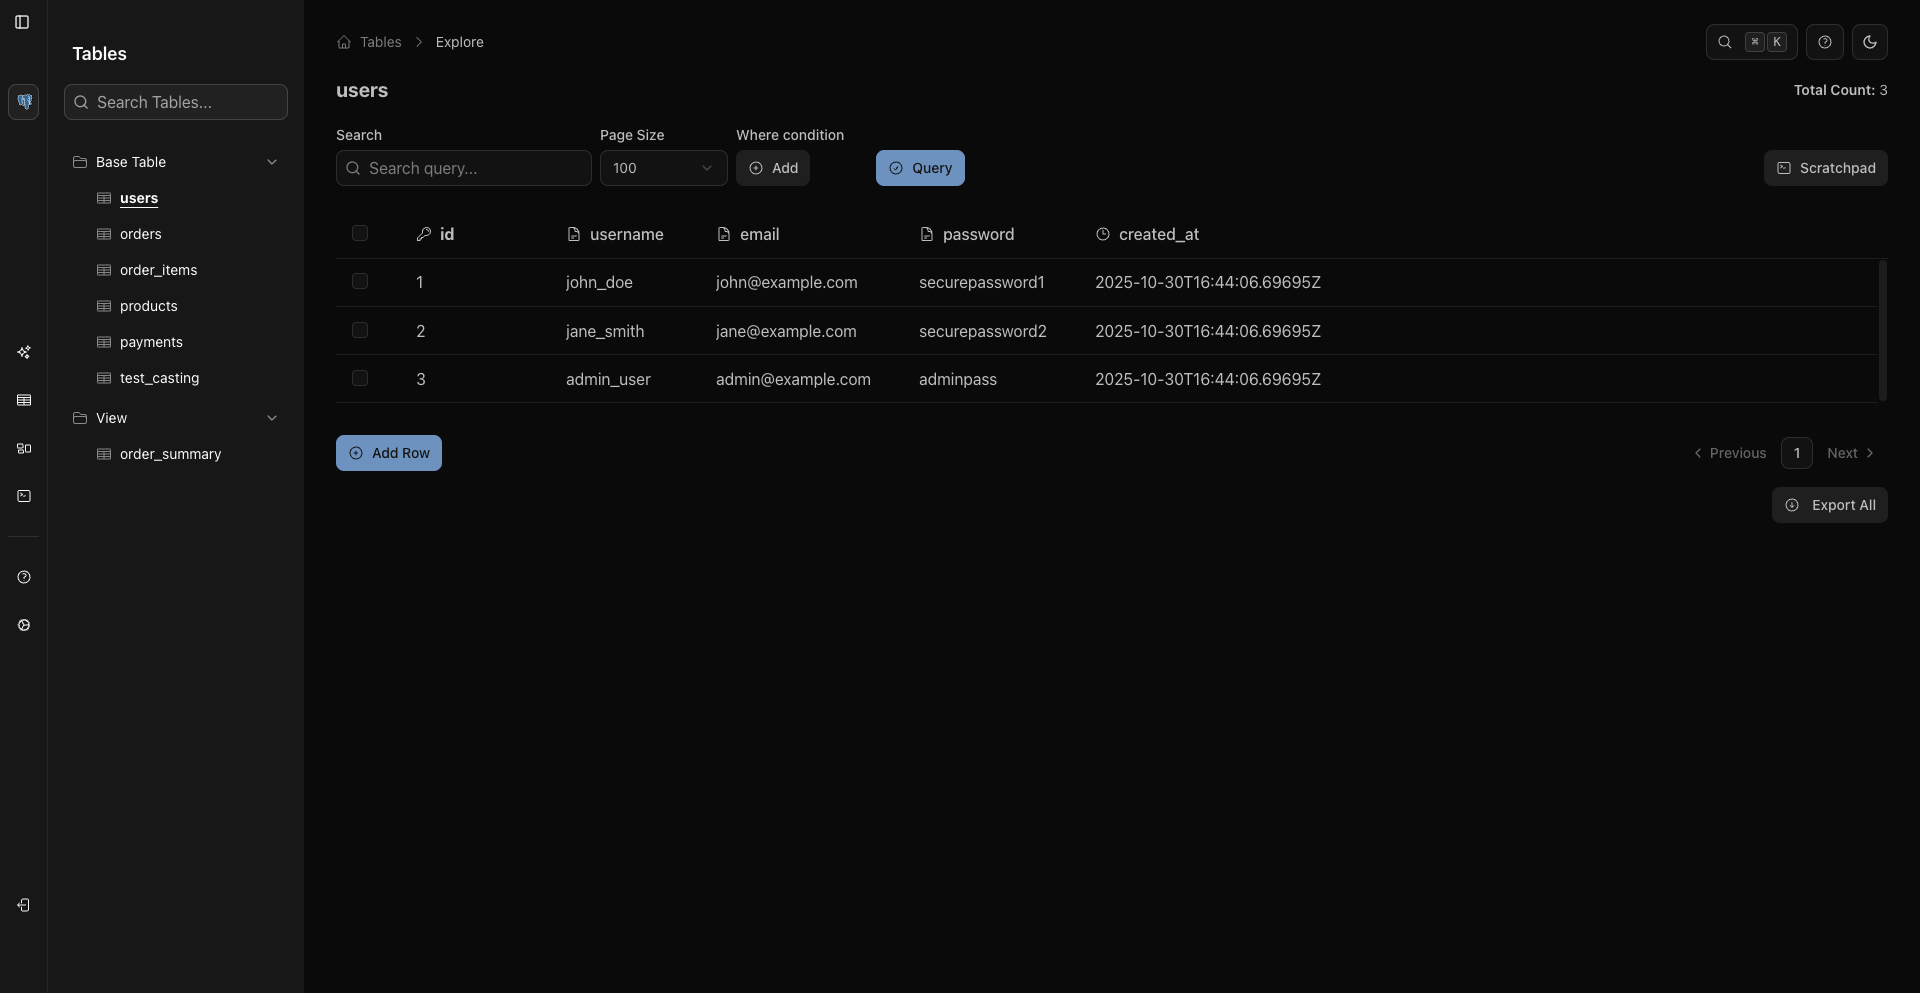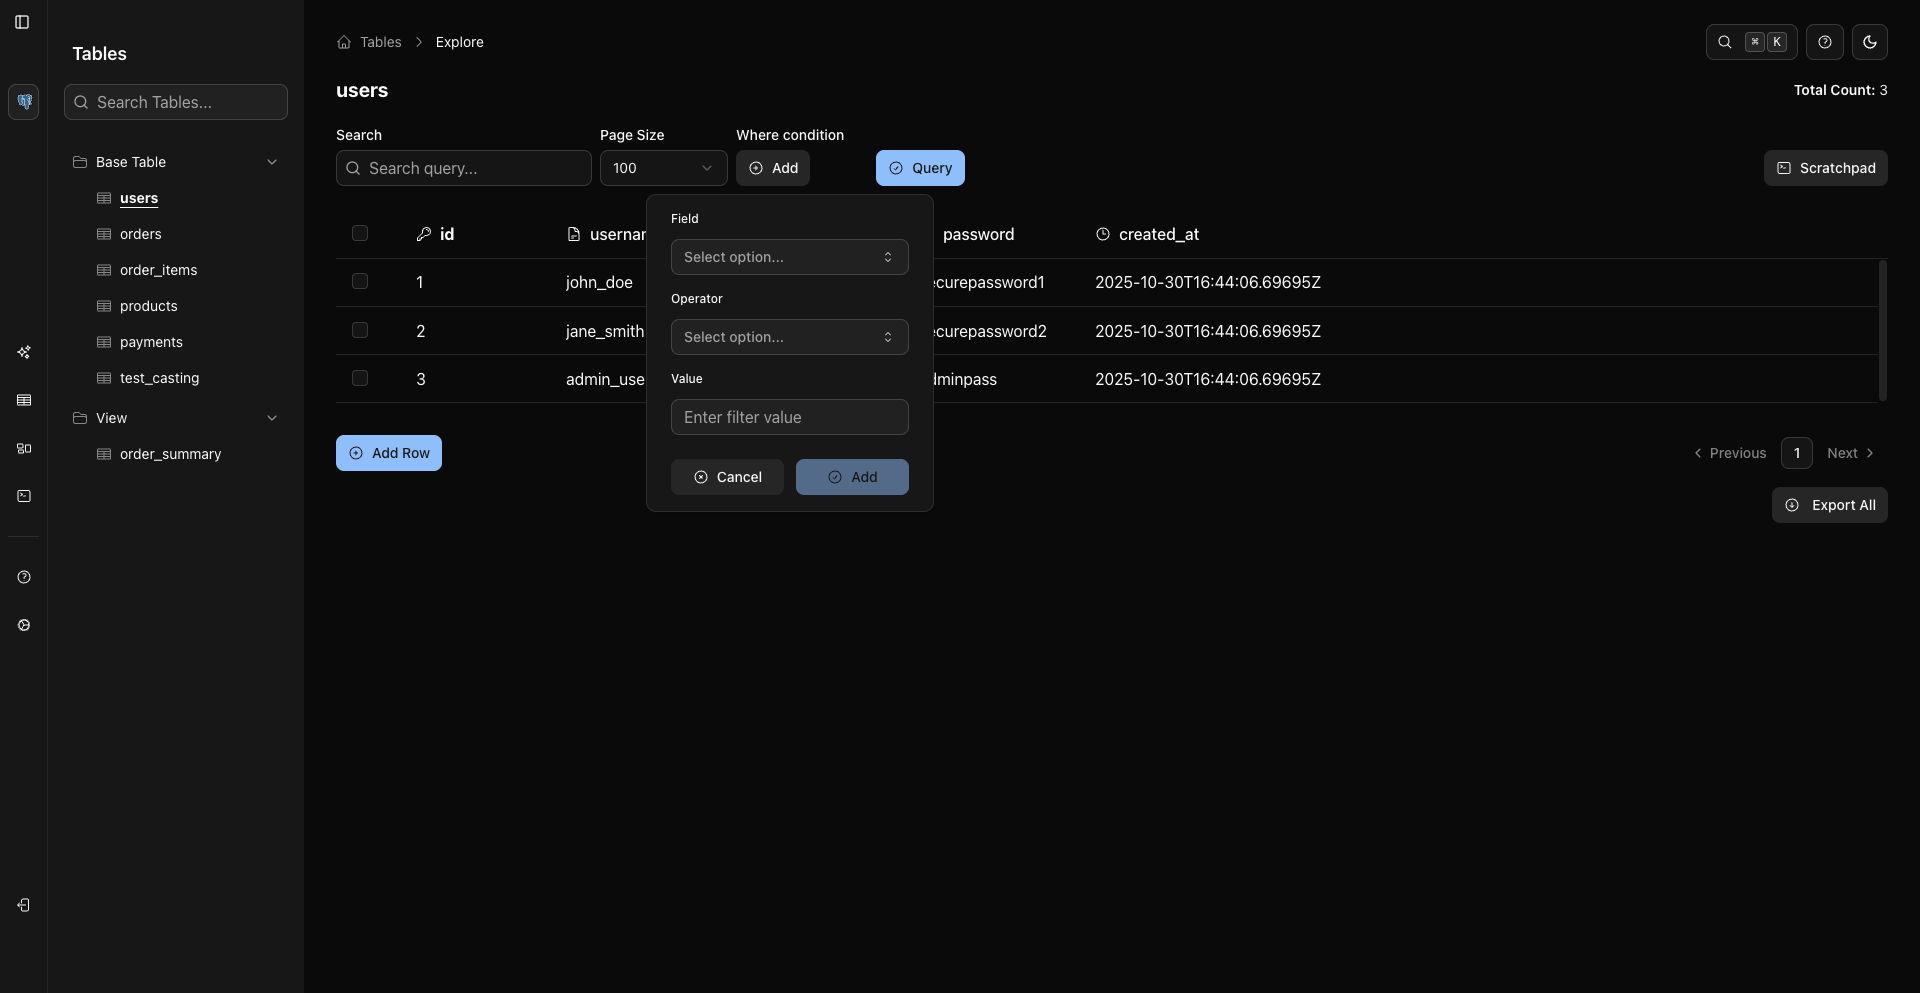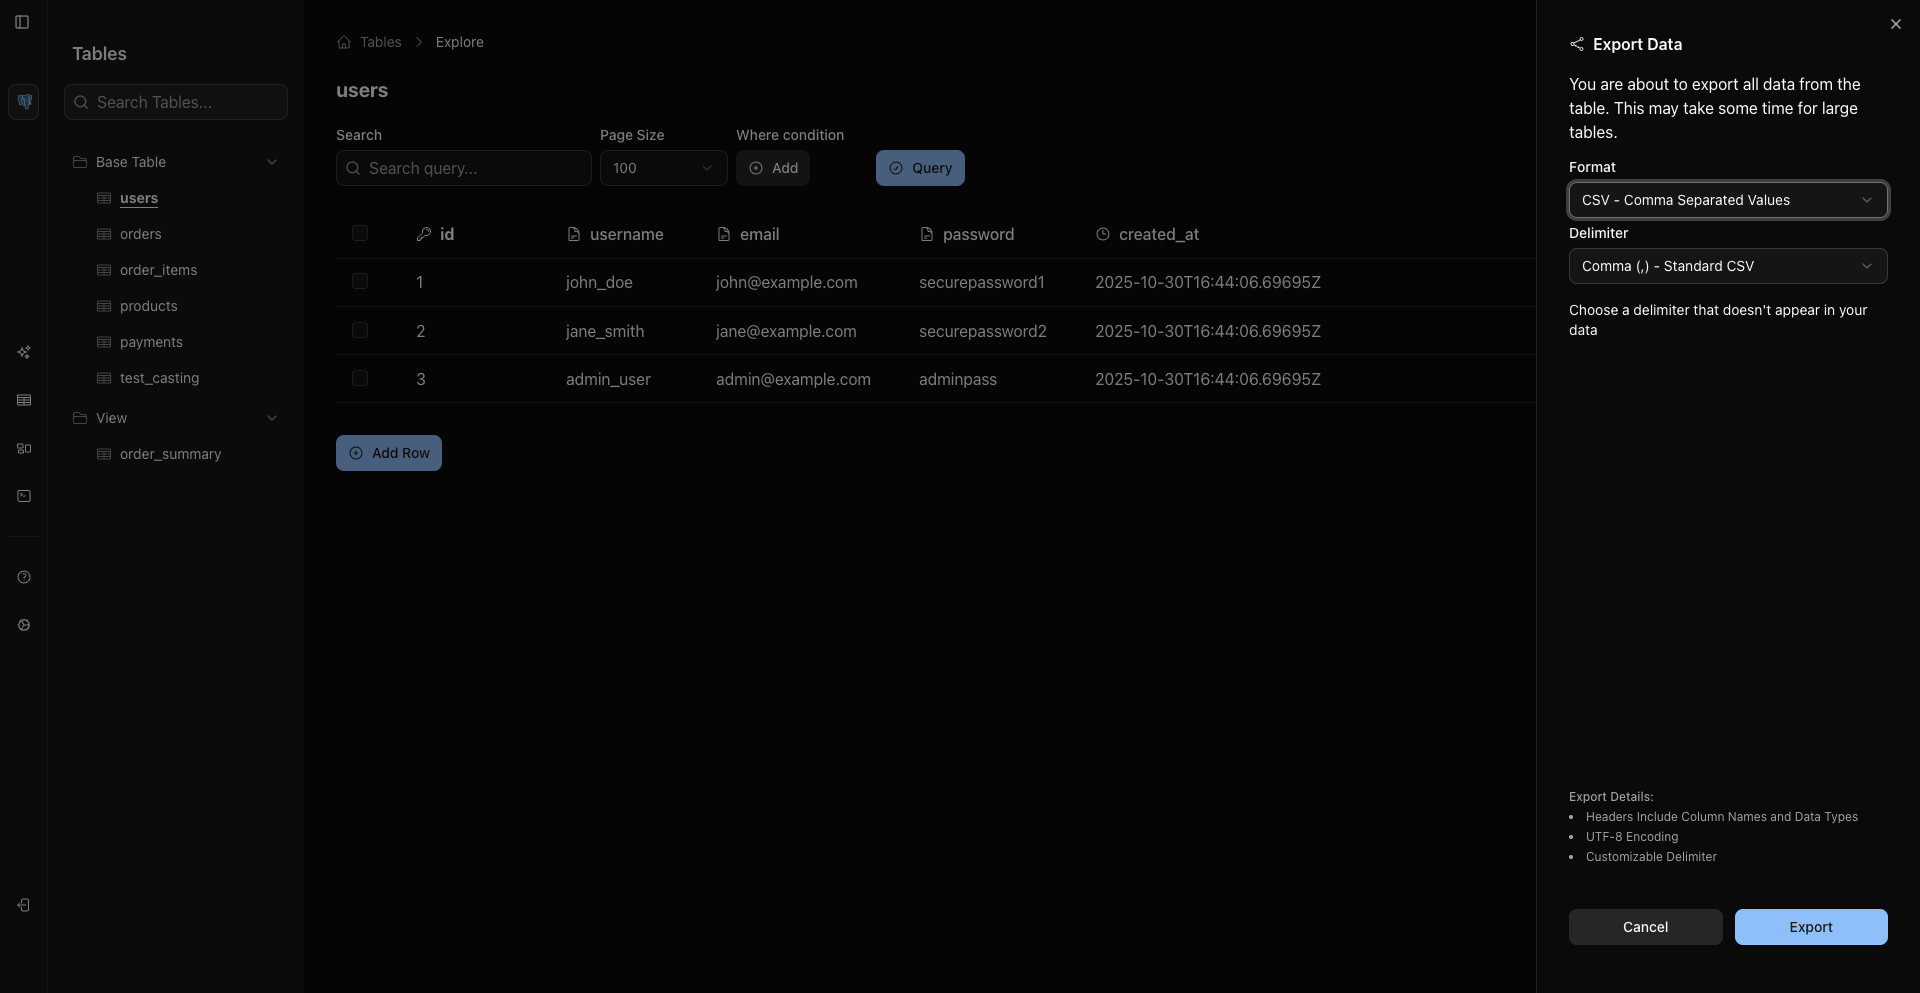
### Advanced/Batch Operations --- title: "Batch Operations" description: "Use current table grid selection and batch actions" --- # Batch Operations The table grid supports row selection and selection-based actions for sources that expose those capabilities. ## Select Rows Use any of these current selection methods: - Click a row checkbox. - Use the header checkbox to select or deselect the visible page. - Focus a row and press `Space`. - Use `Shift + Arrow Up/Down` to extend selection. - Use `Cmd/Ctrl + A` to select all rows in the current view. - Use the row context menu action **Select Row**. Use the header checkbox, row checkboxes, shortcuts, and context menus to select or clear rows. ## Export Selected Rows After selecting rows, use the selected-row export action. The export starts from the selected rows you chose in the grid. ## Edit And Delete If the connected source allows writes: - `Enter` or `Cmd/Ctrl + E` opens edit for the focused row. - `Cmd/Ctrl + Delete` or `Cmd/Ctrl + Backspace` starts delete for the focused row. - The row context menu also exposes **Edit Row** and **Delete Row** when supported. Delete actions show a confirmation dialog before the mutation is submitted. ## Context Menus Right-click a grid row to open the row context menu. Header context menus expose table-level actions such as refresh, export, select/deselect all visible rows, and mock data when supported. ## Related Pages Modify rows from the grid. Delete rows with confirmation. --- ### Advanced/Export Options --- title: "Export Options" description: "Export table data and query results from WhoDB as CSV or Excel, with delimiter options and full-table or selected-row exports" --- # Export Options WhoDB exports data from the table grid and Scratchpad result grids. The export mode is determined by where you start the export, not by a mode selector inside the dialog. ## Entry Points Current export entry points include: - **Export All** from the table footer/action area. - **Export Selected** after selecting rows in the grid. - Header or row context-menu export actions. - Export from Scratchpad result grids. ## Formats CE currently supports: - **CSV** for tabular rows. - **Excel `.xlsx`** for tabular rows. - **JSON Lines (NDJSON)** for records from sources like MongoDB when supported. For SQL backups or migration dumps, use your database's native tools such as `pg_dump`, `mysqldump`, or `mongodump`. ## CSV Delimiters CSV export supports delimiter choices: - Comma - Semicolon - Pipe ## Excel Export Excel export creates an `.xlsx` file from tabular data. Choose Excel to download an `.xlsx` file from the current grid or result set. ## Filtering Before Export To export filtered data: 1. Add WHERE conditions or adjust the grid query. 2. Click **Query** so the grid reloads. 3. Use **Export All** from the filtered grid. Use the grid and the downloaded file to verify row counts, selected columns, and file size. ## Selected Rows To export selected rows: 1. Select one or more rows with the row checkboxes or table selection shortcuts. 2. Use the export action for selected rows. 3. Choose a supported format. ## Related Pages Open the grid that provides export actions. Select rows and apply grid-level actions. --- ### Advanced/Mock Data --- title: "Mock Data" description: "Generate mock rows from the current table grid actions" --- # Mock Data Mock data generation is available from the table grid when the connected source, object, and deployment configuration allow it. ## Open Mock Data Use one of the current entry points: - Right-click the table header and choose the mock data action. - Use the row/header context menu where the mock data action appears. - Press `Cmd/Ctrl + Shift + G` while the table has focus. Use the grid context menu for mock data actions. ## Configure Generation The mock data sheet lets you choose: - Row count. - Generation method. - Data handling mode. - Foreign-key variety when the source supports it. ## Append Or Overwrite Use **Append** to add generated rows to existing data. Use **Overwrite** only when you intentionally want generated data to replace existing rows. WhoDB shows an overwrite confirmation before proceeding. ## Row Counts The row-count field accepts a positive number up to the current backend limit of 200 rows per generation. ## Disable Mock Data Administrators can disable mock data with the `WHODB_DISABLE_MOCK_DATA_GENERATION` environment variable. It has three modes: - Unset or empty: mock data is allowed for all objects. - `*`: mock data is disabled everywhere. - A comma-separated list of object names: mock data is disabled only for those objects. To disable globally: ```bash WHODB_DISABLE_MOCK_DATA_GENERATION="*" ``` or a comma-separated object list: ```bash WHODB_DISABLE_MOCK_DATA_GENERATION=users,payments ``` ## Related Pages Open the table grid that exposes mock data actions. Use row selection and context-menu actions. --- ### Advanced/Where Conditions --- title: "WHERE Conditions" description: "Filter Storage Unit data with the current WHERE condition builder" --- # WHERE Conditions WHERE conditions add server-side filters to the Storage Unit data page. They are separate from the Search field, which only searches currently loaded grid rows. ## Add A Condition Open a table or collection from Storage Units. Click **Add** beside the **Where condition** label. Select a field from the field dropdown. Pick an operator and enter the value. Click **Add Condition** or the add control in the condition UI. Click the page-level **Query** button to reload the grid with the condition applied. ## Operators The operator dropdown lists the database's own operator tokens, provided by the backend for the connected source. For a typical SQL database such as PostgreSQL, the set includes: - `=`, `!=`, `<>` - `>`, `>=`, `<`, `<=` - `BETWEEN`, `NOT BETWEEN` - `LIKE`, `NOT LIKE`, `ILIKE`, `NOT ILIKE` - `IN`, `NOT IN` - `IS NULL`, `IS NOT NULL` The exact list varies by database. ## Multiple Conditions Add multiple conditions when you need a narrower result set. Conditions are combined by the current builder logic and applied when you click **Query**. ## Edit Or Remove Conditions Use the condition controls in the WHERE condition UI to edit or remove an existing condition, then click **Query** again to refresh the grid. ## Search Versus WHERE | Feature | Behavior | |---------|----------| | Search field | Searches/highlights values in the currently loaded rows | | WHERE condition | Sends a server-side filter and changes the result set after **Query** | Use WHERE conditions for real filtering. Use Search to quickly find a value in the rows already visible. ## Related Pages Compare quick search and server-side filters. Filter before exporting. --- ### Ai/Conversation Features --- title: "Conversation Management & Advanced Features" description: "Master multi-turn conversations, chat history navigation, scratchpad integration, and provider management in WhoDB's AI assistant" --- # Conversation Management & Advanced Features WhoDB's AI Chat Assistant is designed for interactive, contextual conversations that build on previous exchanges. This guide covers advanced features that help you work more efficiently with the AI, including conversation history, chat navigation, scratchpad integration, and provider management. The AI assistant maintains full context throughout your conversation, allowing natural follow-up questions without repeating information Conversation features require a selected AI model. If the model dropdown is empty, configure a provider before testing chat history, generated SQL, or Move to Scratchpad. ## Understanding Conversational Context Unlike traditional SQL editors where each query is independent, WhoDB's AI assistant maintains conversational context throughout your session. This enables a natural, iterative approach to data exploration and analysis. ### How Context Works When you ask a question, the AI assistant considers: 1. Your current question 2. All previous messages in the conversation 3. Your database schema 4. Previous query results (implicitly) This context awareness allows the assistant to: - Understand pronouns and references ("show me that data", "what about the previous month?") - Refine previous queries based on feedback - Build complex analyses through multiple steps - Maintain topic continuity across questions ### Context Window Limitations Each AI provider and model has limits on how much conversation history can be maintained. Context window sizes vary by model — check your provider's documentation for the models you use. One token is approximately 4 characters. Longer schemas and verbose queries consume more tokens When the context window approaches its limit, consider starting a new conversation to maintain optimal performance. ## Multi-Turn Conversations Multi-turn conversations allow you to build complex analyses through natural dialogue, refining and iterating on results. ### Follow-Up Questions and Refinement After receiving initial results, ask follow-up questions that reference previous context: ```text You: Show me recent orders AI: [Returns orders from the last 30 days] You: Actually, just from the last week AI: [Adjusts the query to show 7 days instead] You: Sort by total amount descending AI: [Adds ORDER BY clause to the refined query] ``` The assistant understands that "them", "those", or "that query" refer to results from earlier in the conversation. ### Building Complex Analysis Break down complex questions into multiple steps: **You**: "What tables contain customer information?" **You**: "Show me the structure of the customers table" **You**: "Get all customers from California" **You**: "What's the average order value for these customers?" **You**: "Show me monthly trends" Each step builds on previous context, so you never repeat information the assistant already knows. ### Conversation Patterns Discover database contents through iterative questions: 1. "What tables exist in this database?" 2. "Tell me about the products table" 3. "Show me a sample of products" 4. "How many products are out of stock?" Start general and narrow down results: 1. "Show me all sales data" 2. "Just from Q4 2024" 3. "Only sales over $10,000" 4. "Show only the top 10 performers" Compare different data sets: 1. "Show me revenue for January" 2. "Now show me February" 3. "What's the percentage difference?" 4. "Which products drove the increase?" Drill down into specific issues: 1. "Are there any duplicate email addresses?" 2. "Show me the duplicates" 3. "Which accounts were created most recently?" 4. "Generate a query to merge the duplicates" ## Chat History Navigation WhoDB provides keyboard shortcuts to quickly access your previous questions, making it easy to rerun or modify earlier queries. ### Keyboard Shortcuts | Shortcut | Action | Description | |----------|--------|-------------| | (Arrow Up) | Previous message | Navigate backward through your message history | | (Arrow Down) | Next message | Navigate forward through your message history | | Enter | Send message | Submit your current message to the AI | ### Using Arrow Keys Click in the chat input field at the bottom of the screen. Press to load your most recent message, and continue pressing to move backward through your history. Press to move forward. Edit the message if needed, then press Enter to send. Or press Enter without changes to rerun the exact same query. This is useful for rerunning queries after data modifications, adjusting date ranges or filters in a previous question, and recalling phrasing that worked well. Use to quickly access and modify your last query instead of retyping similar questions ## Starting New Conversations When you need to start fresh or when your current conversation becomes too long, use the New Chat feature to clear context and begin a new session. ### When to Start a New Chat You're switching to a completely different topic or database area Your conversation has 30+ messages and performance is slowing The AI seems confused by mixed context from different topics You want to approach a problem with a clean slate ### Creating a New Chat Find the **New Chat** button at the top of the Chat interface, next to the AI provider dropdowns. Click the button to clear the messages in the active session. Your other chat sessions remain available in the chat history sidebar. The chat interface will reset to the initial state with example prompts. Your provider and model selections remain unchanged. ### Chat Sessions WhoDB supports multiple chat sessions, shown in a chat history sidebar: - **Create**: Click the add-session button in the sidebar to start a new session - **Switch**: Click any session in the sidebar to resume that conversation with its context intact - **Rename**: Edit a session's title directly; titles can also be auto-generated by the AI based on the conversation Use separate sessions for separate topics instead of mixing everything into one long conversation. ### Preserving Important Queries Before clearing a session, consider saving important queries to Scratchpad: 1. Hover over any query result 2. Click the ellipsis (...) button and select **Move to Scratchpad** 3. Choose or create a page for the query 4. Start your new chat ## Moving Queries to Scratchpad The Scratchpad integration allows you to save generated SQL queries for later use, modification, or documentation. This bridges the gap between conversational exploration and traditional SQL editing. ### Moving a Query to Scratchpad Ask the AI assistant a question that generates SQL. Wait for the query to execute and display results. Only SQL queries can be moved to Scratchpad. Text responses and errors cannot be transferred Move your mouse over the query results table. An ellipsis (...) button appears next to the result. Click the ellipsis button and choose **Move to Scratchpad** from the dropdown menu. This opens the "Move to Scratchpad" dialog. Select where to add the query: **Option A: Existing Page** — select a page from the dropdown; the query is added as a new cell at the bottom. **Option B: New Page** — select "Create new page" and enter a descriptive name (e.g., "User Analysis Queries"). Click **Move to Scratchpad** to complete the transfer. WhoDB saves the query to the selected page, navigates you to the Scratchpad, and highlights the newly added query. ### Database Support The **Move to Scratchpad** option appears for SQL sources whose connection supports raw query execution — for example PostgreSQL, MySQL, MariaDB, SQLite, ClickHouse, and DuckDB. It is not shown for sources without a SQL query surface, such as Redis and MongoDB. For non-SQL sources, copy the generated query manually if needed for documentation ### Organizing Scratchpad Queries Develop a structure for organizing Scratchpad pages — by functionality (User Queries, Order Analysis, Data Cleanup), by frequency (Daily Reports, Monthly Summaries), or by complexity. Create descriptive page names that make it easy to find queries later, add comments documenting what each query accomplishes, and copy important SQL into your normal shared docs, runbooks, or repository. ## Managing Conversation History As you work with the AI assistant, managing your conversation history becomes important for maintaining clarity and performance. ### Conversation Lifecycle A conversation starts with minimal context and quick responses. As you build on previous questions, context accumulates — enabling sophisticated follow-ups but gradually increasing processing time. After 20-30 messages, performance may slow slightly; as you approach the model's context limit, consider starting a new chat or being more concise. ### Signs You Should Start a New Chat - Responses become noticeably slower - The AI references incorrect previous context - You're switching to a completely different task - Error messages about context length - You've had 50+ messages in one conversation ### Strategies for Long Sessions If you need extended conversations: **Use Models with Large Context Windows**: Some models support much larger context windows than others — check your provider's documentation for context sizes. **Be Concise**: Use shorthand in follow-ups ("show top 10" vs. "can you please show me the top 10 results") and reference previous results by position ("those top 3" instead of repeating criteria). **Periodically Summarize**: ```text Summarize what we've learned about the users table so far ``` **Save to Scratchpad**: Move important queries to Scratchpad, then start a new chat with a fresh context. ## Provider Management Managing your AI providers allows you to switch between different AI services, update credentials, and remove unused providers. ### Viewing Current Provider Your active provider and model are displayed in two dropdowns at the top of the Chat interface: - **Left dropdown**: AI Provider (OpenAI, Anthropic, Gemini, Ollama, LM Studio, etc.) - **Right dropdown**: Specific model, from the list fetched from that provider ### Switching Providers Click the AI Provider dropdown on the left. All configured providers appear in the list. Click on another provider to switch immediately. The model dropdown will update with available models for that provider. Choose the desired model from the updated model dropdown. You can now chat using the new provider and model. Switching providers does NOT clear your conversation history. The new provider will have access to previous messages ### Adding New Providers Click the AI Provider dropdown and select the green **"Add a provider"** option at the bottom. Choose the provider type, enter the required credentials, and click Submit. See [Setting Up AI Providers](/ai/setup-providers) for detailed configuration instructions, provider comparisons, and troubleshooting. ### Deleting Providers When you no longer need a provider (e.g., expired API key, switching to a different service), you can remove it: Use the provider dropdown to select the provider you want to remove. Click the **Delete Provider** button next to the New Chat button. This button is available for manually added providers. Click **Delete** in the confirmation dialog. This action cannot be undone. You'll need to re-enter credentials to use this provider again Environment-defined providers are managed by deployment configuration. ### Managing Multiple Providers You can configure multiple providers simultaneously, useful for: - **Flexibility**: Use a smaller, cheaper model for simple queries and a more capable model for complex analysis - **Redundancy**: Have backup providers if the primary service is down or rate-limited - **Privacy**: Use local models (Ollama, LM Studio) for sensitive queries and cloud providers for faster responses on non-sensitive data For provider selection strategy and cost considerations, see [AI Chat Assistant Best Practices](/best-practices/ai-usage); for setup details, see [Setting Up AI Providers](/ai/setup-providers). Keep at least two providers configured for reliability and flexibility ## Advanced Conversation Patterns ### Context Anchoring Reference specific previous results: ```text Take that query and add a filter for... Apply the same logic to the orders table instead ``` ### Explaining AI Decisions Ask the AI to explain its query choices: ```text Why did you use a LEFT JOIN instead of INNER JOIN? Is there a more efficient way to write this? ``` This helps you learn SQL while using the assistant. ### Multi-Step Workflows Combine conversation with Scratchpad for complex workflows: 1. **Explore with AI**: Ask questions to understand data structure 2. **Generate Base Query**: Get AI to create the initial query 3. **Move to Scratchpad**: Save the query for refinement 4. **Refine Manually**: Add complexity or optimization 5. **Iterate**: Return to the AI with follow-up questions as needed This hybrid approach combines AI speed with manual control. ## Troubleshooting Conversation Issues **Symptoms**: Incorrect query generated, wrong table used, unexpected results **Solutions**: - Be more specific with table and column names - Break complex questions into smaller parts - Use full names instead of pronouns in early messages **Example Fix**: - ❌ "Show me the data" (too vague) - ✅ "Show me all rows from the users table" **Solutions**: - Start a new chat to clear context - Switch to a faster model from your provider's lineup - Save important queries to Scratchpad and start fresh - Use models with larger context windows for long sessions **Symptoms**: Follow-up questions use incorrect table or data from earlier in the conversation **Solutions**: - Be explicit in your question (mention the table name) - Start a new chat if context is too mixed **Example Fix**: - ❌ "Now show me those records" (ambiguous) - ✅ "Show me users from the last query who have orders" **Reasons**: - Current database doesn't support SQL (Redis, MongoDB) - Message is a text response or an error, not a SQL query **Solutions**: Only SQL query results can be moved to Scratchpad. For NoSQL databases, manually copy the query text. **Solutions**: - Ensure the input field is focused (click in the input box) - Verify messages were actually sent (look for user messages in chat) **Note**: Arrow keys only navigate through your sent messages, not AI responses For provider connection issues (invalid API keys, rate limits, Ollama not running), see [Setting Up AI Providers](/ai/setup-providers). ## Next Steps Now that you understand conversation management and advanced features: Learn techniques for effective data retrieval with natural language Safely update, insert, and delete data with AI assistance Master the Scratchpad for advanced SQL editing and query management Discover tips for optimal AI assistant usage Mastering conversation features transforms the AI assistant from a query generator into a powerful collaborative partner for database work --- ### Ai/Introduction --- title: "AI Chat Assistant - Introduction" description: "Transform how you interact with databases using WhoDB's natural language AI assistant" --- # AI Chat Assistant - Introduction WhoDB's AI Chat Assistant revolutionizes database interaction by letting you use natural language instead of SQL. Ask questions in plain English, and the assistant generates accurate queries, executes them, and presents results in an intuitive format. The AI Chat Assistant is like having an expert database administrator and SQL developer available 24/7 ## What is the AI Chat Assistant? The AI Chat Assistant bridges the gap between human language and database queries. Instead of remembering SQL syntax, table names, or join conditions, you simply describe what you want to know. ### Key Capabilities Ask questions in plain English and get structured results The assistant writes optimized SQL based on your database schema Works with PostgreSQL, MySQL, MongoDB, SQLite, Redis, and more Choose from OpenAI, Anthropic, Gemini, Ollama, LM Studio, or custom providers Maintains conversation history for follow-up questions Requires explicit confirmation for data modifications and schema changes (INSERT, UPDATE, DELETE, CREATE, ALTER, DROP) ## How It Works The AI Chat Assistant follows a simple workflow: Type your question in natural language: - "Show me all users" - "What's the total revenue this month?" - "Find products that are out of stock" The assistant analyzes your question and your database schema to create the appropriate SQL query. The assistant has full awareness of your tables, columns, relationships, and database type WhoDB runs the generated SQL against your database. The assistant's text responses stream token-by-token as they are generated. Results appear in an interactive table with sorting, filtering, and export capabilities. ## Who Should Use the AI Assistant? ### Complete Beginners Never written SQL before? The AI assistant is perfect for you: - No SQL knowledge required - Learn by seeing how questions translate to queries - Explore databases without fear of making mistakes - Get immediate results without syntax errors ### Data Analysts Speed up your analysis workflow: - Generate complex aggregations in seconds - Explore data relationships naturally - Create ad-hoc reports without writing SQL - Focus on insights, not query syntax ### Developers Accelerate development tasks: - Quickly understand unfamiliar database schemas - Test queries before implementing in code - Debug data issues in development and production - Prototype features without writing boilerplate SQL ### Database Administrators Simplify routine tasks: - Run diagnostics with natural language commands - Generate reports for stakeholders - Validate data integrity - Perform maintenance queries efficiently ## Example Interactions ### Simple Data Retrieval **You**: "Show me all users" **Assistant**: "Here are all the users in the database." Result: Interactive table with all user records --- **You**: "Find users created in the last week" **Assistant**: [Generates and executes appropriate date filter query] Result: Filtered user list with recent signups ### Complex Analysis **You**: "Count users by email domain" **Assistant**: "Here's the user count by email domain." Result: Aggregated data showing domain distribution --- **You**: "Show average order value by month for the last year" **Assistant**: [Generates query with date grouping and aggregation] Result: Monthly revenue analysis table ### Data Modification **You**: "Delete user with id 5" **Assistant**: [Generates the DELETE statement and shows an inline confirmation alert in the chat. You can view the SQL behind a toggle, then click Confirm or Cancel.] **You**: [Click Confirm] Result: "Action Executed - DELETE" The same inline confirmation applies to all data modifications and schema changes (INSERT, UPDATE, DELETE, CREATE, ALTER, DROP). ## Supported AI Providers WhoDB supports multiple AI providers, giving you flexibility based on your needs: Model lists are fetched live from each provider when you add it, so the available models always reflect your provider's current lineup. **Best for**: Most users, general-purpose queries **Models Available**: Fetched from your OpenAI account when you add the provider **Requirements**: OpenAI API key **Pros**: - Highly accurate SQL generation - Fast response times - Excellent natural language understanding **Cons**: - Requires paid API key - Data sent to external servers **Best for**: Complex reasoning, large context windows **Models Available**: Fetched from your Anthropic account when you add the provider **Requirements**: Anthropic API key **Pros**: - Excellent handling of complex queries - Very large context windows - Strong reasoning capabilities **Cons**: - Requires paid API key - Data sent to external servers **Best for**: Google Cloud users, general-purpose queries **Models Available**: Fetched from the Gemini API when you add the provider **Requirements**: Gemini API key **Pros**: - Strong SQL generation and reasoning - Competitive pricing **Cons**: - Requires API key - Data sent to external servers **Best for**: Privacy-focused deployments, no API costs **Models Available**: Whatever models you have downloaded locally with Ollama **Requirements**: Ollama installed locally **Pros**: - Complete data privacy (runs locally) - No API costs - No internet required - Full control over model selection **Cons**: - Requires local installation - Slower than cloud providers - Requires sufficient local hardware **Best for**: Running local models with a desktop GUI **Models Available**: Whatever models you have loaded in LM Studio **Requirements**: LM Studio installed locally with its local server running **Pros**: - Complete data privacy (runs locally) - No API costs - Easy model management via the LM Studio app **Cons**: - Requires local installation - Requires sufficient local hardware **Best for**: Enterprise deployments, specific requirements Configure custom AI endpoints for: - Self-hosted models - Enterprise AI platforms - Specialized database assistants Contact your administrator for configuration details. ## Privacy and Security ### Data Privacy Considerations **What's Sent**: Your database schema and query text **Not Sent**: Actual database data or query results **Consideration**: Review your organization's policies on external AI services **What's Sent**: Nothing—all processing is local **Privacy**: Complete data isolation **Consideration**: Ideal for sensitive or regulated environments For highly sensitive data, use local models (Ollama) or consult your security team before enabling external AI providers ### Security Features - **Confirmation Required**: All data modifications and schema changes (INSERT, UPDATE, DELETE, CREATE, ALTER, DROP) require explicit confirmation - **Read-Only Mode**: Can be configured with read-only database users - **Permission Aware**: Respects your database user permissions ## Getting Started Ready to use the AI Chat Assistant? Follow these steps: Decide between external providers (OpenAI, Anthropic, Gemini) or local models (Ollama, LM Studio). - **Use External Providers** if: You want the best accuracy and speed - **Use Local Models** if: Privacy is critical or you want zero API costs Configure your chosen AI provider with necessary credentials. [Learn how to set up providers →](/ai/setup-providers) Navigate to the Chat page and begin exploring your database. [See querying guide →](/ai/querying-data) ## AI Assistant Features Overview ### Core Features - **Natural Language Understanding**: Ask questions conversationally - **Schema Awareness**: Knows your tables, columns, and relationships - **SQL Generation**: Creates optimized, database-specific queries - **Result Display**: Interactive tables with full functionality - **Error Handling**: Clear explanations when queries fail ### Advanced Features - **Conversation Context**: Follow-up questions build on previous queries - **Multi-Turn Dialogues**: Complex analysis through iterative refinement - **SQL Code View**: Toggle between results and generated SQL - **Scratchpad Integration**: Move queries to Scratchpad for refinement - **Query History**: Navigate through previous questions with keyboard shortcuts - **Chat Sessions**: Keep multiple conversations in a chat history sidebar and switch between them ### Data Operations - **SELECT Queries**: Retrieve and analyze data - **Aggregations**: COUNT, SUM, AVG, MIN, MAX automatically applied - **Filtering**: WHERE conditions from natural language - **Sorting**: ORDER BY inferred from context - **Joins**: Multi-table queries generated correctly - **Data and Schema Modifications**: INSERT, UPDATE, DELETE, CREATE, ALTER, and DROP with confirmation ## Use Case Examples Quickly understand unfamiliar databases Generate reports without writing SQL See how natural language translates to SQL Find data quality issues efficiently ## Comparison: Traditional SQL vs. AI Assistant | Task | Traditional Approach | With AI Assistant | |------|---------------------|-------------------| | Find all users | Write `SELECT * FROM users` | Ask "Show me all users" | | Complex aggregation | Write GROUP BY with multiple joins | Ask "Count orders by product category" | | Filter by date | Remember date syntax for your database | Ask "Show orders from last month" | | Debug query | Read error message, fix syntax | Rephrase question naturally | | Learn schema | Query information_schema tables | Ask "What tables exist?" | | Data modification | Write UPDATE/DELETE carefully | Describe change, confirm when prompted | The AI assistant eliminates syntax memorization and reduces the time from question to insight. ## Limitations While powerful, the AI assistant has some limitations: Extremely complex multi-step operations may require: - Breaking into multiple queries - Manual refinement in Scratchpad - Traditional SQL for edge cases The assistant respects your database user permissions: - Cannot perform operations beyond granted privileges - No elevation of user permissions - Same access as manual SQL queries Query generation depends on: - AI provider speed - Network latency (for external providers) - Database query execution time - Schema complexity While highly accurate, the assistant may occasionally: - Misinterpret ambiguous questions - Generate suboptimal queries for very specific needs - Require clarification for context-dependent requests Always review generated SQL for critical operations. ## Best Practices Start specific, then generalize. Instead of "show me the data," ask "show me all users created this month" Key practices for effective AI assistant use: 1. **Be Specific**: Clear questions get better results 2. **Provide Context**: Mention table names when ambiguous 3. **Verify SQL**: Review generated queries for important operations 4. **Use Confirmation**: Take advantage of modification confirmations 5. **Leverage Context**: Build on previous questions in conversation 6. **Move to Scratchpad**: Save useful queries for reuse [Learn more best practices →](/best-practices/ai-usage) ## Next Steps Configure OpenAI, Anthropic, Gemini, Ollama, or LM Studio for your needs Learn how to ask questions and retrieve data Step-by-step tutorial for beginners Safely update, insert, and delete records The AI Chat Assistant makes database interaction accessible to everyone, from complete beginners to experienced professionals --- ### Ai/Modifying Data --- title: "Modifying Data with AI Chat Assistant" description: "Learn how to safely insert, update, and delete data using WhoDB's AI Chat Assistant with built-in confirmation safeguards" --- # Modifying Data with AI Chat Assistant WhoDB's AI Chat Assistant enables you to modify database records using natural language while maintaining strict safety controls. Every data modification operation requires explicit confirmation before execution, preventing accidental changes to your database. Data modification operations are permanent and affect your actual database. Always review confirmation prompts carefully before proceeding. This workflow requires an active AI provider and selected model. If the Chat input is disabled or no model is available, configure the provider before testing data modifications. ## Understanding AI-Powered Data Modification The AI Chat Assistant translates your natural language instructions into SQL statements for data modifications and schema changes (INSERT, UPDATE, DELETE, CREATE, ALTER, DROP). Unlike read-only queries, these operations follow a confirmation workflow to ensure safety. ### Key Safety Features All data modifications and schema changes (INSERT, UPDATE, DELETE, CREATE, ALTER, DROP) require manual confirmation before execution See exactly what SQL will execute before confirming Clear confirmation when operations complete successfully Detailed error messages if modifications fail ### How the Confirmation Workflow Works Ask the AI assistant to insert, update, or delete data (or change the schema) using natural language. The assistant analyzes your request and generates the appropriate SQL statement. Nothing executes yet. An inline alert appears in the chat warning that the operation will modify your database, with a **Show Query** toggle to view the SQL and Confirm/Cancel buttons. Click **Show Query** to review the SQL statement carefully. Confirm to proceed or cancel to abort. After confirmation, the SQL executes against your database. An "Action Executed" message appears confirming the operation completed. The confirmation workflow ensures you always know exactly what changes will be made before they occur. The same workflow applies to schema changes (DDL): asking the assistant to CREATE, ALTER, or DROP a table produces the same inline confirmation before anything executes. ## INSERT Operations - Adding Records Use natural language to add new records to your tables. The AI assistant generates appropriate INSERT statements based on your table schema. ```text User Request Create a new product named Laptop with price 999.99, category Electronics, and stock 50 ``` The AI generates: ```sql Generated SQL INSERT INTO products (name, price, category, stock) VALUES ('Laptop', 999.99, 'Electronics', 50) ``` The inline confirmation appears; click **Show Query** to verify the table, columns, and values before confirming. ### Best Practices for INSERT Operations Mention all columns that don't have default values or aren't auto-generated. **Good**: "Add a user with name, email, and status" **Avoid**: "Add a user" (missing required fields) In databases with multiple schemas or similar table names, specify the full table path, e.g. "Add to test_schema.users". Provide values in the expected format for the column type. **Good**: "Add order with date 2025-01-15" **Avoid**: "Add order with date next Monday" (ambiguous) Always check the generated INSERT statement in the confirmation prompt (via **Show Query**) to ensure the correct table is targeted, all required columns are included, and data types match expectations. ## UPDATE Operations - Modifying Records Update existing records by describing what should change and which records to affect. ```text User Request Update the email for user with id 5 to newemail@example.com ``` The AI generates: ```sql Generated SQL UPDATE users SET email = 'newemail@example.com' WHERE id = 5 ``` Conditional and bulk updates work the same way: "Set all products in Electronics category to have discount 10" generates an UPDATE with the matching WHERE clause. When the confirmation appears, pay special attention to the WHERE clause. Missing WHERE clauses will update ALL records in the table. Always verify the WHERE condition before confirming. After confirming, verify the "Action Executed" message, then run a follow-up SELECT to confirm the intended records changed. ### Best Practices for UPDATE Operations Be explicit about which records to update to avoid accidentally modifying all records. **Good**: "Update user with id 5" **Dangerous**: "Update all users" (only if you mean all records) Reference records by primary keys or unique columns when possible. **Good**: "Update user with id 123" **Risky**: "Update user named John" (may match multiple records) For complex updates, first run a SELECT with the same criteria to see which records will be affected. **Step 1**: "Show me all inactive users" **Step 2** (after reviewing): "Set all inactive users to status deleted" Generally avoid updating primary key columns, as this can break foreign key relationships. ## DELETE Operations - Removing Records Delete operations require the most caution as they permanently remove data. Like all modifications, DELETE requests go through the inline confirmation before anything executes. ```text User Request Delete user with id 5 ``` The AI generates the statement and shows the inline confirmation: ```sql Generated SQL DELETE FROM users WHERE id = 5 ``` Conditional deletions ("Delete all inactive users", "Remove all log entries older than 90 days") follow the same pattern. Click **Show Query** to review the DELETE statement and its WHERE clause, then Confirm to execute or Cancel to abort. Afterwards, run a follow-up SELECT to confirm the records are gone. DELETE operations are permanent and cannot be undone through WhoDB. Only database backups can restore deleted data. ### Best Practices for DELETE Operations Never delete without specifying which records to remove. **Good**: "Delete user with id 5" **Extremely Dangerous**: "Delete all users" (removes all records) Run a SELECT query first to verify which records will be deleted. **Step 1**: "Show me all users with status inactive" **Step 2** (after reviewing): "Delete all users with status inactive" If your schema has CASCADE DELETE rules, deleting one record might remove related records in other tables. Conversely, foreign key constraints may block the deletion until referencing records are handled. Verify your schema's constraints before deleting. For recoverable deletions, use UPDATE to set a deleted flag instead of DELETE: "Update user with id 5 to set deleted true". Before deleting thousands of records, verify your database backup is current and tested. ## Understanding Confirmation Prompts The inline confirmation is your final checkpoint before data modification. ### What the Confirmation Shows An inline alert warning that the operation will modify your database. Click **Show Query** to see the exact SQL that will execute, including the target table, columns being affected, WHERE conditions, and values being set. - **Confirm**: Proceeds with the operation - **Cancel**: Aborts the operation ### Checklist Before Confirming - [ ] The SQL targets the intended table and schema - [ ] For UPDATE and DELETE, the WHERE clause targets the correct records - [ ] For INSERT and UPDATE, values are correct and properly formatted - [ ] The number of rows likely affected matches your expectation - [ ] A WHERE clause exists unless you truly intend to affect all records If anything in the confirmation looks unexpected, click Cancel and rephrase your request to the AI assistant. ## Verifying Modifications After executing a modification, verify the changes were applied correctly. Look for the "Action Executed" confirmation in the chat. The success message shows which operation ran (for example, "DELETE" or "UPDATE"). Run a SELECT query to verify the changes: **After INSERT**: "Show me the user with email newemail@example.com" **After UPDATE**: "Show user with id 5" **After DELETE**: "Count how many log entries are older than 90 days" (expect 0) ## Rollback Strategies Plan recovery before making data modifications. ### Prevention is Best Practice modifications in a development database first Run critical operations in transaction blocks (via Scratchpad) Maintain frequent database backups for recovery Use status flags instead of permanent deletion where possible ### If You Make a Mistake Don't make additional changes. Note exactly what operation was executed, how many records were affected, and which tables. For small mistakes (wrong value in one record), correct it with another UPDATE: ```text Update product_id 123 to set price 10 ``` For significant data loss, restore the database from the most recent backup before the mistake. Restoring from backup will lose any changes made after the backup was created. ### Using Transactions for Safety For critical modifications, use the Scratchpad to wrap operations in transactions: ```sql Transaction Example BEGIN; UPDATE users SET status = 'inactive' WHERE last_login < '2023-01-01'; -- Review the affected rows SELECT * FROM users WHERE status = 'inactive' AND last_login < '2023-01-01'; -- If everything looks correct: COMMIT; -- If something is wrong: ROLLBACK; ``` The AI Chat Assistant executes operations immediately after confirmation. For transaction control, use the Scratchpad query interface where you can manually manage BEGIN, COMMIT, and ROLLBACK. ## Safety Practices for Production Data The essentials when modifying production databases: - **Verify your connection** — confirm you're on the correct database (production vs. development) - **SELECT before you modify** — understand the current state and estimate the affected row count - **Check backups** — ensure recent backups exist and have been tested - **Start small** — for bulk operations, test with a single record first - **Verify each step** — check results after each modification before proceeding - **Schedule bulk operations** — perform large modifications during maintenance windows For the full set of production guidelines, change management checklists, and audit considerations, see [AI Chat Assistant Best Practices](/best-practices/ai-usage). ## Common Modification Patterns The core pattern for every safe modification is **preview → modify → verify**: ```text Show all orders with status pending older than 30 days ``` Review (and optionally count) the records that will be affected. ```text Update all orders with status pending older than 30 days to status cancelled ``` Review the confirmation and confirm. ```text Show all orders with status cancelled from the last 30 days ``` Confirm the change was applied correctly. The same three-step shape applies to inserts (check the record doesn't exist, insert, confirm it was created), deletions (preview, delete, confirm records are gone), and cleanups. For records with dependencies — such as deleting a user who has orders — handle the related records first, then the parent record. ## Troubleshooting **Symptom**: You request a modification, but no confirmation prompt shows. **Possible Causes**: The AI generated a read-only query instead, or the request wasn't recognized as a modification. **Solutions**: Rephrase your request more explicitly ("Delete user with id 5"), check the AI response for error messages, or try a simpler, more direct modification request. **Symptom**: "Foreign key constraint violation" error when deleting or updating. **Cause**: Other tables have records referencing the record you're trying to modify. **Solutions**: Delete or update referencing records first, check foreign key relationships, and consider CASCADE rules in your schema. **Symptom**: AI warns "This will affect all records in the table". **Solutions**: Cancel the operation and rephrase with specific conditions ("Delete user with id 5" not "Delete user"). If you truly want to affect all records, explicitly confirm. **Symptom**: The operation modified different records than intended. **Solutions**: Check what was actually modified with a SELECT query. If correctable, run a compensating UPDATE; if serious, restore from backup. In future, use SELECT first to verify target records. **Symptom**: "Permission denied" or "Insufficient privileges" error. **Solutions**: Verify your database user has INSERT/UPDATE/DELETE permissions, contact your database administrator, or check if the connection is read-only. **Symptom**: "Data type mismatch" or "Invalid input syntax" error. **Solutions**: Check the table schema for column types. Format dates as 'YYYY-MM-DD', use numbers without quotes for numeric columns, and proper boolean values (true/false). **Solutions**: Break the operation into smaller batches, use the Scratchpad to run batched statements with transaction control, and schedule large modifications during low-traffic periods. ## Comparing AI Chat vs. Traditional Methods | Scenario | AI Chat Assistant | Traditional UI | Scratchpad SQL | |----------|-------------------|----------------|----------------| | **Quick single record change** | Fast and convenient | Multiple clicks required | Overkill for simple changes | | **Bulk updates with conditions** | Natural language, easy | Must use SQL | Most control and visibility | | **Complex multi-table operations** | May require multiple steps | Not supported | Best option | | **Production-critical changes** | Good with careful review | Limited capabilities | Recommended for control | Use AI Chat for quick modifications and exploration. Use Scratchpad for complex operations requiring transaction control or multiple related statements. ## Security Considerations Your modification requests and table/column names may be sent to external AI providers. However, actual data values are not sent. **What's Sent to AI Providers**: your natural language request, database schema (table and column names), and database type. **What's NOT Sent**: actual data values, query results, or existing record contents. For maximum privacy, use local models (Ollama, LM Studio) for complete data isolation, avoid mentioning sensitive values in your requests, and use Scratchpad for modifications involving sensitive data. **Audit and Compliance**: Modifications are associated with the database user credentials used, so database-level logs can attribute changes. Enable your database's audit or query logging for comprehensive tracking. **Permission Management**: Follow the principle of least privilege — use database users with only necessary permissions, read-only users for exploration, and separate credentials for production vs. development. See [AI Chat Assistant Best Practices](/best-practices/ai-usage) for read-only user setup. ## Next Steps Learn how to retrieve and analyze data without modifications Master multi-turn conversations for complex operations Use SQL directly for complex modifications requiring transactions The canonical guide to safe and effective AI assistant usage Every data modification and schema change (INSERT, UPDATE, DELETE, CREATE, ALTER, DROP) requires explicit confirmation, with full visibility into the SQL before it executes. Review carefully, verify with follow-up queries, and maintain backups for recovery. --- ### Ai/Querying Data --- title: "Querying Data with AI Chat" description: "Master the art of retrieving and analyzing database data using natural language queries" --- # Querying Data with AI Chat WhoDB's AI Chat Assistant transforms database querying from a technical task into a natural conversation. Ask questions in plain English and get instant results with interactive tables, generated SQL, and intelligent error handling. The AI assistant understands your database schema and generates optimized queries specific to your database type AI querying requires an active provider and selected model. If the Chat page shows no available model, configure a provider first; prompts cannot be sent without a model. ## Getting Started with Simple Queries Traditional database querying requires knowledge of SQL syntax, table structures, and join relationships. The AI Chat Assistant eliminates these barriers by translating natural language into accurate SQL queries. ### Asking Your First Question Click the Chat icon in the sidebar to access the AI assistant. In the input field at the bottom, type a natural language question: ```text Example Questions Show me all users List all products Display recent orders ``` Send your message. The AI's response streams in token-by-token as it is generated. The assistant will display the results in an interactive table. ### Simple Text Responses For general questions or informational queries, the assistant provides text responses: **Example interactions:** - "Hello" - Gets a greeting and overview of capabilities - "What tables are available?" - Lists your database tables - "Explain what the users table contains" - Provides schema information Text responses are perfect for understanding your database structure before diving into queries ## Retrieving Data with SELECT Queries The AI assistant excels at generating SELECT queries. Describe what you want — including columns, filters, sorting, and limits — and it produces the SQL: ```text Natural Language Show me usernames and emails from users created after 2024-01-01, sorted by most recent, limit 10 ``` **Generated SQL**: ```sql SELECT username, email FROM users WHERE created_at > '2024-01-01' ORDER BY created_at DESC LIMIT 10 ``` You can phrase filtering, sorting, and limiting naturally: "the first 10 users", "products that cost more than $100", "orders with status 'completed'", "sorted by price descending". Specify column names in your questions for more focused results ## Viewing SQL Code One of the most powerful features is the ability to toggle between table results and the generated SQL code. ### SQL Code Toggle When the assistant returns query results: Hover over the results table and click the ellipsis (...) button that appears next to it. Select **Show Code** from the dropdown menu to switch from table view to SQL code view. Examine the generated SQL to understand how your question was translated. Open the menu again and select **Show Table** to return to the table view. ### Why View SQL Code? See how natural language maps to SQL syntax. Asking "Count users by email domain" and viewing the generated SQL teaches you string functions, aggregation, and grouping all at once. For important queries, review the SQL to ensure it matches your intent: check JOIN conditions, WHERE clauses, GROUP BY logic, and ORDER BY direction. Copy generated SQL to use in application code, save in the Scratchpad for refinement, or share with teammates. If results aren't what you expected, viewing the SQL helps identify wrong table references, incorrect column names, missing filters, or unexpected joins. ## Complex Queries The AI assistant handles sophisticated queries including aggregations, joins, and multi-step logic. ### Aggregation Queries Count, sum, average, and other statistical operations: ```text Natural Language Count users by email domain ``` **Generated SQL**: ```sql SELECT SUBSTRING(email FROM POSITION('@' IN email) + 1) as domain, COUNT(*) as user_count FROM users GROUP BY domain ORDER BY user_count DESC ``` All the standard aggregation functions are available through natural phrasing: "How many users do we have?" (COUNT), "What's the total revenue?" (SUM), "Average order value" (AVG), "Highest and lowest prices" (MIN/MAX). ### Multi-Table Queries (Joins) Ask questions that span multiple tables: ```text Natural Language Show me users and their order counts ``` **Generated SQL**: ```sql SELECT u.id, u.username, COUNT(o.id) as order_count, SUM(o.total) as total_spent FROM users u LEFT JOIN orders o ON u.id = o.user_id GROUP BY u.id, u.username ORDER BY total_spent DESC ``` The AI assistant automatically determines the correct JOIN type and conditions based on your schema ### Dates, Patterns, and Multiple Conditions The same natural phrasing works for time filters, pattern matching, and combined criteria: ```text Natural Language Examples Show revenue grouped by month for 2024 Find users with gmail email addresses Show me active users who joined after 2024-01-01 and have made at least 5 orders ``` The AI translates these into `DATE_TRUNC`/date-range filters, `LIKE` patterns, and combined `WHERE` conditions or subqueries as appropriate for your database type. ## Understanding Query Results When the AI assistant returns data, you get an interactive table with powerful features. ### Interactive Results Table **Table Features**: - **Column Headers**: Show field names from your query - **Scrollable**: Navigate large result sets - **Readable Formatting**: Data types displayed appropriately The assistant also provides context about your results, such as the number of rows returned and the columns included. NULL values are clearly distinguishable from empty strings. ### Large Result Sets Chat results are shown in a fixed-height scrollable table containing all returned rows. For queries returning many rows: - Scroll within the table to view all data - Consider adding LIMIT in your question Very large result sets may take longer to load. Ask the assistant to limit results if you only need a sample ## Handling Errors The AI assistant provides clear, helpful error messages when queries fail. ### Common Error Types **Error Example**: `ERROR: relation "test_schema.nonexistent_table" does not exist` The table or column name doesn't exist in your schema. Check your names, ask "What tables are available?", and verify spelling and schema name. **Error Example**: `ERROR: permission denied for table users` Your database user lacks permissions for this operation. Contact your database administrator or use a connection with appropriate permissions. **Error Example**: `ERROR: syntax error at or near "FROM"` The generated SQL has invalid syntax (rare but possible). Rephrase your question more clearly or break complex questions into simpler steps. **Error Example**: `ERROR: column "price" is of type numeric but expression is of type text` Data type incompatibility in the query. Ask about the schema first, then rephrase with correct type expectations. ### Recovering from Errors The error message contains clues about what went wrong. Try asking the same thing in a different way, or break a complex question into steps: ```text Complex (may fail) Show me average order value by month for premium users who joined in 2024 Simpler (more reliable) 1. Show me premium users 2. [After reviewing] Show me order values for these users 3. [After reviewing] Calculate average by month ``` The assistant can explain what went wrong: ```text Why did my last query fail? Can you explain the error message? ``` ## Multi-Turn Conversations One of the AI assistant's most powerful features is maintaining conversation context for follow-up questions. ### Building on Previous Queries The assistant remembers your conversation, so each question can build on the last: ```text Iterative Refinement You: Show me all users AI: [Returns 1000 users] You: Just the first 10, sorted by most recent AI: [Returns 10 users sorted by created_at DESC] You: Only active ones AI: [Adds the status filter, keeping earlier refinements] ``` Use pronouns like "them," "those," "these" naturally—the assistant understands what you're referring to ### Chat History Navigation Navigate through your previously sent messages using the arrow keys: press Up in the input field to load your previous message, keep pressing to go further back, and press Down to move forward. Edit the loaded message and press Enter to resend. ## Example Workflow: Data Exploration Explore an unfamiliar database systematically: ```text What tables are available? ``` ```text Describe the users table ``` ```text Show me 5 sample users ``` ```text How are users related to orders? ``` ```text Count users by status ``` For a complete walkthrough of this approach, see [AI-Powered Data Exploration](/use-cases/ai-data-exploration). ## Moving Queries to Scratchpad When you generate a useful query, save it for future use: Locate a query result with SQL you want to save. Hover over the result, click the ellipsis (...) button, and select **Move to Scratchpad** from the dropdown menu. **New Page**: Creates a new Scratchpad page with this query **Existing Page**: Adds to an existing Scratchpad page Provide a page name if creating new. Click Confirm to move the query. Navigate to Scratchpad to find your saved query, where you can edit and refine it, add comments, execute it multiple times, or copy important SQL into shared docs, runbooks, or your repository. Queries moved to Scratchpad retain their original SQL exactly as generated by the AI For guidance on formulating effective questions, safety, and performance, see [AI Chat Assistant Best Practices](/best-practices/ai-usage). ## Keyboard Shortcuts | Shortcut | Action | |----------|--------| | `Up Arrow` | Previous message in history | | `Down Arrow` | Next message in history | | `Enter` | Send message | Arrow keys navigate through your previously sent messages, letting you quickly reload, edit, and resend earlier questions. ## Troubleshooting **Symptom**: The generated query doesn't match what you wanted. **Solutions**: 1. Rephrase using different words 2. Be more specific about table and column names 3. Break complex questions into simpler parts Try: "Show me users who signed up recently" instead of "Get the new people" **Symptom**: Query executes but returns unexpected data. **Solutions**: 1. View the generated SQL to understand the logic 2. Check if filters are applied correctly and you're querying the right table 3. Add more specific conditions to your question **Symptom**: The assistant or query execution is very slow. **Solutions**: 1. Add LIMIT to your question: "Show me the first 100 users" 2. Add specific filters or time ranges to reduce data volume 3. Break large operations into smaller queries **Symptom**: You want to re-run a query but can't find it. **Solutions**: 1. Use Up arrow to navigate through message history 2. Scroll up in the chat to find the previous response 3. Check Scratchpad if you moved the query there Next time: Move important queries to Scratchpad for permanent storage **Symptom**: You expected a table but got a text explanation. **Solutions**: Make your question action-oriented using verbs like "show," "list," "display," "find". Try: "Show me all users" instead of "Tell me about users" **Symptom**: The result table doesn't include columns you need. **Solutions**: Explicitly mention the columns you want, or ask a follow-up: "Show me the same data but include [column name]". ## Limitations Understanding limitations helps set appropriate expectations: Some extremely complex operations — recursive CTEs with deep nesting, dynamic pivots, complex window functions with multiple partitions — may require manual SQL in Scratchpad or breaking into multiple simpler queries. The AI adapts to your database type, but some advanced, database-specific functions or proprietary extensions may need clarification. Move to Scratchpad for advanced database-specific features. The AI generates correct queries but may not always produce the most optimized version for very large tables or complex join scenarios. Review and optimize generated SQL in Scratchpad for performance-critical queries. If your question could be interpreted multiple ways, the AI will make its best guess or ask clarifying questions. Be as specific as possible, especially with column names and conditions. ## Privacy and Security For sensitive data, consider using local AI models (Ollama, LM Studio) instead of cloud providers **Sent to AI**: - Your question text - Database schema (table and column names) - Database type (PostgreSQL, MySQL, etc.) **Never Sent**: - Actual data from your tables - Query results - Connection credentials - Passwords or sensitive configuration For sensitive data: use local models for complete privacy, review your organization's policies on external AI services, avoid sensitive schema names with cloud providers, and use read-only connections for exploratory querying. See [AI Chat Assistant Best Practices](/best-practices/ai-usage) for full guidance. ## Next Steps Learn how to safely update, insert, and delete data using the AI assistant Master advanced conversation features and context management Move generated queries to Scratchpad for refinement and reuse Discover optimal patterns for AI-assisted database work You now have the skills to query databases naturally using AI, view and understand generated SQL, and handle complex data retrieval scenarios --- ### Ai/Setup Providers --- title: "Setting Up AI Providers" description: "Configure OpenAI, Anthropic, Gemini, Ollama, LM Studio, or custom AI providers for WhoDB's chat assistant" --- # Setting Up AI Providers Before you can use WhoDB's AI Chat Assistant, you need to configure at least one AI provider. This guide walks you through setting up each supported provider and choosing the right model for your needs. ## Accessing the AI Configuration Navigate to the Chat page in WhoDB to access AI provider settings: The provider configuration is located at the top of the Chat interface with two dropdowns: 1. **AI Provider**: Select your provider (OpenAI, Anthropic, Gemini, Ollama, LM Studio, etc.) 2. **AI Model**: Choose the specific model to use Pick a provider and model before starting the query tutorials. The chat box becomes active once both are selected. ## Choosing Your AI Provider Different providers offer different trade-offs between accuracy, speed, cost, and privacy: **Best for**: Most users, general-purpose queries - Industry-leading accuracy - Fast response times - Pay-per-use pricing **Best for**: Complex reasoning, large contexts - Excellent with sophisticated queries - Very large context windows - Strong safety features **Best for**: Google Cloud users, general-purpose queries - Strong reasoning and SQL generation - Competitive pricing - Pay-per-use pricing **Best for**: Privacy, zero API costs - Complete data privacy - No internet required - Free to use **Best for**: Enterprise deployments - Self-hosted models - Organization-specific configurations - Complete control ## Setting Up OpenAI OpenAI provides GPT models that offer excellent SQL generation capabilities with fast response times. ### Prerequisites Before configuring OpenAI: 1. Create an OpenAI account at https://platform.openai.com/ 2. Add payment method to your account 3. Generate an API key from https://platform.openai.com/api-keys Keep your OpenAI API key secure. Never share it or commit it to version control ### Configuration Steps On the Chat page, click the AI Provider dropdown. Click **"Add a provider"** at the bottom of the dropdown menu. A sheet will slide in from the right side of the screen. In the Model Type dropdown, select **OpenAI**. The dropdown shows icons for each provider to help identify them quickly. Paste your OpenAI API key in the Token field. ```text Example API Key Format sk-proj-xxxxxxxxxxxxxxxxxxxxxxxxxxxxxxxxxxxxx ``` API keys starting with `sk-proj-` are project-specific keys recommended by OpenAI Click the **Submit** button to test the connection and save your configuration. WhoDB will: - Verify the API key is valid - Fetch available models - Save the configuration for future use Once configured, the AI Model dropdown populates with the models fetched live from your OpenAI account. Pick a model based on your accuracy, speed, and cost needs. ### Cost Considerations OpenAI charges based on tokens used. Costs vary by model, schema size, and conversation length. See [OpenAI's pricing page](https://openai.com/api/pricing/) for current rates and monitor usage in your OpenAI dashboard. ## Setting Up Anthropic (Claude) Anthropic's Claude models excel at complex reasoning and handle large database schemas exceptionally well. ### Prerequisites 1. Create an Anthropic account at https://console.anthropic.com/ 2. Add payment method 3. Generate an API key from the console ### Configuration Steps Click the AI Provider dropdown and select **"Add a provider"**. Choose **Anthropic** from the Model Type dropdown. Paste your Anthropic API key in the Token field. ```text Example API Key Format sk-ant-api03-xxxxxxxxxxxxxxxxxxxxxxxxxxxxx ``` Click Submit to verify and save the configuration. Available Claude models are fetched live from the Anthropic API and appear in the Model dropdown. See [Anthropic's pricing page](https://www.anthropic.com/pricing) for current models and rates. ### When to Use Claude Claude excels in these scenarios: - **Large Schemas**: Handles databases with hundreds of tables - **Complex Joins**: Better at understanding multi-table relationships - **Contextual Queries**: Superior at maintaining long conversation contexts - **Ambiguous Requests**: Better at asking clarifying questions ## Setting Up Google Gemini Gemini models offer strong SQL generation with competitive pricing. ### Prerequisites 1. Create a Google AI Studio account at https://aistudio.google.com/ 2. Generate an API key from the AI Studio console ### Configuration Steps Click the AI Provider dropdown and select **"Add a provider"**. Choose **Gemini** from the Model Type dropdown. Paste your Gemini API key in the Token field. Click Submit to verify and save the configuration. Available Gemini models are fetched live from the Gemini API and appear in the Model dropdown. See [Google's Gemini pricing page](https://ai.google.dev/pricing) for current models and rates. To route Gemini requests through a custom endpoint (e.g., a proxy), set the `WHODB_GEMINI_ENDPOINT` environment variable. ## Setting Up Ollama (Local Models) Ollama allows you to run AI models locally on your machine, providing complete privacy with zero API costs. ### Prerequisites Download and install Ollama from https://ollama.com **Supported Platforms**: - macOS (Apple Silicon and Intel) - Linux (x86_64, ARM64) - Windows (via WSL2) Open a terminal and download your preferred model: ```bash Popular Models # Recommended: Llama 3.1 (8B) ollama run llama3.1 # Alternative: CodeLlama (optimized for code) ollama run codellama # Alternative: Mistral (fast and efficient) ollama run mistral # Alternative: Llama 3.1 (70B - requires significant RAM) ollama run llama3.1:70b ``` The first `ollama run` command downloads the model (several GB). Subsequent runs use the cached model Check that Ollama is accessible: ```bash curl http://localhost:11434/api/tags ``` You should see a JSON response with available models. ### Configuring Ollama in WhoDB Navigate to the Chat page. Ollama is always listed in the AI Provider dropdown, whether or not it is currently running. Models only load when the Ollama service is reachable. Choose **Ollama** from the provider dropdown. No API key required—WhoDB connects to Ollama at localhost:11434 by default. If Ollama runs on a different host or port, set the `WHODB_OLLAMA_HOST` and `WHODB_OLLAMA_PORT` environment variables. Select your downloaded model from the AI Model dropdown. Available models are those you've downloaded via `ollama run`. ### Recommended Ollama Models for SQL | Model | Size | RAM Required | Best For | Download Command | |-------|------|-------------|----------|------------------| | Llama 3.1 (8B) | 4.7 GB | 8 GB | General use, good balance | `ollama run llama3.1` | | CodeLlama (7B) | 3.8 GB | 8 GB | Code/SQL generation | `ollama run codellama` | | Mistral (7B) | 4.1 GB | 8 GB | Fast responses | `ollama run mistral` | | Llama 3.1 (70B) | 40 GB | 64 GB | Maximum accuracy | `ollama run llama3.1:70b` | Start with Llama 3.1 (8B) for the best balance of performance and resource usage ### Ollama Performance Optimization **Minimum**: - CPU: 4 cores - RAM: 8 GB - Disk: 10 GB free **Recommended**: - CPU: 8+ cores - RAM: 16 GB+ - GPU: NVIDIA GPU with 8GB+ VRAM (optional but faster) - Disk: 50 GB free for multiple models Ollama automatically uses GPU if available: **NVIDIA GPU**: - Requires CUDA drivers - Dramatically faster inference - Supports larger models with less RAM **Apple Silicon (M1/M2/M3)**: - Native Metal acceleration - Excellent performance - No additional configuration needed Check GPU usage: ```bash ollama ps ``` Adjust model size based on your hardware: **If queries are slow**: - Use smaller models (7B instead of 70B) - Close other applications - Enable GPU acceleration - Consider using cloud providers for complex queries **If accuracy is poor**: - Upgrade to larger models (70B) - Provide more specific queries - Use cloud providers (OpenAI/Anthropic) for critical tasks ### Ollama Privacy Benefits Your database schema never leaves your machine Works in air-gapped or offline environments No API charges regardless of usage Choose models, control updates, customize behavior Ollama is ideal for regulated industries, sensitive data, or organizations requiring complete data sovereignty ## Setting Up LM Studio (Local Models) LM Studio is another local option with a desktop app for downloading and managing models. Download LM Studio from https://lmstudio.ai and load a model. Enable LM Studio's local server (default: `http://localhost:1234`). Like Ollama, LM Studio is always listed in the AI Provider dropdown. Select it and choose one of your loaded models. If LM Studio runs on a non-default endpoint, set `WHODB_LMSTUDIO_BASE_URL`. Use `WHODB_LMSTUDIO_API_KEY` if your server requires a key, and `WHODB_LMSTUDIO_NAME` to change the display name. ## Advanced Configuration ### Multiple Providers You can configure multiple AI providers and switch between them: Add OpenAI, Anthropic, and Ollama providers using the "Add a provider" option. Use the AI Provider dropdown to switch between configured providers at any time. **Strategy**: - Use a local model (Ollama, LM Studio) for exploration and learning - Use a fast, low-cost cloud model for quick production queries - Use your provider's most capable model for complex analytics This optimizes both cost and performance. ### Removing Providers On the Chat page, select a manually added provider and click the **Delete Provider** button. A confirmation dialog appears. Click **Delete** to remove the current provider configuration. This removes the API key and disconnects the provider. You'll need to reconfigure to use it again Providers configured by environment variables are managed through deployment configuration. Remove or change those providers by updating the deployment environment. As a security measure, a server-configured provider API key is never combined with a client-supplied endpoint — if a request overrides the endpoint, WhoDB uses the server-configured endpoint with the server key instead. ### Built-In Providers via Environment Variables You can preconfigure the built-in providers on the server so users don't need to enter API keys in the UI: | Variable | Description | |----------|-------------| | `WHODB_OPENAI_API_KEY` | OpenAI API key | | `WHODB_OPENAI_ENDPOINT` | Custom OpenAI-compatible endpoint (optional) | | `WHODB_OPENAI_NAME` | Display name override (optional) | | `WHODB_ANTHROPIC_API_KEY` | Anthropic API key | | `WHODB_ANTHROPIC_ENDPOINT` | Custom Anthropic endpoint (optional) | | `WHODB_ANTHROPIC_NAME` | Display name override (optional) | | `WHODB_GEMINI_ENDPOINT` | Custom Gemini endpoint (optional) | | `WHODB_OLLAMA_HOST` / `WHODB_OLLAMA_PORT` | Ollama host and port (default: localhost:11434) | | `WHODB_OLLAMA_NAME` | Display name override (optional) | | `WHODB_LMSTUDIO_BASE_URL` | LM Studio server URL (default: http://localhost:1234) | | `WHODB_LMSTUDIO_API_KEY` | LM Studio API key, if required (optional) | | `WHODB_LMSTUDIO_NAME` | Display name override (optional) | | `WHODB_BLOCK_INTERNAL_AI_ENDPOINTS` | Set to `true` to block AI requests to internal/private network endpoints (SSRF protection for hosted deployments) | ### Custom Providers via Environment Variables You can connect any OpenAI-compatible AI provider (LM Studio, OpenRouter, vLLM, etc.) using `WHODB_AI_GENERIC__*` environment variables. This is useful for Docker deployments, self-hosted models, or providers not built into the UI. Each provider needs a unique `` (e.g., `LMSTUDIO`, `OPENROUTER`) and up to six variables: | Variable | Required | Default | Description | |----------|----------|---------|-------------| | `WHODB_AI_GENERIC__NAME` | No | `` | Display name shown in the provider dropdown | | `WHODB_AI_GENERIC__TYPE` | No | `openai-generic` | Client type (leave default for OpenAI-compatible APIs) | | `WHODB_AI_GENERIC__BASE_URL` | Yes | | API base URL (e.g., `http://localhost:1234/v1`) | | `WHODB_AI_GENERIC__API_KEY` | No | | API key if required by the provider | | `WHODB_AI_GENERIC__MODELS` | Yes | | Comma-separated list of model names | | `WHODB_AI_GENERIC__ICON` | No | | URL of an icon to show in the provider dropdown | ```bash LM Studio (local) export WHODB_AI_GENERIC_LMSTUDIO_NAME="LM Studio" export WHODB_AI_GENERIC_LMSTUDIO_BASE_URL="http://localhost:1234/v1" export WHODB_AI_GENERIC_LMSTUDIO_MODELS="mistral-7b,llama-3-8b" ``` ```bash OpenRouter (cloud) export WHODB_AI_GENERIC_OPENROUTER_NAME="OpenRouter" export WHODB_AI_GENERIC_OPENROUTER_BASE_URL="https://openrouter.ai/api/v1" export WHODB_AI_GENERIC_OPENROUTER_API_KEY="your_key_here" export WHODB_AI_GENERIC_OPENROUTER_MODELS="google/gemini-2.0-flash-001,anthropic/claude-3.5-sonnet" ``` ```bash Requesty (cloud) export WHODB_AI_GENERIC_REQUESTY_NAME="Requesty" export WHODB_AI_GENERIC_REQUESTY_BASE_URL="https://router.requesty.ai/v1" export WHODB_AI_GENERIC_REQUESTY_API_KEY="your_key_here" export WHODB_AI_GENERIC_REQUESTY_MODELS="openai/gpt-4o-mini,anthropic/claude-3.5-sonnet" ``` ```yaml Docker Compose services: whodb: image: clidey/whodb:latest ports: - "8080:8080" environment: - WHODB_AI_GENERIC_LMSTUDIO_NAME=LM Studio - WHODB_AI_GENERIC_LMSTUDIO_BASE_URL=http://host.docker.internal:1234/v1 - WHODB_AI_GENERIC_LMSTUDIO_MODELS=mistral-7b,llama-3-8b ``` You can configure multiple generic providers at the same time — each `` creates a separate entry in the provider dropdown. The `BASE_URL` and `MODELS` variables are required; all others are optional. ## Provider Comparison Choose the right provider for your needs: | Feature | OpenAI | Anthropic | Ollama | |---------|--------|-----------|--------| | **Setup Complexity** | Easy | Easy | Moderate | | **Cost** | Pay per use | Pay per use | Free | | **Privacy** | External | External | Complete | | **Speed** | Fast | Medium | Varies | | **Accuracy** | Excellent | Excellent | Good | | **Internet Required** | Yes | Yes | No | | **Best For** | General use | Complex queries | Privacy/Cost | ## Troubleshooting **Symptom**: "Invalid API key" error when adding OpenAI provider **Solutions**: 1. Verify key is copied correctly (no extra spaces) 2. Check key hasn't been revoked in OpenAI dashboard 3. Ensure billing is set up on your OpenAI account 4. Try generating a new API key 5. Verify you're using a valid key format (starts with `sk-`) **Symptom**: Cannot connect to Anthropic after entering API key **Solutions**: 1. Verify API key from https://console.anthropic.com/ 2. Check your account has available credits 3. Ensure no network/firewall blocking claude.ai 4. Try a new API key 5. Check Anthropic service status **Symptom**: Ollama is selected but no models load or queries fail **Solutions**: 1. Verify Ollama is running: `curl http://localhost:11434/api/tags` 2. Restart Ollama service 3. Check Ollama is accessible on port 11434 (or set `WHODB_OLLAMA_HOST`/`WHODB_OLLAMA_PORT` for a custom endpoint) 4. Ensure no firewall blocking localhost connections 5. Verify at least one model is downloaded Test Ollama: ```bash ollama list # Shows downloaded models ollama ps # Shows running models ``` **Symptom**: Model dropdown is empty after adding provider **Solutions**: 1. Wait a few seconds for models to load 2. Refresh the page 3. Verify API key has proper permissions 4. Check provider dashboard for account status 5. Try removing and re-adding the provider For Ollama: ```bash ollama list # Verify models are downloaded ``` **Symptom**: Ollama queries take very long to respond **Solutions**: 1. Close resource-intensive applications 2. Use smaller models (7B instead of 70B) 3. Verify GPU acceleration is working: `ollama ps` 4. Increase system RAM allocation 5. Consider cloud providers for time-sensitive queries Check resource usage: ```bash # Monitor Ollama resource usage ollama ps top -p $(pgrep ollama) ``` **Symptom**: "Rate limit exceeded" from OpenAI or Anthropic **Solutions**: 1. Wait before retrying (limits reset after time window) 2. Upgrade your API plan for higher limits 3. Reduce query frequency 4. Check usage in provider dashboard 5. Consider switching to Ollama for unlimited queries ## Security Best Practices - Never share API keys publicly - Don't commit keys to git repositories - Use environment variables in production - Rotate keys regularly (every 90 days) - Monitor usage for unauthorized access **Highly Sensitive Data**: - Use Ollama exclusively - Never send to external providers **Moderately Sensitive Data**: - Review provider terms of service - Verify data handling policies - Consider data residency requirements **Public or Non-Sensitive Data**: - Any provider acceptable **OpenAI**: https://platform.openai.com/usage **Anthropic**: https://console.anthropic.com/settings/usage Set up billing alerts to prevent unexpected charges. When creating API keys: - Limit permissions to only what's needed - Create separate keys for development/production - Set spending limits where available - Enable key restrictions (IP allowlists, etc.) ## Next Steps Learn how to ask questions and retrieve data using your configured provider Step-by-step tutorial to get started with the AI assistant Master multi-turn conversations and context management Learn optimal patterns for using the AI assistant With your AI provider configured, you're ready to start querying your database using natural language --- ### Best Practices/Access Control --- title: Database Access Control description: Best practices for database access control, role-based access, read-only users, and security policies with WhoDB --- # Database Access Control Proper access control is fundamental to database security. This guide covers implementing role-based access, managing read-only users, establishing connection profiles, and enforcing security policies to protect your databases while enabling productive work. ## Access Control Fundamentals ### Principle of Least Privilege Grant users only the minimum permissions necessary to perform their job functions. **Least Privilege Benefits:** - Reduces blast radius of compromised credentials - Minimizes accidental data damage - Simplifies security audits - Improves compliance posture - Enables precise accountability tracking **Implementation Process:** 1. Document each user's actual job requirements 2. Grant read-only access initially 3. Expand permissions only when justified 4. Review periodically and remove unused access 5. Audit changes regularly **Dangerous Anti-Patterns:** - Sharing credentials between team members - Using administrative accounts for routine work - Granting broad permissions "just in case" - Not reviewing access after role changes - Maintaining access after team transitions ### Database User Categories Design your access control strategy around user categories. **Purpose**: Data exploration, reporting, analysis **Permissions**: - SELECT on specific schemas - View creation (read-only views) - Query execution only **Restrictions**: - No INSERT, UPDATE, DELETE - No DDL (CREATE, ALTER, DROP) - No administrative functions - Limited to development/reporting data **Example (PostgreSQL)**: ```sql CREATE ROLE analyst_readonly; GRANT CONNECT ON DATABASE analytics TO analyst_readonly; GRANT USAGE ON SCHEMA public TO analyst_readonly; GRANT SELECT ON ALL TABLES IN SCHEMA public TO analyst_readonly; ALTER DEFAULT PRIVILEGES IN SCHEMA public GRANT SELECT ON TABLES TO analyst_readonly; CREATE USER analyst_user WITH PASSWORD 'secure_password'; GRANT analyst_readonly TO analyst_user; ``` **Purpose**: Read and write application data in development/staging **Permissions**: - SELECT, INSERT, UPDATE on specific tables - View creation - Stored procedure execution - Limited schema modifications in dev only **Restrictions**: - No production write access - No administrative operations - No user management - No backup/restore operations **Example (PostgreSQL)**: ```sql CREATE ROLE developer_app; GRANT CONNECT ON DATABASE dev_db TO developer_app; GRANT USAGE ON SCHEMA public TO developer_app; GRANT SELECT, INSERT, UPDATE ON ALL TABLES IN SCHEMA public TO developer_app; GRANT EXECUTE ON ALL FUNCTIONS IN SCHEMA public TO developer_app; ``` **Purpose**: ETL operations, data transformations, pipeline management **Permissions**: - Full access to staging schemas - SELECT on source tables - Full access to transformation tables - Scheduled job execution - Read-only access to production source data **Restrictions**: - No direct production data modifications - No user management - No security configuration changes - No backup operations **Example (PostgreSQL)**: ```sql CREATE ROLE data_engineer; GRANT CONNECT ON DATABASE analytics TO data_engineer; GRANT USAGE ON SCHEMA public, staging TO data_engineer; GRANT SELECT ON ALL TABLES IN SCHEMA public TO data_engineer; GRANT ALL ON ALL TABLES IN SCHEMA staging TO data_engineer; GRANT EXECUTE ON ALL FUNCTIONS IN SCHEMA staging TO data_engineer; ``` **Purpose**: System administration, maintenance, emergency operations **Permissions**: - Full database access - User and role management - Backup and recovery operations - Configuration management - Performance tuning and monitoring **Restrictions**: - MFA required - Limited to administrative tasks only - Comprehensive audit logging mandatory - Change approval process required - Time-limited elevated sessions **Purpose**: Automated processes, scheduled jobs, application runtime **Permissions**: - Only necessary for application function - Environment-specific (dev, staging, prod) - Limited to required tables and operations **Restrictions**: - No interactive use - No shared with developers - Rotated regularly - Monitored for suspicious activity - No elevated privileges ## Role-Based Access Control (RBAC) ### Designing Your RBAC Schema Establish a systematic approach to managing roles and permissions. **RBAC Structure Example:** ``` Database: production ├── Organization Role │ ├── department_sales_read │ ├── department_marketing_read │ └── department_finance_read ├── Function Role │ ├── analyst_read │ ├── developer_app │ ├── engineer_etl │ └── admin_full └── Data Role ├── can_access_customer_pii ├── can_access_financial ├── can_access_internal_only └── can_modify_production ``` **Naming Conventions:** ``` Format: [environment]_[function]_[permission] Examples: - dev_analyst_read (development, analytics, read-only) - prod_app_readwrite (production, application, read+write) - staging_engineer_full (staging, data engineering, full access) - prod_admin_emergency (production, admin, emergency access) ``` ### Role Hierarchy Organize roles hierarchically to simplify administration. **Hierarchy Example:** ``` admin_full ├── developer_app │ ├── analyst_read │ └── user_basic ├── engineer_etl │ ├── analyst_read │ └── user_basic └── support_tier1 └── user_basic ``` **Benefits:** - Inheriting permissions reduces duplication - Changes to parent roles propagate automatically - Clear permission hierarchy understood by teams - Easier onboarding and offboarding ### Implementing RBAC **Step 1: Create roles** ```sql CREATE ROLE analyst_read; CREATE ROLE developer_app; CREATE ROLE engineer_etl; CREATE ROLE admin_full; ``` **Step 2: Define permissions** ```sql -- Read-only analyst role GRANT CONNECT ON DATABASE myapp TO analyst_read; GRANT USAGE ON SCHEMA public TO analyst_read; GRANT SELECT ON ALL TABLES IN SCHEMA public TO analyst_read; -- Developer role (inherits analyst permissions + write) GRANT analyst_read TO developer_app; GRANT INSERT, UPDATE ON ALL TABLES IN SCHEMA public TO developer_app; ``` **Step 3: Create users and assign roles** ```sql CREATE USER alice WITH PASSWORD 'secure_password'; GRANT analyst_read TO alice; CREATE USER bob WITH PASSWORD 'secure_password'; GRANT developer_app TO bob; ``` **Step 4: Set default permissions** ```sql ALTER DEFAULT PRIVILEGES IN SCHEMA public GRANT SELECT ON TABLES TO analyst_read; ALTER DEFAULT PRIVILEGES IN SCHEMA public GRANT SELECT, INSERT, UPDATE ON TABLES TO developer_app; ``` **Step 1: Create users with roles** ```sql CREATE USER 'analyst'@'%' IDENTIFIED BY 'secure_password'; CREATE USER 'developer'@'%' IDENTIFIED BY 'secure_password'; CREATE USER 'admin'@'%' IDENTIFIED BY 'secure_password'; ``` **Step 2: Grant role-based permissions** ```sql -- Analyst: read-only GRANT SELECT ON myapp.* TO 'analyst'@'%'; -- Developer: read and write GRANT SELECT, INSERT, UPDATE, DELETE ON myapp.* TO 'developer'@'%'; -- Admin: full access GRANT ALL PRIVILEGES ON myapp.* TO 'admin'@'%' WITH GRANT OPTION; ``` **Step 3: Apply changes** ```sql FLUSH PRIVILEGES; ``` **Step 4: Set default role** ```sql ALTER USER 'developer'@'%' DEFAULT ROLE 'developer_app'; ``` **Step 1: Create roles with specific privileges** ```javascript db.createRole({ role: "analyst_readonly", privileges: [ { resource: { db: "analytics", collection: "" }, actions: ["find", "listCollections"] } ], roles: [] }) ``` **Step 2: Create users with role assignment** ```javascript db.createUser({ user: "analyst_user", pwd: "secure_password", roles: [ { role: "analyst_readonly", db: "analytics" } ] }) ``` **Step 3: Verify role permissions** ```javascript db.getRole("analyst_readonly", { showPrivileges: true }) ``` ## Read-Only Access Management ### Creating Safe Read-Only Users Read-only users are essential for non-destructive database access. **Read-Only User Best Practices:** - Use for analysts, consultants, auditors - Default to read-only, expand only when justified - Combine with IP restrictions and time-based limits - Monitor for suspicious activity patterns - Rotate credentials regularly ### Read-Only Verification Verify that read-only access truly prevents modifications. Some database configurations can accidentally grant write access through views or functions. **Verification Queries:** ```sql -- PostgreSQL: Verify user has no write permissions SELECT grantee, privilege_type FROM information_schema.role_table_grants WHERE table_name='your_table' AND grantee='analyst_user'; -- Should return: SELECT only, not INSERT, UPDATE, DELETE ``` ```sql -- MySQL: Check user privileges SHOW GRANTS FOR 'analyst_user'@'%'; -- Verify only SELECT is granted ``` ```javascript -- MongoDB: List user roles and privileges db.getUser("analyst_user") // Verify role contains only read actions ``` ### View-Based Read-Only Access Use views to provide controlled, read-only access to specific data. **Sensitive Data Masking View:** ```sql -- Hide sensitive columns for read-only users CREATE VIEW customers_redacted AS SELECT id, name, city, country, '***' as email, -- Mask email '***' as phone, -- Mask phone FALSE as is_premium -- Hide business logic FROM customers; -- Grant read-only access to view only GRANT SELECT ON customers_redacted TO analyst_readonly; ``` **Time-Series Data View:** ```sql -- Provide read-only access to recent data only CREATE VIEW recent_transactions AS SELECT * FROM transactions WHERE created_at >= NOW() - INTERVAL '90 days'; -- Grant access to view, not underlying table GRANT SELECT ON recent_transactions TO analyst_readonly; REVOKE SELECT ON transactions FROM analyst_readonly; ``` ## Connection Profile Management ### Establishing Connection Profiles WhoDB connection profiles securely store database credentials and settings. **Connection Profile Best Practices:** - Use environment-specific profiles (dev, staging, prod) - Never hardcode credentials in configuration files - Rotate credentials regularly - Use least privilege database users - Enable SSL/TLS for all connections - Document connection purpose and usage ### Organizing Connection Profiles Use consistent naming for easy identification: Format: `[environment]-[database-type]-[region]-[purpose]` Examples: - `dev-postgres-us-east-analytics` - `prod-mysql-us-west-app` - `staging-postgres-eu-reporting` - `dev-mongodb-local-testing` Keep profiles organized by environment: ``` Development ├── dev-postgres-local ├── dev-mysql-docker └── dev-mongodb-local Staging ├── staging-postgres-rds ├── staging-mysql-rds └── staging-mongodb-atlas Production ├── prod-postgres-primary ├── prod-postgres-replica ├── prod-mysql-primary └── prod-mongodb-cluster ``` Use unambiguous profile names to prevent accidental production operations: - Prefix names with the environment: `prod-`, `staging-`, `dev-` - Include the access level where relevant: `prod-postgres-readonly` - Always verify the profile name before executing modifications - Train the team on the naming convention Configure security parameters in each profile: ``` Host: db.example.com Port: 5432 Database: myapp Username: app_user SSL Mode: require (or verify-full) Timeout: 30 seconds Pool Size: 10 Notes: - Uses IAM authentication with assumed role - Read replica: only for reporting queries - Backup location: us-east-1a - VPN required: Yes ``` ### Credential Rotation Regular credential rotation is essential for security. Credentials should be rotated at least quarterly, immediately after employee departure, and after any suspected breach. **Credential Rotation Process:** ``` Step 1: Prepare new credentials ├── Generate new password (16+ chars, mixed case, symbols) ├── Test in development environment first └── Verify old credentials still work (for rollback) Step 2: Update database ├── Create new user with same permissions ├── Verify new user can connect └── Keep old user active temporarily Step 3: Update applications ├── Update connection string in WhoDB ├── Verify all services connect successfully ├── Monitor logs for connection errors Step 4: Verify and cleanup ├── Confirm all services use new credentials ├── Run security audit ├── Remove old credentials └── Document rotation date and approver ``` **Rotation Schedule:** ``` Production Databases: Quarterly + immediate after separation Staging Databases: Semi-annually + after breach suspicion Development Databases: Annually + after onboarding Service Accounts: Quarterly + after vulnerability scan ``` ## Security Policies ### Data Classification Classify data by sensitivity to guide access control decisions. **Data Classification Levels:** | Level | Examples | Access | Encryption | Auditing | |-------|----------|--------|------------|----------| | **Public** | Product catalog, public documentation | Everyone | Optional | Optional | | **Internal** | Sales reports, team info | Employees | Recommended | Recommended | | **Sensitive** | Customer data, health records | Department specific | Required | Required | | **Restricted** | Passwords, API keys, PII | Minimal, need-based | Required | Required | **Classification Process:** 1. Audit all tables and columns 2. Document sensitivity level 3. Define access restrictions 4. Implement technical controls 5. Review and update annually **Example Classification:** ``` Table: users ├── id: PUBLIC ├── name: INTERNAL ├── email: SENSITIVE (PII) ├── password_hash: RESTRICTED └── ssn: RESTRICTED (highly sensitive) ``` ### Implementing Access Policies Restrict access to sensitive columns: ```sql -- PostgreSQL: Create role without access to sensitive columns CREATE ROLE analyst_no_pii; GRANT SELECT (id, name, city, country) ON customers TO analyst_no_pii; -- Not SELECT *, only specified columns -- Excludes email, phone, ssn ``` PostgreSQL Row-Level Security (RLS): ```sql -- Enable RLS on table ALTER TABLE customers ENABLE ROW LEVEL SECURITY; -- Analysts can only see customers in their region CREATE POLICY analyst_access_by_region ON customers FOR SELECT USING (region = current_setting('app.user_region')); -- Set user's region SET app.user_region = 'NORTH_AMERICA'; ``` Restrict access by time: ```sql -- PostgreSQL: Create role valid only during business hours CREATE ROLE developer_business_hours; -- Check access time before granting connection CREATE OR REPLACE FUNCTION check_business_hours() RETURNS BOOLEAN AS $$ BEGIN RETURN EXTRACT(HOUR FROM CURRENT_TIME) BETWEEN 9 AND 18 AND EXTRACT(DOW FROM CURRENT_DATE) BETWEEN 1 AND 5; END; $$ LANGUAGE plpgsql; ``` Restrict connections by IP: ``` Connection Profile: prod-postgres-primary ├── Host: db.prod.example.com ├── Allowed IPs: │ ├── 10.0.1.0/24 (office network) │ ├── 10.0.2.0/24 (VPN network) │ └── 203.0.113.45/32 (admin home) └── Blocked IPs: 0.0.0.0/0 (deny all by default) ``` ### Audit Logging Enable comprehensive audit logging for all database access. Audit logs are critical for security investigations, compliance audits, and incident response. **What to Log:** - User login/logout events - Query execution (SELECT, INSERT, UPDATE, DELETE) - Schema modifications - Security policy changes - Failed authentication attempts - Administrative operations **PostgreSQL Audit Configuration:** ```sql -- Install pgAudit extension CREATE EXTENSION pgaudit; -- Log all write operations ALTER SYSTEM SET pgaudit.log = 'write, ddl'; -- Log which tables accessed ALTER SYSTEM SET pgaudit.log_relation = on; -- Log statement details ALTER SYSTEM SET pgaudit.log_statement = off; ALTER SYSTEM SET pgaudit.log_statement_once = off; -- Reload configuration SELECT pg_reload_conf(); ``` **Audit Log Review Process:** ``` Daily: - Check for failed authentication attempts - Review administrative operations - Monitor unusual access patterns Weekly: - Analyze access by user and role - Identify overprivileged accounts - Review data exports Monthly: - Comprehensive access review - Compliance verification - Detection of suspicious patterns Quarterly: - Formal access audit - Recertification of access - Policy effectiveness review ``` ## Managing Access Lifecycle ### User Onboarding - [ ] Database account created - [ ] Appropriate role assigned - [ ] Temporary password issued securely - [ ] Connection profile provided - [ ] Security policy overview provided - [ ] WhoDB access granted - [ ] User confirmed connection works - [ ] Permissions verified correct - [ ] Training completed on security policies - [ ] First queries documented - [ ] Questions answered - [ ] Permissions still appropriate for role - [ ] Access usage review - [ ] Feedback on onboarding process - [ ] Additional training needs identified - [ ] Permanent password set ### Access Reviews **Process:** 1. Generate user list with assigned roles 2. Send to department managers for verification 3. Collect feedback on access appropriateness 4. Identify and remove unnecessary access 5. Document review and approvals 6. Archive for compliance **Template:** ``` User: alice@example.com Current Role: analyst_readonly Department: Sales Manager: Bob Johnson Questions: - Does this user still need database access? YES / NO - Is the role appropriate? YES / NO / NEEDS_UPGRADE / NEEDS_DOWNGRADE - Any concerns? ___________________ Recommendation: APPROVE / REVOKE / MODIFY ``` When user changes roles: - [ ] Remove old role permissions - [ ] Document date of change - [ ] Assign new role permissions - [ ] Verify appropriate access - [ ] Document business justification - [ ] Notify security team Inactive accounts should be disabled: ``` Audit Query (PostgreSQL): SELECT usename, valuntil, last_login FROM pg_user LEFT JOIN pg_stat_user_tables ON 1=1 WHERE last_login < NOW() - INTERVAL '90 days' OR last_login IS NULL; Action: - Disable account after 90 days inactivity - Archive after 1 year - Delete after 2 years (per retention policy) ``` ### User Offboarding Prompt offboarding is critical when employees leave. Delayed credential removal represents a significant security risk. **Offboarding Checklist:** ``` Effective Date: [departure date] Employee: [name] Immediate (Day 0): [ ] Disable database user account [ ] Revoke all role memberships [ ] Disable SSH keys if applicable [ ] Remove VPN access [ ] Notify security team Within 24 Hours: [ ] Confirm account is disabled [ ] Check for running queries/sessions [ ] Audit recent query history [ ] Document access used over final period Within 7 Days: [ ] Archive credentials securely [ ] Document any outstanding work [ ] Transfer owned queries to team [ ] Update access documentation [ ] File security incident if needed ``` ## Access Control Checklist **Initial Setup:** - [ ] Database roles defined for each user type - [ ] Least privilege principle implemented - [ ] Read-only users created for analysts - [ ] Connection profiles configured securely - [ ] SSL/TLS enabled for all connections **Role Management:** - [ ] RBAC hierarchy established - [ ] Default permissions set - [ ] New table permissions automated - [ ] Role documentation complete - [ ] Service accounts use least privilege **Security Policies:** - [ ] Data classified by sensitivity - [ ] Column-level security implemented - [ ] Row-level security configured - [ ] IP restrictions enforced - [ ] Audit logging enabled **Ongoing Maintenance:** - [ ] Quarterly access reviews scheduled - [ ] Credential rotation calendar maintained - [ ] Dormant accounts identified monthly - [ ] Audit logs reviewed regularly - [ ] Policy violations investigated **Incident Response:** - [ ] Breach response procedures documented - [ ] Escalation path defined - [ ] Audit log preservation process established - [ ] Forensic analysis capabilities in place - [ ] Communication template prepared ## Summary Robust access control requires careful planning, consistent implementation, and ongoing maintenance. Use database roles, dedicated credentials, network controls, and database-native audit logs to protect your data while keeping WhoDB useful for daily inspection and query workflows. Access control is not a one-time setup; review it as team members, environments, and threats change. --- ### Best Practices/Ai Usage --- title: AI Chat Assistant Best Practices description: Comprehensive guidance for optimal and safe use of WhoDB's AI Chat Assistant --- # AI Chat Assistant Best Practices The AI Chat Assistant transforms database interaction from technical SQL writing to natural conversation. This guide is the canonical reference for using the AI assistant effectively, safely, and efficiently in production environments. Effective AI assistant usage combines clear communication, security awareness, and strategic provider selection ## Understanding AI-Powered Database Interaction The AI Chat Assistant is fundamentally different from traditional database tools. Rather than writing SQL directly, you describe what you want in natural language, and the AI generates appropriate queries based on your database schema. ### How AI Assistants Work The AI assistant analyzes your complete database schema, including tables, columns, data types, and relationships. Your question is processed to understand intent, entities, conditions, and desired operations. Based on schema and intent, the AI generates database-specific SQL optimized for your database type. WhoDB executes the query and presents results, which become part of conversation context. ### Key Differences from Traditional SQL | Aspect | Traditional SQL | AI Assistant | |--------|----------------|-------------| | **Input Method** | Write exact syntax | Describe desired outcome | | **Schema Knowledge** | Must memorize or reference | Automatically aware | | **Error Handling** | Syntax errors require fixes | Rephrase in natural language | | **Learning Curve** | Steep for beginners | Accessible immediately | | **Precision** | Exact control | Interpretation required | | **Speed** | Fast for experts | Fast for everyone | ## Query Formulation Best Practices Effective communication with the AI assistant follows specific patterns that produce accurate, efficient results. ### Be Specific and Explicit Vague questions produce unreliable results. Specificity ensures the AI understands your exact intent. **Good Examples:** ```text Show me all records from the users table Count orders in the orders table Display products from the inventory.products table ``` **Avoid:** ```text Show me the data Get everything ``` When table names might be ambiguous, include schema names: `test_schema.users` **Good Examples:** ```text Show user_id, email, and created_at from users Display product names and prices ``` **Avoid:** ```text Show some user information Get order stuff ``` Explicit column names help the AI generate precise SELECT statements. **Good Examples:** ```text Show orders from the last 7 days Display users created after 2024-01-01 ``` **Avoid:** ```text Show recent orders Find old logs ``` Use specific dates or clear relative ranges (last 7 days, this month, last year). **Good Examples:** ```text Show users where status is active and email_verified is true Find products where price is greater than 100 and stock is less than 10 ``` **Avoid:** ```text Show active users Find expensive products ``` Explicitly state field names, comparison operators, and values. ### Provide Context Context helps the AI understand your intent and generate more accurate queries. **Include Business Context:** ```text Show revenue by product category for the last quarter (for quarterly report) Find users who haven't logged in for 90 days (for cleanup campaign) ``` **Mention Expected Results:** ```text Show all orders (expecting about 1000 records) Count active subscriptions (should be around 500) ``` Expected results help you quickly identify when queries return unexpected data. ### Use Proper Database Terminology Use terminology appropriate to your database type: tables, rows, columns, JOINs, and WHERE clauses for SQL databases; collections, documents, fields, and aggregation pipelines for MongoDB; keys, values, sets, and hashes for Redis. **SQL Example:** ```text Join the orders table with customers table on customer_id and show customer names with their order totals ``` **MongoDB Example:** ```text Aggregate users collection grouped by email domain with count ``` ### Start Simple, Then Refine Build complex queries through iterative refinement rather than trying to get everything perfect in one question: ```text 1. Show me all orders 2. Just orders from the last 30 days 3. Group those by customer 4. Show total order value for each customer 5. Sort by total value descending ``` The AI understands each question refines the previous one. This iterative approach is faster and more reliable than trying to construct complex queries in a single request. ## Safety and Security Best Practices Using AI assistants safely requires understanding what data is shared, potential risks, and protective measures. ### Understand Data Sharing Different AI providers have different data handling policies. Your database schema structure and query text are sent to AI providers. However, actual data values and query results are not transmitted. **What Gets Sent to AI Providers:** - Your natural language questions - Database table names and schemas - Column names and data types - Database type (PostgreSQL, MySQL, etc.) - Previous conversation context **What Does NOT Get Sent:** - Actual row data from your database - Query result contents - Stored data values - Connection credentials **For Maximum Privacy:** - Use local models (Ollama, LM Studio) for complete data isolation - Avoid mentioning sensitive values in questions - Use generic terms instead of revealing schema names ### Verify Before Modifying Data Always review and verify before confirming data modification operations. Before clicking Confirm on any INSERT, UPDATE, DELETE, CREATE, ALTER, or DROP operation, click **Show Query** and check: - [ ] Correct table is targeted - [ ] WHERE clause is present and accurate - [ ] Values are correct and properly formatted - [ ] No unintended side effects Always verify which records will be affected before modifying them. **Step 1 - Verify:** ```text Show me all users where last_login is before 2020-01-01 ``` Review the results carefully. Count the records. Verify these are the records you want to modify. **Step 2 - Modify:** ```text Delete all users where last_login is before 2020-01-01 ``` This two-step approach prevents accidental data loss. For critical operations, test the query in a development environment before running in production: 1. Connect to development database 2. Ask the AI assistant to generate the query 3. Review the generated SQL, execute, and verify results 4. Copy the verified SQL to production (via Scratchpad) 5. Execute in production during an appropriate window ### Use Read-Only Users When Possible For data exploration and analysis tasks, connect with read-only database credentials. **PostgreSQL Read-Only User:** ```sql CREATE ROLE readonly_user WITH LOGIN PASSWORD 'secure_password'; GRANT CONNECT ON DATABASE mydb TO readonly_user; GRANT USAGE ON SCHEMA public TO readonly_user; GRANT SELECT ON ALL TABLES IN SCHEMA public TO readonly_user; ALTER DEFAULT PRIVILEGES IN SCHEMA public GRANT SELECT ON TABLES TO readonly_user; ``` **MySQL Read-Only User:** ```sql CREATE USER 'readonly_user'@'%' IDENTIFIED BY 'secure_password'; GRANT SELECT ON mydb.* TO 'readonly_user'@'%'; FLUSH PRIVILEGES; ``` Confirmation prompts are triggered by the SQL operation type, not by database permissions. With a read-only user you still see the confirmation for a modification request; the database rejects the statement if you confirm it. Use read-only credentials for most of your database work. Only use write credentials when actually modifying data. ### Backup Before Bulk Operations Before executing bulk modifications, ensure a recent, tested backup exists that includes all affected tables, and that the restoration procedure is documented. **Quick Backup Commands:** PostgreSQL: ```bash pg_dump -h localhost -U username -d database -t table_name > backup_$(date +%Y%m%d_%H%M%S).sql ``` MySQL: ```bash mysqldump -h localhost -u username -p database table_name > backup_$(date +%Y%m%d_%H%M%S).sql ``` ### Review Generated SQL The AI assistant shows generated SQL before execution. Use this visibility to verify correctness: - **SELECT**: correct tables, appropriate JOIN conditions, WHERE filters match intent, no expensive functions on large tables - **UPDATE**: WHERE clause present and correct, SET values appropriate - **DELETE**: WHERE clause present (unless intentionally deleting all), correct table, backup exists - **INSERT**: all required columns included, values match column data types ## Provider Selection Strategy Choosing the right AI provider for each situation optimizes cost, performance, privacy, and accuracy. ### When to Use Each Provider Model lists are fetched live from each provider when you add it, so pick from your provider's current lineup. For current model options and rates, check your provider's pricing page. **Best For:** - General-purpose queries across all database types - Fast response requirements - Users without local AI infrastructure **Cost Optimization:** - Use a smaller, cheaper model for simple queries - Reserve the most capable model for complex multi-table operations - See [OpenAI's pricing page](https://openai.com/api/pricing/) for current rates **Best For:** - Complex analytical queries - Large database schemas (100+ tables) - Long conversation contexts - Sophisticated reasoning requirements **Model Selection:** Choose from the models fetched from the Anthropic API — smaller models for speed and cost, larger models for the most complex scenarios. See [Anthropic's pricing page](https://www.anthropic.com/pricing) for current models and rates. **Best For:** - Google Cloud users - General-purpose queries with competitive pricing **Model Selection:** Choose from the models fetched from the Gemini API. See [Google's Gemini pricing page](https://ai.google.dev/pricing) for current models and rates. **Best For:** - Privacy-sensitive environments and regulated industries - Air-gapped or offline deployments - Unlimited usage without API costs **Model Selection:** Use whatever models you have downloaded locally. Larger models are more accurate but need more RAM; smaller models respond faster on modest hardware. **Trade-offs:** - Typically slower than cloud providers - Smaller local models may be less accurate than the top cloud models - Complete privacy and zero ongoing costs ### Cost Optimization Strategies Your provider's smaller models handle simple queries well at a fraction of the cost Long conversations consume more tokens. Start fresh when switching topics Shorter questions and responses reduce token usage and costs Local models (Ollama, LM Studio) eliminate per-query costs for high-volume usage Per-token pricing changes frequently — compare current rates on your providers' pricing pages rather than relying on fixed estimates. ### Privacy Considerations Choose providers based on data sensitivity and organizational policies. **Highly Sensitive** (PHI, financial records, trade secrets, PII): use local models exclusively. **Moderately Sensitive** (internal business data, non-PII customer information): review provider terms of service, consider local models or ensure provider compliance. **Public or Non-Sensitive** (public datasets, demonstration databases): any provider acceptable. Consult your information security, data governance, legal/compliance, and privacy teams. Verify alignment with data residency requirements, third-party data processing policies, and regulations such as GDPR, HIPAA, and PCI DSS. For external providers: document approved use cases, train users on privacy boundaries, and establish escalation procedures. For local models: document installation and configuration, maintain model versions, and plan capacity for user growth. Schema names and table names are sent to external AI providers. Avoid using sensitive or revealing names if privacy is critical. ## Performance Optimization Optimize AI assistant performance through efficient query patterns and conversation management. ### Efficient Query Patterns Request aggregated data rather than retrieving all rows. **Efficient:** ```text Count users by email domain Show average order value by month ``` **Inefficient:** ```text Show me all users (then manually count by domain) ``` Let the database perform aggregations rather than retrieving large datasets. Request only necessary data for large tables. **Efficient:** ```text Show top 100 users by registration date Display 50 most recent orders ``` **Inefficient:** ```text Show me all users (millions of rows) ``` Use LIMIT clauses for exploratory queries on large tables. Structure queries to leverage existing indexes. **Index-Friendly:** ```text Find users where user_id equals 12345 Show orders where order_date is 2024-01-15 ``` **Index-Inefficient:** ```text Find users where email contains gmail Show orders where YEAR(order_date) equals 2024 ``` Ask about indexed columns: "What indexes exist on the orders table?" Ensure JOINs have proper conditions. **Efficient:** ```text Join orders with customers on customer_id and show customer names with order totals ``` The AI generally avoids this, but verify JOIN conditions in the generated SQL. ### Managing Conversation Context Long conversations accumulate context that slows response times and increases costs. Short conversations (1-10 messages) are fastest and cheapest; conversations beyond 30-50 messages become noticeably slower and more expensive. **When to Start New Conversations:** When switching to a completely different database area or analysis focus, click "New Chat" and start fresh. When queries take noticeably longer to respond, save important queries to Scratchpad, then start a new chat. When the AI references incorrect previous context or misunderstands follow-up questions, start a new conversation with clear, explicit questions. Every model has a context limit, and quality degrades as you approach it. Limits vary widely by model — check your provider's documentation, and start fresh proactively. Move important queries to Scratchpad before starting a new chat "Show top 10" instead of "Can you please show me the top 10 results" ## Collaboration and Documentation Preserve valuable queries and build shared knowledge with a lightweight process. When a query is worth reusing — regular reports, complex analysis you'll repeat, or queries that revealed useful insights — hover over the result, click the ellipsis (...) button, and select **Move to Scratchpad**. Choose or create an appropriately named page, then add a comment explaining what the query does, when to use it, and any caveats. Organize Scratchpad pages by purpose (reporting, analysis templates, data quality checks, maintenance) so queries are easy to find later. For team sharing, copy important SQL into your normal shared docs, runbooks, or repository. Finally, well-documented schemas help the AI generate more accurate queries. Add database-level comments to tables and non-obvious columns: ```sql COMMENT ON TABLE users IS 'Customer user accounts with authentication'; COMMENT ON COLUMN users.last_login IS 'UTC timestamp of most recent successful login'; ``` ## Error Handling and Recovery Understand common mistakes and recovery strategies. ### Common Mistakes to Avoid **Mistake:** Executing a bulk DELETE directly in production without verification. **Prevention:** 1. Test in development database first 2. Use SELECT to verify before DELETE 3. Ensure backup exists **Recovery:** If executed accidentally, restore from the most recent backup. **Mistake:** "Update all users to set role to admin" — no WHERE clause, so all records are affected. **Prevention:** - Always specify which records to modify - Review the confirmation prompt carefully before confirming - Use SELECT first to verify target records **Recovery:** If a backup exists, restore the affected table. Otherwise, manually identify and correct affected records. **Mistake:** "Show me the data" — too vague, the AI must guess intent. **Better:** ```text Show user_id, email, and created_at from users table where created_at is in the last 7 days ``` **Mistake:** Clicking Confirm without reviewing the SQL in the confirmation prompt. **Prevention:** Always read the generated SQL before confirming. Verify table names, WHERE clauses, and values. Cancel and rephrase if anything looks wrong. **Mistake:** Continuing conversations for 50+ messages, assuming the AI remembers early context accurately. **Prevention:** Start new conversations when switching topics, be explicit in follow-up questions, and watch for signs of context confusion. ### Troubleshooting Approach When queries don't work as expected, follow a systematic troubleshooting process. What did you ask for? What did you actually receive? What error message appeared? Does the generated SQL match your intent? Open the result's ellipsis (...) menu and select **Show Code** to see the generated SQL. Check table and column names, WHERE conditions, JOIN conditions, and aggregations against your intent. If the query is complex, break it into smaller parts: ```text 1. Show me all orders from the last quarter 2. Now filter those to only California customers 3. Join with products to get categories 4. Calculate total revenue by category and month ``` Incremental refinement is more reliable than complex single questions. Ensure the data you're querying actually exists and names match your schema: ```text Count records in the users table Show me a sample of 5 records from orders What columns exist in the products table ``` Empty result sets might indicate an empty table, overly restrictive filters, a wrong table, or data in a different schema. If the AI misunderstood, rephrase with more explicit details: **Vague:** "Show user data" **Explicit:** "Show user_id, email, first_name, last_name, and created_at from the users table for all active users" ### Recovery Strategies For incorrect UPDATE operations, run a compensating query to restore values For significant data loss, restore affected tables from a recent backup If using Scratchpad with transactions, ROLLBACK before COMMIT For small-scale errors, manually correct affected records ## Production Environment Guidelines Using AI assistants in production requires additional discipline and procedures. ### Testing Queries Never execute untested queries directly in production. Connect to a development or staging database first. Generate and test queries in the non-production environment. Execute the generated query and verify it returns expected data, performance is acceptable, and there are no unintended side effects. Assess how many rows will be affected, whether this locks tables, and what the rollback plan is. Copy the verified SQL from Scratchpad, execute during an appropriate window, monitor execution, and verify results immediately. ### Change Management Follow established change management procedures for data modifications. **Pre-Change Checklist:** - [ ] Change request documented and approved - [ ] Testing completed in non-production - [ ] Backup verified and accessible - [ ] Rollback procedure documented - [ ] Team members notified **During and After:** - [ ] Execute during scheduled window and monitor progress - [ ] Verify results match expectations - [ ] Update documentation and notify stakeholders ### Audit Requirements Maintain audit trails for compliance and troubleshooting. **Audit Logging in WhoDB Community Edition:** Use database-level audit logging to record executed queries. Per-query audit trails with user attribution are available in the Enterprise Edition. **Additional Audit Measures:** - Enable database-level query logging - Review audit logs regularly and retain them per compliance requirements - Consider regulatory obligations: GDPR (personal data access), HIPAA (PHI access), SOX (financial data), PCI DSS (cardholder data) ## Learning and Improvement The AI assistant is also an effective SQL tutor. Ask it to explain generated queries ("Why did you use LEFT JOIN instead of INNER JOIN?"), request alternative approaches ("Is there a more efficient way to write this query?"), and explore features in context ("How do window functions work in PostgreSQL?"). Build skills progressively: start with simple SELECT queries, then add WHERE conditions, aggregations, JOINs, and eventually subqueries and window functions. Study the SQL the AI generates — its JOIN structure, aliasing, and date-filtering patterns — rather than using queries blindly. Comparing AI-generated SQL against queries you write manually in Scratchpad is a fast way to discover techniques you might not have considered. ## Next Steps Review AI Chat Assistant capabilities and features Configure OpenAI, Anthropic, Gemini, Ollama, or LM Studio for your needs Learn effective techniques for data retrieval Understand safe data modification with AI assistance Master multi-turn conversations and context management Comprehensive security practices for database management Combine AI assistance with human judgment for optimal database management—the AI generates queries efficiently, and you verify they're correct before execution --- ### Best Practices/Collaboration --- title: Team Collaboration description: Practical patterns for using WhoDB as a team - shared deployments, per-user database accounts, version-controlled queries, and data exports --- # Team Collaboration In WhoDB, collaboration happens through a shared deployment, database-side access control, version control for SQL, and exports. This guide covers the patterns that work. ## Run One Shared Deployment Deploy a single WhoDB instance for the team instead of everyone running their own copy. Everyone gets the same version, the same connection profiles, and one place to secure and monitor. Define the team's connections as environment-defined profiles on the deployment so they appear on the login page for everyone: ```bash export WHODB_POSTGRES_1='{"alias":"staging","host":"staging-db.internal","user":"whodb_readonly","database":"myapp","port":"5432","password":"..."}' ``` This keeps connection details in deployment config (one source of truth) rather than in chat messages and wikis. See the [Team Setup Guide](/guides/team-setup) for full deployment instructions and [Database Connectivity](/features/database-connectivity) for the profile format. ## Use Per-User Database Accounts Access control in WhoDB is the database's access control. Give each person their own database account scoped to what they actually need, rather than sharing one credential: ```sql -- PostgreSQL: read-only account for an analyst CREATE USER analyst_jane WITH PASSWORD 'unique_strong_password'; GRANT CONNECT ON DATABASE myapp TO analyst_jane; GRANT USAGE ON SCHEMA public TO analyst_jane; GRANT SELECT ON ALL TABLES IN SCHEMA public TO analyst_jane; ``` Why per-user accounts matter for collaboration: - **Least privilege**: analysts get `SELECT`, developers get read-write on dev, only operators get production write access - **Attribution**: database-native audit and statement logs show who ran what - **Clean offboarding**: disable one account instead of rotating a shared password See [Access Control](/best-practices/access-control) for detailed role setups. ## Share Queries Through Version Control WhoDB's [Scratchpad](/query/scratchpad-intro) state is stored per-browser — pages and cells are not visible to teammates. Use Scratchpad to build and test queries, then share the SQL itself through your normal channels: 1. **Develop** the query in Scratchpad against a development or staging database 2. **Document** it with a short header comment (purpose, dependencies, expected runtime) 3. **Review** it in a pull request like any other code — especially `UPDATE`/`DELETE` statements and anything touching production 4. **Store** it in a shared repository: ``` queries/ ├── analytics/ │ └── daily_sales_summary.sql ├── reporting/ │ └── customer_invoices.sql └── operational/ └── health_checks.sql ``` Anyone who needs the query pastes it back into their own Scratchpad. Cell history in Scratchpad helps you recover your own recent SQL, but the repository is the team's memory. Treat destructive queries like code changes: peer review before they run against production, and keep the reviewed version in the repository so the next person doesn't rewrite it from scratch. ## Share Data Through Exports For sharing results rather than queries, use WhoDB's [export options](/advanced/export-options): - **CSV or Excel** from the data grid or query results — attach to tickets, drop into Slack, or feed into spreadsheets - **JSON Lines** for records from sources like MongoDB, where supported - Apply filters before exporting so the snapshot contains only what the discussion needs When you share an export, include the SQL that produced it and when it was run — a CSV without provenance goes stale silently. ## Collaboration Checklist - [ ] One shared WhoDB deployment, secured per the [Team Setup Guide](/guides/team-setup) - [ ] Connections defined as environment profiles, secrets in a password manager - [ ] Per-user database accounts with least-privilege grants - [ ] Team query repository in version control, with review for destructive SQL - [ ] Exports shared with the query and timestamp that produced them - [ ] Accounts disabled and shared credentials rotated when someone leaves ## Summary Use WhoDB for inspection, querying, and repeatable exports; use database accounts for access control; and use your normal source control and review practices for long-lived team knowledge. The Scratchpad is each person's workbench — version control is the team's shared surface. --- ### Best Practices/Data Management --- title: Data Management Best Practices description: Safe and effective data management techniques for WhoDB users --- # Data Management Best Practices Effective data management balances operational efficiency with data safety. This guide covers essential practices for managing data safely and effectively using WhoDB, from routine operations to complex data transformations. ## Data Safety Principles ### Always Backup Before Changes The most important rule of data management is simple: always have a backup before making changes. **Types of Changes Requiring Backups:** - Bulk updates or deletes - Schema modifications - Data migrations - Testing new queries on production data - Running unfamiliar scripts - Major application updates **Backup Strategies:** - Full database backup for major changes - Table-level backup for isolated changes - Row-level backup for small, targeted changes - Transaction savepoints for multi-step operations **Creating Backups:** PostgreSQL: ```bash # Full database backup pg_dump -h localhost -U username -d database_name > backup_$(date +%Y%m%d_%H%M%S).sql # Single table backup pg_dump -h localhost -U username -d database_name -t table_name > table_backup.sql # Compressed backup pg_dump -h localhost -U username -d database_name | gzip > backup.sql.gz ``` MySQL: ```bash # Full database backup mysqldump -h localhost -u username -p database_name > backup_$(date +%Y%m%d_%H%M%S).sql # Single table backup mysqldump -h localhost -u username -p database_name table_name > table_backup.sql # All databases mysqldump -h localhost -u username -p --all-databases > all_databases_backup.sql ``` MongoDB: ```bash # Full database backup mongodump --host localhost --port 27017 --db database_name --out /backup/location # Single collection backup mongodump --host localhost --db database_name --collection collection_name --out /backup/location ``` ### Verify Backups Backups are only useful if they can be restored successfully. **Backup Verification Process:** 1. Create test database or schema 2. Restore backup to test location 3. Verify data integrity 4. Test critical queries 5. Document verification date 6. Automate verification where possible **Regular Testing Schedule:** - Test restore procedures monthly - Verify backup completeness - Measure restoration time - Update recovery documentation - Train team members on restoration ### Use Transactions Appropriately Transactions ensure data consistency by treating multiple operations as a single unit of work. **Transaction Basics:** ```sql BEGIN; UPDATE accounts SET balance = balance - 100 WHERE id = 1; UPDATE accounts SET balance = balance + 100 WHERE id = 2; -- Verify changes before committing SELECT id, balance FROM accounts WHERE id IN (1, 2); -- If correct: COMMIT; -- If incorrect: ROLLBACK; ``` **When to Use Transactions:** - Multiple related updates - Data migrations - Batch operations - Testing complex queries - Any operation that must be atomic **Transaction Best Practices:** - Keep transactions short - Avoid user interaction during transactions - Don't hold transactions during long operations - Use appropriate isolation levels - Monitor for deadlocks ## Safe Data Modification ### Test Queries Before Execution Always test data modification queries before running them on production data. **Safe Testing Workflow:** 1. **Select Before Update/Delete:** ```sql -- First, SELECT to see what will be affected SELECT * FROM users WHERE last_login < '2020-01-01'; -- Review the results, then execute the update -- UPDATE users SET active = false WHERE last_login < '2020-01-01'; ``` 2. **Use Transactions for Testing:** ```sql BEGIN; UPDATE products SET price = price * 1.10 WHERE category = 'electronics'; -- Review the changes SELECT id, name, price FROM products WHERE category = 'electronics'; -- If correct: COMMIT; otherwise: ROLLBACK; ROLLBACK; ``` 3. **Test on Subset First:** ```sql -- Test on small subset UPDATE orders SET status = 'archived' WHERE order_date < '2020-01-01' LIMIT 10; -- If successful, run on full dataset -- UPDATE orders SET status = 'archived' WHERE order_date < '2020-01-01'; ``` ### Use WHERE Clauses Carefully Missing or incorrect WHERE clauses cause some of the most devastating data loss incidents. **Dangerous Patterns:** ```sql -- DANGER: Missing WHERE clause updates all rows UPDATE users SET role = 'admin'; -- DANGER: Incorrect logic updates wrong rows UPDATE products SET discontinued = true WHERE active = true; -- (Should be: WHERE active = false) ``` **Safety Measures:** - Always write WHERE clause first - Use SELECT to verify WHERE logic - Double-check column names and values - Use transactions for reversibility - Limit rows affected during testing ### Implement Row-Level Verification For critical updates, verify each affected row. **Verification Query Pattern:** ```sql -- Create temporary backup table CREATE TABLE orders_backup AS SELECT * FROM orders WHERE status = 'pending'; -- Perform update UPDATE orders SET status = 'processing', updated_at = CURRENT_TIMESTAMP WHERE status = 'pending'; -- Verify changes SELECT b.id, b.status as old_status, o.status as new_status FROM orders_backup b JOIN orders o ON b.id = o.id WHERE b.status != o.status; -- If incorrect, rollback using backup table -- If correct, drop backup table DROP TABLE orders_backup; ``` ## Bulk Operations ### Planning Bulk Operations Bulk operations require careful planning to avoid impacting system performance. **Pre-Operation Checklist:** - [ ] Backup created and verified - [ ] Operation tested on subset - [ ] Maintenance window scheduled - [ ] Rollback plan documented - [ ] Monitoring in place - [ ] Stakeholders notified - [ ] Resource requirements assessed ### Batch Processing Process large datasets in batches to avoid locking tables and consuming excessive resources. **Batch Update Pattern:** ```sql -- Process in batches of 1000 rows DO $$ DECLARE batch_size INTEGER := 1000; processed INTEGER := 0; total INTEGER; BEGIN SELECT COUNT(*) INTO total FROM users WHERE active = false; WHILE processed < total LOOP UPDATE users SET archived = true WHERE id IN ( SELECT id FROM users WHERE active = false AND archived = false LIMIT batch_size ); processed := processed + batch_size; -- Short delay to reduce system load PERFORM pg_sleep(0.1); RAISE NOTICE 'Processed % of % rows', processed, total; END LOOP; END $$; ``` **Benefits of Batch Processing:** - Reduces lock contention - Allows concurrent operations - Easier to monitor progress - Can be paused and resumed - Lower memory usage ### Handling Large Deletes Large delete operations can cause performance issues and transaction log growth. **Incremental Delete Strategy:** ```sql -- Delete in chunks DELETE FROM logs WHERE id IN ( SELECT id FROM logs WHERE created_at < '2020-01-01' LIMIT 10000 ); -- Repeat until done -- Monitor table size reduction: SELECT COUNT(*) FROM logs; ``` **Truncate for Full Table Deletion:** ```sql -- Much faster than DELETE for removing all rows TRUNCATE TABLE staging_data; -- Truncate with cascade for related tables TRUNCATE TABLE orders CASCADE; ``` ## Data Validation ### Input Validation Validate data before insertion or update to maintain data quality. **Validation Checks:** Data Type Validation: ```sql -- Ensure numeric values are within range SELECT * FROM products WHERE price < 0 OR price > 1000000; -- Check date validity SELECT * FROM events WHERE event_date > CURRENT_DATE + INTERVAL '10 years'; ``` Format Validation: ```sql -- Validate email format SELECT * FROM users WHERE email !~ '^[A-Za-z0-9._%+-]+@[A-Za-z0-9.-]+\.[A-Z|a-z]{2,}$'; -- Validate phone format SELECT * FROM contacts WHERE phone !~ '^\+?[0-9]{10,15}$'; ``` Business Rule Validation: ```sql -- Check inventory consistency SELECT product_id, SUM(quantity) as total FROM inventory_movements GROUP BY product_id HAVING total < 0; -- Verify referential integrity SELECT o.id FROM orders o LEFT JOIN customers c ON o.customer_id = c.id WHERE c.id IS NULL; ``` ### Constraint Management Use database constraints to enforce data integrity automatically. **Essential Constraints:** Primary Keys: ```sql ALTER TABLE users ADD PRIMARY KEY (id); ``` Foreign Keys: ```sql ALTER TABLE orders ADD CONSTRAINT fk_customer FOREIGN KEY (customer_id) REFERENCES customers(id) ON DELETE RESTRICT; ``` Unique Constraints: ```sql ALTER TABLE users ADD CONSTRAINT unique_email UNIQUE (email); ``` Check Constraints: ```sql ALTER TABLE products ADD CONSTRAINT check_price CHECK (price >= 0); ALTER TABLE orders ADD CONSTRAINT check_status CHECK (status IN ('pending', 'processing', 'shipped', 'delivered', 'cancelled')); ``` Not Null Constraints: ```sql ALTER TABLE users ALTER COLUMN email SET NOT NULL; ALTER TABLE orders ALTER COLUMN order_date SET NOT NULL; ``` ### Data Quality Monitoring Continuously monitor data quality to detect issues early. **Quality Metrics:** - Null value percentages - Duplicate record counts - Constraint violation attempts - Data distribution anomalies - Referential integrity breaks **Quality Monitoring Queries:** ```sql -- Check for duplicate emails SELECT email, COUNT(*) FROM users GROUP BY email HAVING COUNT(*) > 1; -- Find orphaned records SELECT COUNT(*) FROM order_items oi LEFT JOIN orders o ON oi.order_id = o.id WHERE o.id IS NULL; -- Identify null critical fields SELECT COUNT(*) as null_emails FROM users WHERE email IS NULL; -- Check data freshness SELECT MAX(updated_at) as last_update, EXTRACT(EPOCH FROM (CURRENT_TIMESTAMP - MAX(updated_at)))/3600 as hours_since_update FROM products; ``` ## Data Migration ### Planning Migrations Data migrations require thorough planning and testing. **Migration Planning Checklist:** - [ ] Source and target schemas documented - [ ] Data transformation logic defined - [ ] Data volume and duration estimated - [ ] Dependencies identified - [ ] Testing strategy created - [ ] Rollback procedure documented - [ ] Validation queries prepared ### Migration Testing Test migrations in non-production environment before running in production. **Testing Phases:** 1. **Unit Testing:** - Test individual transformation functions - Verify edge cases - Validate error handling 2. **Integration Testing:** - Test complete migration process - Verify referential integrity - Check constraint compliance 3. **Performance Testing:** - Measure migration duration - Assess system impact - Optimize batch sizes 4. **Data Validation:** - Compare row counts - Verify data accuracy - Check completeness **Validation Query Examples:** ```sql -- Verify row counts match SELECT (SELECT COUNT(*) FROM source_table) as source_count, (SELECT COUNT(*) FROM target_table) as target_count; -- Check for missing records SELECT s.id FROM source_table s LEFT JOIN target_table t ON s.id = t.id WHERE t.id IS NULL; -- Verify data accuracy (sample) SELECT s.id, s.value as source_value, t.value as target_value FROM source_table s JOIN target_table t ON s.id = t.id WHERE s.value != t.value LIMIT 100; ``` ### Rollback Procedures Every migration needs a documented rollback procedure. **Rollback Strategy:** 1. Keep original data until migration validated 2. Document reverse transformation logic 3. Test rollback procedure 4. Define rollback decision criteria 5. Assign rollback authority **Example Rollback Process:** ```sql -- Step 1: Stop application writes to new table -- Step 2: Restore from backup DROP TABLE IF EXISTS new_users; CREATE TABLE new_users AS SELECT * FROM users_backup; -- Step 3: Verify restoration SELECT COUNT(*) FROM new_users; -- Step 4: Rename tables BEGIN; ALTER TABLE users RENAME TO users_failed_migration; ALTER TABLE new_users RENAME TO users; COMMIT; -- Step 5: Resume application ``` ## Data Archival ### Archival Strategy Archive old data to maintain system performance while preserving historical information. **When to Archive:** - Data no longer actively used - Regulatory retention requirements met - Table size impacting performance - Historical reference needed **Archival Approaches:** Separate Archive Tables: ```sql -- Create archive table CREATE TABLE orders_archive (LIKE orders INCLUDING ALL); -- Move old data INSERT INTO orders_archive SELECT * FROM orders WHERE order_date < '2020-01-01'; -- Verify and delete DELETE FROM orders WHERE order_date < '2020-01-01' AND id IN (SELECT id FROM orders_archive); ``` Partitioning: ```sql -- PostgreSQL table partitioning CREATE TABLE orders ( id SERIAL, order_date DATE NOT NULL, -- other columns ) PARTITION BY RANGE (order_date); CREATE TABLE orders_2023 PARTITION OF orders FOR VALUES FROM ('2023-01-01') TO ('2024-01-01'); CREATE TABLE orders_2024 PARTITION OF orders FOR VALUES FROM ('2024-01-01') TO ('2025-01-01'); -- Drop old partitions when archiving DROP TABLE orders_2020; ``` ### Archive Storage Choose appropriate storage for archived data. **Storage Options:** - Separate database for archives - Compressed backup files - Cloud object storage (S3, Azure Blob) - Tape backup for long-term storage **Archive Access:** - Read-only access when needed - Separate connection credentials - Lower priority query execution - Documented retrieval process ## Data Safety Checklist Before executing any data modification operation: **Pre-Operation:** - [ ] Backup created and verified - [ ] Query tested with SELECT - [ ] WHERE clause verified - [ ] Transaction started (if appropriate) - [ ] Row count estimated - [ ] Operation documented **During Operation:** - [ ] Progress monitored - [ ] Performance impact assessed - [ ] Errors logged - [ ] Can pause if needed **Post-Operation:** - [ ] Changes verified - [ ] Transaction committed - [ ] Documentation updated - [ ] Stakeholders notified - [ ] Backup retained until validated **Rollback Ready:** - [ ] Rollback procedure documented - [ ] Rollback tested (if critical) - [ ] Rollback authority designated - [ ] Decision criteria defined ## Summary Safe data management requires discipline, planning, and robust procedures. Always backup before changes, test operations thoroughly, use transactions appropriately, and validate results carefully. By following these best practices, you can confidently manage data using WhoDB while minimizing risk of data loss or corruption. Remember that the time invested in proper planning and testing is always less than the time required to recover from data disasters. --- ### Best Practices/Documentation --- title: Database Documentation description: Practical ways to document your databases using WhoDB - database comments, schema diagram exports, and version-controlled SQL --- # Database Documentation Good database documentation lives as close to the data as possible. This guide covers the documentation practices that work well alongside WhoDB: database-side comments, exported schema diagrams, and version-controlled SQL. ## Use Database Comments The most durable place to document a table or column is the database itself. Comments stored in the catalog travel with the schema, survive tool changes, and are always one query away — run them from WhoDB's [Scratchpad](/query/scratchpad-intro) whenever you need to read or update them: ```sql -- PostgreSQL COMMENT ON TABLE customers IS 'Core customer accounts. Owned by Sales Ops. Soft-delete only.'; COMMENT ON COLUMN customers.customer_tier IS 'Subscription level: free, standard, professional, enterprise. Default free.'; ``` ```sql -- MySQL / MariaDB ALTER TABLE customers COMMENT = 'Core customer accounts. Owned by Sales Ops. Soft-delete only.'; ALTER TABLE customers MODIFY COLUMN customer_tier VARCHAR(50) COMMENT 'Subscription level: free, standard, professional, enterprise.'; ``` What to capture in comments: - Business purpose of the table and who owns it - Valid values and defaults for enum-like columns - Known data quality issues ("nulls possible in pre-2016 rows") - Sensitivity flags for PII columns Keep comments short and factual. Longer context — retention policies, runbooks, incident history — belongs in your team's regular documentation system, linked from a short pointer in the comment if needed. ## Export Schema Diagrams from the Graph View WhoDB's [graph view](/visualization/graph-view) renders your schema as an interactive diagram of tables and foreign-key relationships. Use the download/export action in the lower-right graph controls to save the diagram as an image for your documentation. Good uses for exported diagrams: - Architecture and onboarding docs — a current picture of the schema beats prose - Design review artifacts before and after a migration - Spotting undocumented or missing relationships while you write schema docs Re-export after schema changes so diagrams in your docs don't drift from reality. ## Share SQL Through Version Control WhoDB's [Scratchpad](/query/scratchpad-intro) is where you build and refine queries, but Scratchpad pages are stored per-browser — they are not shared between team members or machines. Treat Scratchpad as a workbench, and store the finished SQL in version control. A simple repository layout works well: ``` queries/ ├── analytics/ │ ├── daily_sales_summary.sql │ └── user_retention.sql ├── reporting/ │ └── customer_invoices.sql └── operational/ └── health_checks.sql ``` Give each committed query a short header so the next reader has context: ```sql -- Query: Monthly revenue by region -- Purpose: Finance reporting dashboard -- Dependencies: sales, customers -- Expected runtime: < 5 seconds SELECT c.region, DATE_TRUNC('month', s.sale_date) AS month, SUM(s.amount) AS total_revenue FROM sales s JOIN customers c ON s.customer_id = c.id GROUP BY c.region, DATE_TRUNC('month', s.sale_date) ORDER BY month DESC, total_revenue DESC; ``` The workflow: 1. Build and test the query in Scratchpad against a development database 2. Copy the final SQL into your repository with a header comment 3. Review it like any other code change (pull request) 4. Paste it back into Scratchpad whenever someone needs to run it ## Document Connections with Environment-Defined Profiles Connection details are documentation too. Instead of a wiki page of hosts and ports that goes stale, define connection profiles as environment variables on your WhoDB deployment — they appear on the login page for everyone, and the deployment config becomes the single source of truth: ```bash export WHODB_POSTGRES_1='{"alias":"prod-readonly","host":"prod-db.internal","user":"whodb_readonly","database":"myapp_prod","port":"5432","password":"..."}' ``` See [Database Connectivity](/features/database-connectivity) for the full profile format, and keep the actual secrets in your secret manager rather than committed files. ## Keep It Current Outdated documentation is worse than no documentation. Update comments and re-export diagrams as part of the same change that alters the schema, not as a separate cleanup task. A lightweight cadence is enough: - **With every schema migration**: update affected table/column comments - **After notable schema changes**: re-export the graph diagram used in docs - **Quarterly**: prune queries in the repository that are no longer used ## Summary Documentation that lives in the database (comments), in version control (SQL files), and in exported diagrams stays useful because it sits in the same workflow as the changes themselves. WhoDB produces the diagrams from the graph view and gives you the Scratchpad to develop and read the SQL you commit. --- ### Best Practices/Mongodb --- title: "Using WhoDB with MongoDB" description: "How to connect, browse, and query MongoDB databases in WhoDB" --- # Using WhoDB with MongoDB This page covers what is specific to MongoDB when you use it through WhoDB: connecting, browsing collections, and running shell-style commands in the Scratchpad. ## Connecting Select **MongoDB** on the login page. The form asks for: - **Hostname** (required) — you can also paste a full `mongodb://` or `mongodb+srv://` connection URL and WhoDB parses it into the fields. - **Username**, **Password**, and **Database** (optional, depending on your server's auth setup). Advanced options include: - **Port** — defaults to `27017`. - **URL Params** — extra connection-string parameters such as `?authSource=admin`. - **DNS Enabled** (`false`) — set to `true` for SRV (`mongodb+srv`) connections such as MongoDB Atlas. - **SSL mode** — Disabled, Enabled (TLS with certificate verification), or Insecure (TLS without certificate verification). For production databases, connect with a read-only user. WhoDB edits documents directly from the grid, so browsing with a read-only user prevents accidental changes. ## How WhoDB Presents MongoDB - **Collections** are the storage units, scoped to the selected database; `system.*` collections are hidden. Views appear read-only, and indexes are listed as metadata. - Documents can be browsed as a grid or as JSON, and edited, inserted, or deleted from the UI. - Because documents are schema-less, field and type information is **sampled** from existing documents rather than read from a fixed schema. ## WhoDB Features with MongoDB - **Scratchpad** — runs shell-style commands like `db.users.find({age: {$gt: 30}})`. Supported methods: `find`, `findOne`, `insertOne`, `insertMany`, `updateOne`, `updateMany`, `deleteOne`, `deleteMany`, `countDocuments`, `aggregate`, `distinct`, `createIndex`, `drop`, and `db.dropDatabase()`. `find` results are capped at 1,000 documents, and aggregation pipelines may not use `$where`, `$function`, `$accumulator`, `$out`, or `$merge`. See [Scratchpad](/query/scratchpad-intro). - **Where conditions** — the filter builder offers MongoDB query operators such as `eq`, `ne`, `gt`, `lt`, `in`, `exists`, `regex`, and `elemMatch`. See [Where Conditions](/advanced/where-conditions). - **Graph view** — relationships between collections are inferred from naming conventions (for example, a `user_id` field pointing at `users`), since MongoDB has no declared foreign keys. See [Graph View](/visualization/graph-view). - **Mock data generation** — generates documents for collections. See [Mock Data](/advanced/mock-data). - **Export** — CSV, Excel, and additionally **NDJSON** (JSON Lines), which preserves nested document structure. See [Export Options](/advanced/export-options). ## Tips - Prefer NDJSON export when documents contain nested objects or arrays; flat CSV cells stringify them. - Use a filter in `find` or the where-condition builder before browsing very large collections. - Sampled field lists may miss fields that only appear in rare documents — check the JSON view of individual documents when in doubt. ## Compatible Databases FerretDB and Amazon DocumentDB speak the MongoDB wire protocol and appear as their own entries on the login page, with the same collection-based experience in WhoDB. ## Further Reading For index design, replica sets, sharding, and backup guidance, see the official [MongoDB documentation](https://www.mongodb.com/docs/). ## Related Pages Connection details for all supported databases. CSV, Excel, and NDJSON export. --- ### Best Practices/Mysql --- title: "Using WhoDB with MySQL" description: "How to connect, browse, and query MySQL and MariaDB databases in WhoDB" --- # Using WhoDB with MySQL This page covers what is specific to MySQL and MariaDB when you use them through WhoDB: connecting, database switching, and which WhoDB features apply. ## Connecting Select **MySQL** or **MariaDB** on the login page. The form asks for: - **Hostname**, **Username**, **Password**, and **Database** (all required). Advanced options include: - **Port** — defaults to `3306`. - **Parse Time** (`True`) and **Loc** (`UTC`) — control how the driver handles date/time values. - **Allow clear text passwords** (`0`). - **SSL mode** — `DISABLED`, `PREFERRED`, `REQUIRED`, `VERIFY_CA`, or `VERIFY_IDENTITY`. For production databases, connect with a read-only account. WhoDB edits rows directly from the grid, so browsing with a read-only user prevents accidental changes. ## How WhoDB Presents MySQL - MySQL has no schema layer inside a database, so instead of a schema dropdown the sidebar offers **database switching**: pick a different database on the same server without logging in again. System databases (`information_schema`, `mysql`, `performance_schema`, `sys`) are hidden. - **Tables** and **views** appear as storage units. Tables support row viewing, inserts, updates, deletes, and data import; views are read-only. - Column types, primary keys, and foreign keys are read from the catalog, so the grid and graph reflect your actual schema. ## WhoDB Features with MySQL - **Scratchpad** — run MySQL SQL, including multiple statements in one cell. See [Scratchpad](/query/scratchpad-intro). - **Graph view** — visualizes foreign-key relationships between tables in the current database. See [Graph View](/visualization/graph-view). - **Where conditions** — the filter builder offers MySQL operators such as `=`, `LIKE`, `BETWEEN`, `IN`, and `IS NULL`. See [Where Conditions](/advanced/where-conditions). - **Mock data generation** — generates rows for tables and follows foreign-key dependencies so parent rows are created first. See [Mock Data](/advanced/mock-data). - **Export** — CSV and Excel from the grid or Scratchpad results. See [Export Options](/advanced/export-options). ## Tips - Add a `LIMIT` to exploratory Scratchpad queries on large tables; unbounded `SELECT` statements pull every row. - Foreign keys drive both the graph view and mock data ordering — tables without declared foreign keys show no relationships. - Filter with the where-condition builder before exporting so the file contains only the rows you need. ## Compatible Databases TiDB is MySQL-compatible and appears as its own entry on the login page (default port `4000`) with the same MySQL-style experience in WhoDB. ## Further Reading For server tuning, storage engines, replication, and backup guidance, see the official [MySQL documentation](https://dev.mysql.com/doc/) or the [MariaDB documentation](https://mariadb.com/kb/en/documentation/). ## Related Pages Connection details for all supported databases. Write and run SQL against your connection. --- ### Best Practices/Performance --- title: Performance Optimization description: Techniques for optimizing database query performance in WhoDB --- # Performance Optimization Database performance directly impacts application responsiveness and user experience. This guide covers proven techniques for optimizing query performance and managing database resources effectively in WhoDB. ## Understanding Query Performance ### Query Execution Fundamentals Before optimizing queries, understand how databases execute them: **Query Processing Stages:** 1. **Parsing**: SQL syntax validation and query tree construction 2. **Planning**: Query optimizer determines execution strategy 3. **Optimization**: Query plan refinement based on statistics 4. **Execution**: Actual data retrieval and processing 5. **Result Return**: Data formatting and transmission **Performance Factors:** - Table size and row count - Index availability and quality - Data distribution and statistics - Query complexity and joins - Hardware resources (CPU, memory, I/O) - Concurrent user load ### Performance Metrics Track these key metrics to identify performance issues: **Query-Level Metrics:** - Execution time (total and breakdown) - Rows examined vs. rows returned - Index usage - Temporary table creation - Sort operations **System-Level Metrics:** - Query throughput (queries per second) - Connection pool utilization - Cache hit ratios - I/O wait times - CPU and memory usage ## Query Optimization Strategies ### Use EXPLAIN to Analyze Queries The EXPLAIN command reveals how the database executes your query. WhoDB makes it easy to analyze query plans. **PostgreSQL EXPLAIN:** ```sql EXPLAIN ANALYZE SELECT u.username, o.order_date, o.total FROM users u JOIN orders o ON u.id = o.user_id WHERE o.order_date > '2024-01-01' ORDER BY o.order_date DESC; ``` **Key Information to Review:** - **Seq Scan**: Full table scan (potentially slow) - **Index Scan**: Using an index (generally fast) - **Nested Loop**: Join method for small result sets - **Hash Join**: Join method for larger result sets - **Sort**: Explicit sorting operation - **Cost**: Estimated query cost - **Actual Time**: Real execution time **MySQL EXPLAIN:** ```sql EXPLAIN FORMAT=JSON SELECT p.product_name, COUNT(*) as order_count FROM products p JOIN order_items oi ON p.id = oi.product_id GROUP BY p.product_name HAVING order_count > 100; ``` **Warning Signs:** - Type: ALL (full table scan) - Extra: Using filesort (disk-based sorting) - Extra: Using temporary (temporary table creation) - Rows: Large numbers indicating inefficiency ### Optimize WHERE Clauses WHERE clause optimization is fundamental to query performance. **Use Indexed Columns:** ```sql -- Inefficient: Function on indexed column prevents index use SELECT * FROM users WHERE LOWER(email) = 'user@example.com'; -- Efficient: Direct comparison uses index SELECT * FROM users WHERE email = 'user@example.com'; ``` **Avoid Leading Wildcards:** ```sql -- Inefficient: Leading wildcard prevents index use SELECT * FROM products WHERE name LIKE '%shoes%'; -- Efficient: Trailing wildcard can use index SELECT * FROM products WHERE name LIKE 'running%'; ``` **Use Appropriate Data Types:** ```sql -- Inefficient: Type conversion required SELECT * FROM orders WHERE order_id = '12345'; -- Efficient: Matching data type SELECT * FROM orders WHERE order_id = 12345; ``` ### Optimize JOIN Operations Joins are common performance bottlenecks in complex queries. **Join Order Matters:** Join smaller tables first to reduce intermediate result sizes: ```sql -- Better: Join smaller lookup tables first SELECT c.name, o.order_date, p.product_name FROM customers c JOIN orders o ON c.id = o.customer_id JOIN order_items oi ON o.id = oi.order_id JOIN products p ON oi.product_id = p.id WHERE c.country = 'US'; ``` **Use Appropriate Join Types:** - **INNER JOIN**: Only matching rows (most efficient) - **LEFT JOIN**: All left table rows (use when necessary) - **RIGHT JOIN**: All right table rows (consider reversing to LEFT) - **FULL OUTER JOIN**: All rows from both tables (least efficient) **Index Foreign Keys:** Always create indexes on foreign key columns: ```sql CREATE INDEX idx_orders_customer_id ON orders(customer_id); CREATE INDEX idx_order_items_order_id ON order_items(order_id); CREATE INDEX idx_order_items_product_id ON order_items(product_id); ``` ### Limit Result Sets Retrieving unnecessary data wastes resources. **Use LIMIT for Large Tables:** ```sql -- Better: Limit results when you don't need all rows SELECT * FROM logs WHERE log_date > '2024-01-01' ORDER BY log_date DESC LIMIT 1000; ``` **Select Specific Columns:** ```sql -- Inefficient: Retrieves all columns SELECT * FROM users WHERE active = true; -- Efficient: Only needed columns SELECT id, username, email FROM users WHERE active = true; ``` **Use Pagination:** For displaying data in pages, use offset and limit: ```sql -- Page 3, 50 items per page SELECT id, title, created_at FROM articles ORDER BY created_at DESC LIMIT 50 OFFSET 100; ``` Note: For large offsets, consider keyset pagination for better performance. ## Indexing Strategies ### Index Basics Indexes dramatically improve query performance but require careful planning. **When to Create Indexes:** - Columns frequently used in WHERE clauses - Columns used in JOIN conditions - Columns used in ORDER BY clauses - Columns used in GROUP BY clauses - Foreign key columns **Index Types:** - **B-tree**: Default, good for equality and range queries - **Hash**: Fast equality comparisons, no range support - **GIN/GiST**: Full-text search and array operations - **Bitmap**: Multiple index combination ### Composite Indexes Composite indexes cover multiple columns and are powerful optimization tools. **Column Order Matters:** ```sql -- Index for queries filtering by country then city CREATE INDEX idx_users_country_city ON users(country, city); -- This query uses the index efficiently SELECT * FROM users WHERE country = 'US' AND city = 'Seattle'; -- This query also uses the index SELECT * FROM users WHERE country = 'US'; -- This query does NOT use the index efficiently SELECT * FROM users WHERE city = 'Seattle'; ``` **General Rule:** Place the most selective (filters to fewer rows) column first, and columns used together frequently. ### Covering Indexes Covering indexes include all columns needed for a query, eliminating table lookups. **Example:** ```sql -- Query that runs frequently SELECT username, email FROM users WHERE country = 'US'; -- Covering index includes all needed columns CREATE INDEX idx_users_country_covering ON users(country) INCLUDE (username, email); ``` ### Index Maintenance Indexes require maintenance to remain effective. **PostgreSQL Index Maintenance:** ```sql -- Rebuild index to remove bloat REINDEX INDEX idx_users_email; -- Update statistics for query planner ANALYZE users; -- Vacuum to reclaim space VACUUM ANALYZE users; ``` **MySQL Index Maintenance:** ```sql -- Optimize table to rebuild indexes OPTIMIZE TABLE users; -- Update statistics ANALYZE TABLE users; ``` **When to Rebuild:** - After large bulk operations - When query performance degrades - Regular maintenance schedule (monthly/quarterly) - After significant data distribution changes ## Managing Large Result Sets ### Cursor-Based Pagination For large result sets, cursor-based pagination is more efficient than offset-based. **Keyset Pagination:** ```sql -- Initial query SELECT id, username, created_at FROM users WHERE active = true ORDER BY created_at DESC, id DESC LIMIT 50; -- Next page (using last seen values) SELECT id, username, created_at FROM users WHERE active = true AND (created_at, id) < ('2024-01-15 10:30:00', 12345) ORDER BY created_at DESC, id DESC LIMIT 50; ``` This approach maintains consistent performance regardless of page depth. ### Streaming Results For very large exports, stream results instead of loading all into memory: **Batch Processing:** ```sql -- Process in chunks SELECT id, email, status FROM users WHERE id > $last_processed_id ORDER BY id LIMIT 10000; ``` Process each batch, update `$last_processed_id`, and repeat. ### Aggregation Optimization Optimize aggregation queries for large datasets. **Use Materialized Views:** ```sql -- PostgreSQL materialized view for expensive aggregation CREATE MATERIALIZED VIEW daily_sales_summary AS SELECT DATE(order_date) as sale_date, COUNT(*) as order_count, SUM(total_amount) as total_sales FROM orders GROUP BY DATE(order_date); -- Refresh periodically REFRESH MATERIALIZED VIEW daily_sales_summary; ``` **Use Incremental Aggregation:** Instead of recalculating everything, maintain running totals: ```sql -- Update summary table incrementally INSERT INTO daily_sales_summary (sale_date, order_count, total_sales) SELECT DATE(order_date), COUNT(*), SUM(total_amount) FROM orders WHERE order_date >= CURRENT_DATE GROUP BY DATE(order_date) ON CONFLICT (sale_date) DO UPDATE SET order_count = EXCLUDED.order_count, total_sales = EXCLUDED.total_sales; ``` ## Connection Pooling ### Understanding Connection Pools Database connections are expensive to create. Connection pooling reuses connections for better performance. **Benefits:** - Reduced connection overhead - Better resource utilization - Improved scalability - Consistent performance under load ### Connection Pool Configuration **Key Parameters:** - **Minimum Pool Size**: Connections kept open during idle periods - **Maximum Pool Size**: Upper limit on concurrent connections - **Connection Timeout**: Maximum wait time for available connection - **Idle Timeout**: Time before idle connection is closed - **Max Lifetime**: Maximum connection age before refresh **Recommended Starting Values:** ``` Minimum Pool Size: 5 Maximum Pool Size: 20 Connection Timeout: 30 seconds Idle Timeout: 10 minutes Max Lifetime: 30 minutes ``` Adjust based on: - Application concurrent user count - Query execution time - Database server capacity - Network latency ### Connection Pool Monitoring Monitor these metrics: - Active connections - Idle connections - Connection wait times - Connection creation rate - Connection errors **Warning Signs:** - Frequent connection timeouts - High connection wait times - Maximum pool size consistently reached - Many short-lived connections ## Query Caching ### Application-Level Caching Cache query results at the application level for frequently accessed data. **Good Candidates for Caching:** - Reference data (countries, categories) - User session data - Dashboard aggregations - Recently viewed items **Cache Invalidation Strategies:** - Time-based expiration (TTL) - Event-based invalidation - Versioned cache keys - Least Recently Used (LRU) eviction ### Database Query Cache Some databases provide built-in query caching. **MySQL Query Cache (Deprecated in 8.0):** Modern MySQL versions don't include query cache. Use application-level caching instead. **PostgreSQL Shared Buffers:** PostgreSQL caches frequently accessed data pages in shared buffers. Configure appropriately: ```sql -- View current setting SHOW shared_buffers; -- Recommended: 25% of system RAM for dedicated database server ALTER SYSTEM SET shared_buffers = '4GB'; ``` ## Performance Testing ### Load Testing Test performance under realistic load conditions before deploying to production. **Testing Scenarios:** - Normal load: Expected concurrent users - Peak load: Maximum anticipated users - Stress test: Beyond expected capacity - Endurance test: Sustained load over time **Tools:** - Apache JMeter - pgbench (PostgreSQL) - sysbench (MySQL) - Custom load scripts ### Performance Baselines Establish performance baselines to detect regressions. **Baseline Metrics:** - Query execution times (p50, p95, p99) - Throughput (queries per second) - Error rates - Resource utilization **Regular Monitoring:** - Compare current performance to baseline - Investigate significant deviations - Update baselines after infrastructure changes - Track trends over time ## Performance Tips Summary **Query Optimization:** - Use EXPLAIN to understand query execution - Index foreign keys and frequently filtered columns - Avoid functions on indexed columns in WHERE clauses - Select only needed columns - Use appropriate JOIN types and order **Indexing:** - Create indexes on columns used in WHERE, JOIN, and ORDER BY - Use composite indexes for multi-column queries - Consider covering indexes for frequently run queries - Maintain indexes regularly - Don't over-index (each index has overhead) **Data Management:** - Use pagination for large result sets - Implement cursor-based pagination for deep pagination - Stream large exports instead of loading all into memory - Use materialized views for expensive aggregations - Archive old data to keep tables smaller **Resource Management:** - Configure connection pooling appropriately - Monitor connection pool metrics - Implement application-level caching - Optimize database server configuration - Scale horizontally when vertical scaling insufficient **Testing and Monitoring:** - Establish performance baselines - Test under realistic load conditions - Monitor query performance continuously - Set up alerts for performance degradation - Regular performance reviews and optimization ## Common Anti-Patterns to Avoid **N+1 Query Problem:** ```sql -- Bad: Separate query for each user's orders -- Application code loops: for each user, SELECT orders WHERE user_id = ? -- Good: Single query with JOIN SELECT u.*, o.* FROM users u LEFT JOIN orders o ON u.id = o.user_id WHERE u.active = true; ``` **SELECT * in Production:** Always select specific columns to reduce data transfer and improve cache efficiency. **Missing Indexes on Foreign Keys:** Always index foreign key columns used in joins. **Overusing DISTINCT:** DISTINCT adds overhead. If you need DISTINCT, consider whether your joins are correct. **Large IN Clauses:** ```sql -- Less efficient for large lists SELECT * FROM products WHERE id IN (1, 2, 3, ..., 10000); -- Better: Use temporary table or array SELECT * FROM products WHERE id = ANY($1::int[]); ``` ## Summary Database performance optimization is an iterative process requiring measurement, analysis, and refinement. Start with proper indexing, optimize queries using EXPLAIN, and implement efficient data access patterns. Regular monitoring and testing ensure performance remains acceptable as data volumes grow and usage patterns change. WhoDB's query analysis tools make it easy to identify and resolve performance issues before they impact users. --- ### Best Practices/Postgresql --- title: "Using WhoDB with PostgreSQL" description: "How to connect, browse, and query PostgreSQL databases in WhoDB" --- # Using WhoDB with PostgreSQL This page covers what is specific to PostgreSQL when you use it through WhoDB: connecting, how the sidebar and grid present your data, and which WhoDB features apply. ## Connecting Select **Postgres** on the login page. The form asks for: - **Hostname** (required) — you can also paste a full `postgres://` connection URL and WhoDB parses it into the fields. - **Username** and **Password** (required). - **Database** (required). - **Search Path** (optional) — restrict browsing to specific schemas. Advanced options include **Port** (defaults to `5432`) and an **SSL mode** selector ranging from disabled to full certificate verification (PostgreSQL's `disable`, `require`, verify CA, and `verify-full`). For production databases, connect with a read-only role. WhoDB edits rows directly from the grid, so browsing with a read-only user prevents accidental changes. ## How WhoDB Presents PostgreSQL - The sidebar shows a **schema dropdown**; browsing is scoped to the selected schema. System schemas such as `information_schema`, `pg_catalog`, and `sys` are hidden automatically. - **Tables** and **views** appear as storage units. Tables support row viewing, inserts, updates, deletes, and data import; views are read-only and expose their definition. - Column types, primary keys, and foreign keys are read from the catalog, so the grid and graph reflect your actual schema. ## WhoDB Features with PostgreSQL - **Scratchpad** — run PostgreSQL SQL, including multiple statements in one cell. See [Scratchpad](/query/scratchpad-intro). - **Graph view** — visualizes foreign-key relationships between tables in the selected schema. See [Graph View](/visualization/graph-view). - **Where conditions** — the filter builder offers PostgreSQL operators, including `ILIKE`/`NOT ILIKE` for case-insensitive matching alongside `LIKE`, `BETWEEN`, `IN`, and `IS NULL`. See [Where Conditions](/advanced/where-conditions). - **Mock data generation** — generates rows for tables and follows foreign-key dependencies so parent rows are created first. See [Mock Data](/advanced/mock-data). - **Export** — CSV and Excel from the grid or Scratchpad results. See [Export Options](/advanced/export-options). ## Tips - Add a `LIMIT` to exploratory Scratchpad queries on large tables; unbounded `SELECT` statements pull every row. - Use **Search Path** at login to keep the schema dropdown focused when a database has many schemas. - Filter with the where-condition builder before exporting so the file contains only the rows you need. ## Compatible Databases CockroachDB, YugabyteDB, and QuestDB speak the PostgreSQL wire protocol and appear as their own entries on the login page, with the same PostgreSQL-style experience (QuestDB is table-scoped and has no schema dropdown). ## Further Reading For server tuning, indexing strategy, replication, and backup guidance, see the official [PostgreSQL documentation](https://www.postgresql.org/docs/). ## Related Pages Connection details for all supported databases. Write and run SQL against your connection. --- ### Best Practices/Query Optimization --- title: "SQL Query Optimization" description: "Master SQL query optimization techniques to improve database performance and reduce execution time" --- # SQL Query Optimization Query optimization is fundamental to database performance. A well-optimized query can execute thousands of times faster than an inefficient one. This comprehensive guide covers practical techniques, real-world examples, and common pitfalls to avoid. Use the EXPLAIN command to analyze query execution plans before optimizing. Understanding how your database executes queries is the first step to optimization. ## Understanding Query Execution Plans ### Using EXPLAIN The EXPLAIN command shows how your database will execute a query. This is your most powerful diagnostic tool. **Basic EXPLAIN Usage:** ```sql EXPLAIN SELECT * FROM users WHERE user_id = 42; ``` **PostgreSQL EXPLAIN with Analysis:** ```sql EXPLAIN ANALYZE SELECT * FROM orders WHERE created_at > '2024-01-01' ORDER BY total DESC; ``` **Interpreting Output:** Look for these performance indicators: - Seq Scan: Full table scan (slow for large tables) - Index Scan: Using an index (usually fast) - Filter: Rows being eliminated during scan - Sort: Sorting operation (can be expensive) - Hash Join: Hash-based join (efficient) - Nested Loop: Loop-based join (slower with large datasets) A Seq Scan on a large table without a WHERE clause is almost always a problem. Add appropriate indexes or improve query selectivity. ## Indexing Strategies ### Creating Effective Indexes **Single Column Index (Most Common):** ```sql CREATE INDEX idx_users_email ON users(email); ``` **Composite Index (Multiple Columns):** ```sql CREATE INDEX idx_orders_customer_date ON orders(customer_id, created_at DESC); ``` **Unique Index:** ```sql CREATE UNIQUE INDEX idx_users_username ON users(username); ``` **Partial Index (Index subset of data):** ```sql CREATE INDEX idx_active_orders ON orders(customer_id) WHERE status = 'active'; ``` Composite indexes should order columns: equality conditions first, then range conditions, then sort conditions. This maximizes index effectiveness. ### Index Column Order Matters ```sql -- GOOD: customer_id (equality), created_at (range) CREATE INDEX idx_orders_cust_date ON orders(customer_id, created_at); -- Will use index for queries like: SELECT * FROM orders WHERE customer_id = 123 AND created_at > '2024-01-01'; -- SLOW: Wrong order wastes index potential CREATE INDEX idx_orders_date_cust ON orders(created_at, customer_id); ``` ## Query Pattern Optimization ### Pattern 1: Avoid SELECT * **Inefficient:** ```sql SELECT * FROM users WHERE status = 'active' LIMIT 10; ``` **Optimized:** ```sql SELECT user_id, email, name, status FROM users WHERE status = 'active' LIMIT 10; ``` The optimized version reduces data transfer and allows index-only scans on the selected columns. ### Pattern 2: Use WHERE Before HAVING **Inefficient:** ```sql SELECT customer_id, COUNT(*) as order_count FROM orders GROUP BY customer_id HAVING COUNT(*) > 5; ``` **Optimized:** ```sql SELECT customer_id, COUNT(*) as order_count FROM orders WHERE created_at > '2024-01-01' GROUP BY customer_id HAVING COUNT(*) > 5; ``` Filter rows before grouping to reduce the dataset processed by the aggregation. ### Pattern 3: Use IN for Multiple Values **Inefficient:** ```sql SELECT * FROM users WHERE status = 'active' OR status = 'pending' OR status = 'review'; ``` **Optimized:** ```sql SELECT * FROM users WHERE status IN ('active', 'pending', 'review'); ``` The IN operator is more efficient and often uses better execution plans. ### Pattern 4: BETWEEN for Range Queries **Inefficient:** ```sql SELECT * FROM transactions WHERE amount >= 100 AND amount <= 500; ``` **Optimized:** ```sql SELECT * FROM transactions WHERE amount BETWEEN 100 AND 500; ``` BETWEEN often generates better index utilization for range queries. ### Pattern 5: Use UNION Instead of OR for Complex Conditions **Potentially Inefficient:** ```sql SELECT * FROM orders WHERE customer_id = 123 OR product_id = 456 OR status = 'high-priority'; ``` **Potentially Faster:** ```sql SELECT * FROM orders WHERE customer_id = 123 UNION SELECT * FROM orders WHERE product_id = 456 UNION SELECT * FROM orders WHERE status = 'high-priority'; ``` UNION allows each part to use different indexes. Use UNION ALL if duplicates are acceptable (faster). ## Join Optimization ### Pattern 6: Join with Indexed Foreign Keys **Inefficient (No Index):** ```sql SELECT o.order_id, c.customer_name, o.total FROM orders o JOIN customers c ON o.customer_id = c.customer_id WHERE o.created_at > '2024-01-01'; ``` **Optimized (With Index):** ```sql CREATE INDEX idx_orders_customer_id ON orders(customer_id); CREATE INDEX idx_customers_id ON customers(customer_id); SELECT o.order_id, c.customer_name, o.total FROM orders o JOIN customers c ON o.customer_id = c.customer_id WHERE o.created_at > '2024-01-01'; ``` Always index foreign key columns used in joins. ### Pattern 7: Join Order Matters **Inefficient Order:** ```sql SELECT o.order_id, c.customer_name, p.product_name FROM orders o JOIN customers c ON o.customer_id = c.customer_id JOIN products p ON o.product_id = p.product_id WHERE c.status = 'vip'; ``` **Optimized Order:** ```sql SELECT o.order_id, c.customer_name, p.product_name FROM customers c JOIN orders o ON c.customer_id = o.customer_id JOIN products p ON o.product_id = p.product_id WHERE c.status = 'vip'; ``` Start with the most filtered table first. This reduces the number of rows in subsequent joins. ### Pattern 8: LEFT JOIN with NULL Filter **Inefficient (Still uses LEFT JOIN):** ```sql SELECT u.user_id, u.email, l.login_count FROM users u LEFT JOIN login_logs l ON u.user_id = l.user_id WHERE l.login_id IS NOT NULL; ``` **Optimized (Switch to INNER JOIN):** ```sql SELECT u.user_id, u.email, l.login_count FROM users u INNER JOIN login_logs l ON u.user_id = l.user_id; ``` If you're filtering out NULL values, use INNER JOIN instead. ## Aggregation Optimization ### Pattern 9: Aggregate with GROUP BY Efficiently **Inefficient:** ```sql SELECT customer_id, COUNT(*) as order_count FROM orders GROUP BY customer_id; ``` **Optimized (Add Index):** ```sql CREATE INDEX idx_orders_customer_id ON orders(customer_id); SELECT customer_id, COUNT(*) as order_count FROM orders GROUP BY customer_id; ``` ### Pattern 10: Subquery Optimization with Common Table Expressions **Inefficient (Correlated Subquery):** ```sql SELECT u.user_id, u.email, (SELECT COUNT(*) FROM orders o WHERE o.customer_id = u.user_id) as order_count FROM users u WHERE (SELECT COUNT(*) FROM orders o WHERE o.customer_id = u.user_id) > 3; ``` **Optimized (CTE):** ```sql WITH user_orders AS ( SELECT customer_id, COUNT(*) as order_count FROM orders GROUP BY customer_id ) SELECT u.user_id, u.email, uo.order_count FROM users u JOIN user_orders uo ON u.user_id = uo.customer_id WHERE uo.order_count > 3; ``` CTEs make the query clearer and prevent repetitive subquery execution. ## Avoiding Common Performance Mistakes ### Mistake 1: Functions in WHERE Clauses **Slow (Cannot use index):** ```sql SELECT * FROM users WHERE UPPER(email) = 'USER@EXAMPLE.COM'; ``` **Fast (Can use index):** ```sql SELECT * FROM users WHERE email = 'user@example.com'; ``` Functions on indexed columns prevent index usage. Process data application-side when possible. ### Mistake 2: Implicit Type Conversion **Slow (String compared to number):** ```sql SELECT * FROM users WHERE user_id = '123'; ``` **Fast (Proper type matching):** ```sql SELECT * FROM users WHERE user_id = 123; ``` Type mismatches force conversions that bypass indexes. ### Mistake 3: LIKE with Leading Wildcard **Very Slow (No index use):** ```sql SELECT * FROM products WHERE product_name LIKE '%laptop%'; ``` **Faster (Prefix search):** ```sql SELECT * FROM products WHERE product_name LIKE 'laptop%'; ``` **Fastest (Exact/Index search):** ```sql SELECT * FROM products WHERE product_name = 'laptop'; ``` Leading wildcards prevent index usage. Consider full-text search for text matching. ### Mistake 4: NOT IN with NULL Values **Problematic:** ```sql SELECT * FROM orders WHERE customer_id NOT IN ( SELECT customer_id FROM vip_customers WHERE vip_customers.status IS NULL ); ``` **Fixed:** ```sql SELECT * FROM orders WHERE customer_id NOT IN ( SELECT customer_id FROM vip_customers WHERE status IS NOT NULL ); ``` NOT IN returns NULL if any subquery value is NULL, causing the entire condition to be NULL. ### Mistake 5: Unnecessary DISTINCT **Inefficient (Extra processing):** ```sql SELECT DISTINCT customer_id FROM orders WHERE status = 'completed'; ``` **Optimized (If duplicates aren't possible):** ```sql SELECT customer_id FROM orders WHERE status = 'completed'; ``` Only use DISTINCT when necessary. It requires sorting or hashing. ## Advanced Optimization Techniques Cache frequently accessed data: ```sql -- Create a summary table for reporting CREATE TABLE daily_sales_summary AS SELECT DATE(created_at) as sale_date, SUM(total) as daily_total FROM orders WHERE created_at > CURRENT_DATE - INTERVAL '30 days' GROUP BY DATE(created_at); -- Now query the summary instead of raw data SELECT * FROM daily_sales_summary WHERE sale_date > '2024-01-01'; ``` Materialized views or summary tables reduce computation for expensive queries. For very large tables, partitioning improves performance: ```sql -- PostgreSQL: Partition by date range CREATE TABLE orders_partitioned ( order_id SERIAL, customer_id INT, total DECIMAL, created_at TIMESTAMP ) PARTITION BY RANGE (YEAR(created_at)); CREATE TABLE orders_2024 PARTITION OF orders_partitioned FOR VALUES FROM (2024) TO (2025); ``` Partitioning allows faster queries by limiting data scans to relevant partitions. In read-heavy scenarios, denormalization can improve performance: ```sql -- Instead of joining every time SELECT o.order_id, c.customer_name, o.total FROM orders o JOIN customers c ON o.customer_id = c.customer_id; -- Store customer_name in orders table ALTER TABLE orders ADD COLUMN customer_name VARCHAR(255); -- Update on customer insert/change (handled by trigger) SELECT o.order_id, o.customer_name, o.total FROM orders o; ``` Trade storage and update complexity for faster reads. Reuse database connections: ``` Connection Pool Settings: - Min connections: 5 - Max connections: 20 - Connection timeout: 30 seconds - Idle timeout: 300 seconds ``` Connection pooling reduces overhead for repeated queries. ## Performance Testing Workflow Run the current query and note execution time and resource usage. ```sql EXPLAIN ANALYZE SELECT * FROM orders WHERE status = 'pending'; ``` Look at the EXPLAIN output for Seq Scan, high costs, or poor index usage. "Adding an index on status column will improve performance" ```sql CREATE INDEX idx_orders_status ON orders(status); ``` ```sql EXPLAIN ANALYZE SELECT * FROM orders WHERE status = 'pending'; ``` Compare to baseline. Measure execution time, plan cost, and rows examined. Keep records of what worked and what didn't for future reference. ## Optimization Checklist - [ ] Run EXPLAIN ANALYZE on the slow query - [ ] Confirm the query is actually slow in production - [ ] Check current indexes on involved tables - [ ] Review table row counts and data distribution - [ ] Have a backup of the database - [ ] Add missing indexes on WHERE, JOIN, and ORDER BY columns - [ ] Remove functions from WHERE clauses - [ ] Replace OR conditions with IN - [ ] Move filter conditions to WHERE before HAVING - [ ] Use UNION for complex OR conditions - [ ] Check join order - [ ] Replace LEFT JOIN with INNER JOIN when applicable - [ ] Use CTEs for complex subqueries - [ ] Reduce SELECT columns to only needed ones - [ ] Add LIMIT to prevent full table scans - [ ] Re-run EXPLAIN ANALYZE to verify improvement - [ ] Test query on production data volume - [ ] Monitor query performance in production - [ ] Check index size and storage impact - [ ] Document the optimization for team reference - [ ] Clean up abandoned indexes ## Related Topics Overall database performance techniques PostgreSQL-specific optimization tips MySQL-specific optimization tips Learn query writing in WhoDB ## Summary SQL query optimization combines art and science. Use EXPLAIN to understand execution plans, create strategic indexes, avoid common pitfalls, and test changes methodically. Even small optimizations compound when queries run thousands of times daily. Start with the highest-impact changes and work systematically through the optimization checklist. You now have a comprehensive understanding of SQL query optimization techniques and patterns. Apply these principles to transform slow queries into fast, efficient ones. ---